Budgies make wonderful pets. Not only will their beautiful plumage brighten up any room, they are also very intelligent and sociable, and will develop strong bonds with their owners. Like with all pets however, they come with responsibilities, and it is now your job to make sure they stay healthy and happy. Here are the most important things to think about if you’re new to budgie keeping:
FOOD AND WATER
Try giving your budgies the nutritional equivalent of what they would eat in the wild. The basis of their diet should be a good quality seed mix, and they should always have access to water and a cuttlefish bone. Leafy greens and herbs provide vitamins and minerals, and can be given a few times a week. Only feed your budgie fruits once a week, as they are high in sugar. Food and water containers must be refilled every day, and washed a few times a week.
Twice a year your budgies will moult, and their plumage will gradually fall out and grow back. To help them keep healthy during this time it’s important that the budgies get extra moulting vitamins in their water.
Like most pets, budgies prefer clear routines in their lives. Try feeding and letting them out of the cage around the same time every day, and if you want to put a cover over the cage at night time, it’s best to do this every day. This way the budgies will know what’s happening around them and feel comfortable in your presence, which will minimise stress and anxiety.
STIMULATION
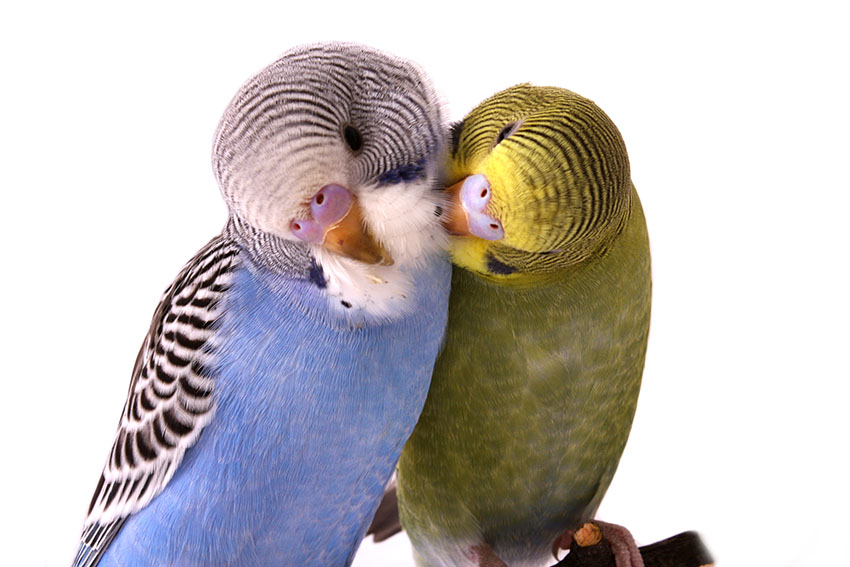
Budgies are very sociable creatures, and it’s always best to keep them as a pair, preferably two siblings of the same sex who are used to living together. If you just want one budgie, you will need to act as its friend and companion, and spend a lot of time together with your pet.
Most budgies like to bathe. In the wild the main purpose of the bath would be to clear dust and sand from their feathers and to cool off, and even if your budgies probably won’t have these daily requirements, they will enjoy splashing around in the water. You don’t have to have a bath in the cage, instead you can put a bowl of water somewhere in the room where the budgies are flying, but if you do it’s important to change the water as soon as it gets dirty. If your pet doesn’t seem interested, an alternative to bath time is a budgie shower. Hang some wet leaves (lettuce, basil and parsley are favourites) in the cage, and watch your budgie run through them.
The budgies should be offered the opportunity to fly freely (but supervised) outside the cage every day, at least 45 minutes, but ideally a few hours. Make sure the room is budgie proofed before your let your pets out. Close windows and doors, block off fireplaces, turn off fans and air conditioners and keep other pets out of the room. Budgies are intelligent, very sociable and active birds who will enjoy spending time with you and the rest of the family.
CAGE CHECK
Check the cage weekly to see that everything is in place and nothing has broken. Perches must be kept clean and fully functioning. Toys are great for mental stimulation, they encourage physical exercise and wear the beak down. Change the toys every now and then to keep your budgie interested. You don’t have to buy new toys all the time, but rotate the ones you’ve got regularly and throw in a new one every now and again.
HEALTH CHECK
Budgies’ beaks and nails grow constantly throughout their lives, so it is important that they have access to toys to grind them down. In most cases you will have to trim the nails when they get too long, so make sure to purchase a pair of clippers suited for the task.
Budgies, like other pack animals, are very good at hiding pain and illness, so it’s important to give your pet regular health checks. When you get to know your budgie, it’ll be easier to spot irregular behaviours.
Normal signs of illness include changes in weight, discoloured feathers, reduced interaction with humans and toys, scabby nostrils and missing feathers around the eyes. Another way of spotting early signs of illness is to regularly check your budgie’s droppings. The disposable paper liners in the Geo bird cage makes it easy to monitor your pet’s health. When you do your weekly clean, check the amount, colour and texture of the droppings. They can vary somewhat depending on what your budgie has been eating, but all faeces should be firm, and the urine part transparent and clear. If you notice clear changes, or have other reasons to suspect that your budgie might be ill or in pain, contact your vet as soon as possible. Make sure to find a vet that specialises in small animals, ideally as soon as you take the budgie home, so you know who to contact if something goes wrong.
If you need more information, check out the section on budgie illnesses inour guide.
Many of us know what it’s like. You start with a few chickens, thinking you’re just going to try it out, but once you realise what amazing pets they are and what delicious eggs they lay you will probably soon think it’s time to expand the flock and get some more hens for your garden.
But adding new chickens to an existing flock is easier said than done, and it’s important to know what you’re doing to avoid bickering and bullying, or even worse. The key to introducing chickens is time. Be patient, it might take a while before your new individuals are living happily with your current flock, but it will be worth it in the end. Each breed of chicken is different, and all chickens have different personalities, so how well your attempts will go depends on many different factors. Here are some useful things to think about:
Make the right choices
Some people say sticking to the same breed is a good idea, but it’s definitely possible to have several different breeds living side by side. If possible, add chickens that are of similar age and size as your existing ones. Smaller, younger hens will easily become a target if added to a group of larger chickens, and new younger, fitter chickens might cause stress for the older members of your current flock. Never add chicks to a group until they are old and strong enough to fight back if someone decides to bully them.
Also never introduce a chicken on her own; she is bound to become bullied in an already established pecking order. The more chickens you add, the more the pecking order will have to change, and it will be easier for the group to decide who is actually the most dominant. If possible, adding more chickens than you already have will often minimise problems with bullying, but it’s a risky game if you plan on expanding your flock more than once!
Quarantine
The first step in the process is to quarantine the new chickens somewhere away from your flock to make sure they don’t carry any diseases or parasites. Do regular health checks on the new chickens while you’re keeping them separate, and treat any illness you might come across. It might be worth doing a worming treatment and to dust them in Diatomaceous Earth a few times to be extra sure they are not bringing in any parasites into your coop.
Quarantine the new birds for at least a week, preferably longer, or until you’re certain they are happy and healthy.
Slow introductions
Unfortunately you can’t just plonk the new chickens down with the old ones as soon as you’re sure they are healthy. Instead you must allow them to get used to each other. Ideally this is done by placing the two groups close enough to each other that they can see and smell each other, but not close enough that they can touch. They will hopefully be curious of the other group, but not feel that their home is being invaded. The partitions for the Omlet Walk in run is perfect for this stage, as it means you can divide the run and slowly introduce the two groups.
Keep this setup for at least a week. It may seem like they have gotten used to each other after a few days, but for chickens there’s a big difference between seeing some hens over the fence and actually sharing a coop and run with them. Be patient, then you’re more likely to succeed.
The big meet
When you think it’s time for the two groups to meet for real, it is best done in a new, neutral area that no chicken has claimed as her own, even if it’s just a small fenced off area in the garden.
It’s always best to let the old flock come to the new, so put them down before you let your existing flock approach. This is especially important if you’re carrying out the introduction in the flock’s current run: don’t let them out of the coop until the new chickens are comfortable on the run.
Try putting up some entertaining distractions that might avert their attention somewhat. Fill a Peck Toy or a Caddi with your chickens’ favourite treat, and they will hopefully be more interested in that than the newcomers.
Another thing worth trying is introducing chickens in the night when they are quietly roosting in their coop. Open the door of the Eglu and put the new chickens in with your existing ones. This allows them to get used to the presence and the smell of the new chickens while they are sleepy and not likely to attack. This seems to work really well for some, whereas it leads to a few problems for others, so it’s up to you if you want to risk it. Make sure you are there in the morning when the chickens wake up to see how they are reacting to their new friends.
As we said, it might take a while before the flock goes back to its harmonious self. You must prepare yourself for some disagreement and a bit of bullying, this is part of establishing the pecking order. It should however have calmed down after a few days, maybe a week. If you notice that chickens are getting seriously hurt or are drawing blood it’s time to step in. Identify the main bully and isolate her somewhere else for a few days on her own. It might seem harsh, but it’s the best thing you can do for your flock. When you put her back with the group she will be too busy trying to figure out the new order that she won’t have time to bully.
The main thing is to give your budgies and finches a space in which they can happily do what a bird has to do – eat, sleep, fly, perch, and chill out.
So, your check list might read something like this:
Full flying access to the entire cage
Fantastic feeding station
Lots of perches and usable ‘corners’ for taking time out
Easy access to and from the cage
Fantastic design that makes it a standout feature in the room.
And that pretty much summarises the new Geo – the first great leap forward in cage design for 100 years.
The Geo Bird Cage for Budgies, Finches and Canaries
Until the arrival of the Geo, bird cages hadn’t changed much since the early 20th century.
But why did we need another innovation in cage design, you may ask? For the simple reason that when keeping a pet, its welfare and happiness are the top priorities.
So, with this in mind, could the old, rectangular-type standard bird cage be improved upon?
The answer is yes – and then some!
The unique geodesic-dome shape of the Geo, and its central feeding station, are the stand-out features. To explain how we got there, let’s take a brief sprint through previous approaches to cage design.
Bird Cages – from Small Cells to Big Sales
Bird cages have a long history, and their basic shape and function has evolved over the years.
In the beginning a cage was simply a cell in which the feathered inmate – usually a finch, bunting or starling – was expected to sing its little heart out. These small cages were made from wicker or other light, pliable wood. By the 1830s cages were being made from metal and wire. The basic design remained bell-shaped (the kind of thing seen in Tweety Pie cartoons).
This design lingered into the later 19th century when keeping birds as pets underwent a huge surge in popularity, with budgies becoming the pet bird of choice for many. The cages were often ornate, but the emphasis was on decoration, rather than keeping the birds happy. These cages were all height and no width, usually.
By the early 20th century, rectangular, wider bird cages were mass produced – the kinds of things still sold as the standard finch or budgie cage in most pet shops. Design was, at last, part of the overall concept – seed trays that slot into the cage sides, water bottles that attach via clips, better, wider doors, removable bases for easy cleaning.
With a wide range of cage sizes, it meant you could ensure that the dimensions were right for the number of birds you owned. So what was left improve – why do we need the Geo?
Why the Geo Cage is Better for Pet Birds
The geodesic dome shape of the Geo cage provides the ideal dimensions for birds to move around in. When flapping and flying in a rectangular cage, birds don’t have much front-to-back space – the flying area is limited to the length of the cage. Also, birds cannot negotiate 90 degree corners: these are dead space when it comes to flying.
So, if you were to map the total usable flying area, you might be surprised to find that in a standard rectangular cage of 90x60x40cm (220,000 cubic centimetres) a budgie or finch can only make use of one tenth of the area for flying.
In contrast, the Geo’s 62x60x60cm (223,200 cubic centimetres) is nearly ALL flying space. There are no front-to-back limited space issues, and no right-angled corners to prevent a bird stretching its wings.
Birds are happier if they can fly outside the cage
In any indoor cage, a bird is only able to fly in a limited space. Ideally, all pet birds should be allowed to free-fly in the room every day in a safe manner.
The Geo makes free-flying a breeze – it has two wide doors allowing your birds easy access to and from the cage.
Cutting Corners
Do birds need corners to hide in if they’re startled or afraid of something?
Yes and no. It’s more about the position of the cage. If the birds are in the middle of a room completely surrounded by activity they will have nowhere to hide if they’re feeling nervous. That’s why a cage – including the Geo – should be close to a wall or a corner of the room if possible.
Also, the Geo does have corners – lots and lots of them, just not the right-angled corners of a standard cage. You’ll still find your birds using these multiple corners to rest and take stock.
Looking good, feeling good
The Geo’s marriage of great looks and ultimate bird-friendly design set it apart from anything else available.
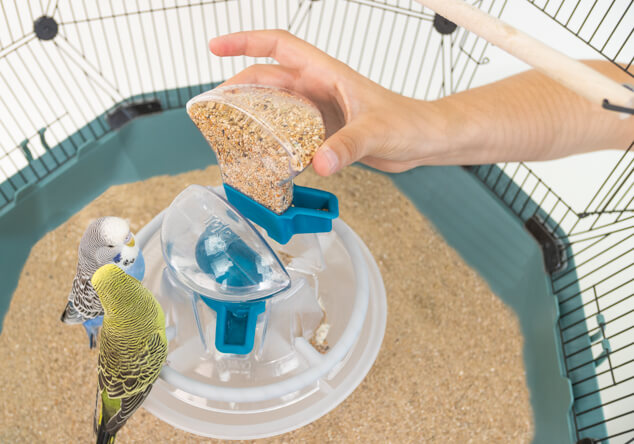
One of the most eye-catching features is its central feeding station. It’s a joy to watch birds gather together and feed, and the Geo has an extra bonus in that most of the discarded husks and dropped seeds fall into the feeding station’s hopper for easy cleaning.
The rounded shape of the Geo – not circular, but a collection of many flat sides – makes it a striking feature in the room. But, most importantly, it’s a striking feature that doubles as the perfect environment for your pet budgies and inches.
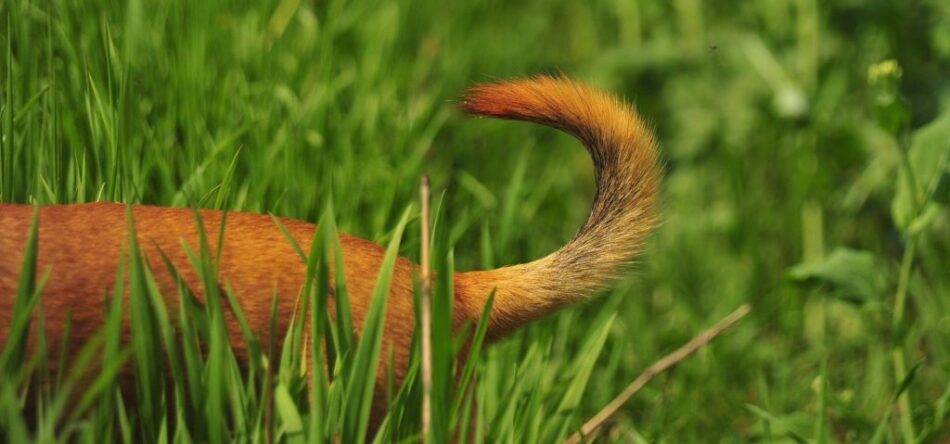
? The main purpose of the tail is communication, and to spread personal information in the form of pheromones. Dogs have anal glands right under the tail that release scents that can be detected by other canines. When the dog wags its tail, the muscles around the dog’s bum tense and press on the glands, sending out lots of information. The sweeping motions from the tail can also help spread the scent even further.
? In a situation where the dog wants to be more low-key and not get noticed, maybe if they are feeling scared or hesitant, the dog will tuck its tail between the legs to minimise the spread of their scent.
? Dogs that have very small tails, or no tails at all, have a limited ability to use this body part to communicate and will have to use other modes of communication. Ears can for example be very useful to show other dogs who you are and how you are feeling.
? Different types of tail movements signify different emotions. A slight wag when meeting someone new can be seen as a tentative greeting, whereas a wider more sweeping movement is very friendly and non-competitive. A dog that makes short back-and-forth movements with the tail held high is possibly showing signs of uncertainty, assessing potential threats.
? Puppies don’t wag their tails when they are born. The first month and a half is spent mainly eating and sleeping, and they have no real interest in their surroundings. However, as soon as they start socialising, around 49 days old, they will start wagging.
? The tail can be seen as an extension of the spine. Just like the backbone, tails are made up of 5-20 vertebrae, separated by soft discs that enable movement and flexibility. The vertebrae are wider at the base of the tail and get smaller toward the tip.
? The shape and form of the tail of specific dogs has been determined through selective breeding. The Dachshund’s long, sturdy tail is for example believed to have worked as a handle to pull them out of badger burrows, whereas a Beagle’s tail has a white tip to make it easier for the hunters to locate it in the distance, and Labradors have a so called “otter tail” that is thick and round and can act as a kind of rudder when the dog is swimming.
? Dogs do not only use their tails for communication, it is also useful for keeping balance. If you watch a really fast dog run, like a Greyhound or a Whippet, you can see that the tail sticks out straight behind them. It works as a counterweight and helps the dog to accelerate, brake and turn at high speeds.
? According to studies made on dog tails, there is evidence that the direction a dog wags its tail can tell you something about their feelings. Positive stimuli (food, or seeing their owner) made the dogs start moving their tail to the right, whereas negative stimuli i.e. a threat causes the tail to start wagging to the left.
Liked this blog on dog’s tails? Take a read of Cat Tail Facts blog!
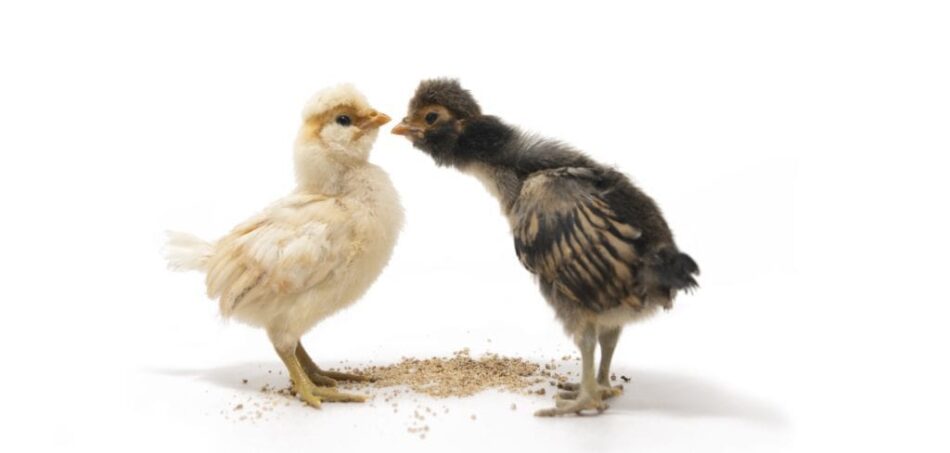
You can buy chickens from online hatcheries, local farm supply stores, private breeders, poultry shows, animal shelters, and farmers markets. The right source depends on what breed you want, what age chicken suits your setup, and what time of year you’re starting out. Some routes are seasonal, some are available year-round, and each one comes with its own advantages worth knowing before you commit.
Getting your first flock is genuinely exciting, but figuring out where to actually find your flock members can be the first hurdle. Chickens aren’t typically sold at pet stores, and the options can feel a little overwhelming at first. This guide walks you through every route available to you, helps you decide what age of bird to buy, covers hatching as an alternative, and tells you exactly what you need to have ready before your chickens come home.
Before you source your chickens, make sure your coop, run, feed, and water are in place. Getting the setup right first makes the whole experience smoother from day one.
Buying Chickens from an Online Hatchery
Online hatcheries are one of the most popular ways to buy chickens in Australia, and it’s easy to see why. They specialise in hatching and delivering day-old chicks directly to your door, and many also offer older pullets and started hens if you’d rather skip the brooder stage.
The biggest advantage of buying from a hatchery is selection. Most carry dozens of breeds, from common egg-layers like Rhode Island Reds and Buff Orpingtons to heritage and rare varieties that are almost impossible to find locally. Many hatcheries ship year-round, so you’re not limited to the spring “chick season” that governs most feed stores.
What to Look for in a Hatchery
It’s worth doing a little research before you place an order. Look for these three things:
State biosecurity compliance: Australian hatcheries are subject to state-level biosecurity regulations. Look for operations that are transparent about their disease management practices and flock health status.
A live arrival guarantee: Delivering chicks by courier carries some risk. A good hatchery will replace or refund chicks that don’t arrive alive.
Strong customer reviews: Look for consistent positive feedback on breed accuracy, bird health, and customer service.
Caring for Mail-Order Chicks on Arrival
When your chicks arrive, they need attention immediately. Have everything ready before your delivery lands:
Fresh water with poultry electrolytes added (to help them settle in)
A heat source set to 35°C for the first week, reducing by 3°C each week after
Chick starter feed, which gives them the right protein and nutrient balance for the first few weeks of life
Chicks are resilient, but that first hour matters. Getting them warm, hydrated, and fed quickly helps them to settle in well.
Where to Buy Chickens Near You
If you’d rather see the birds before you buy, there are plenty of local options across Australia. Buying locally means you can inspect your chickens in person, which is especially useful when you’re adding adult hens to an existing flock.
Produce Stores and Agricultural Merchants
Some produce stores, stock feed suppliers, and rural pet shops stock chicks and pullets, particularly in spring and early summer. It’s worth ringing ahead to check availability, as stock varies by region and season. Selection is usually limited to a handful of popular hybrid breeds, so if you have a specific breed in mind, a dedicated breeder is a better bet.
Local Breeders and Backyard Keepers
Private breeders and experienced backyard chicken keepers are one of the best sources for quality birds, and they’re available year-round. You’ll usually need to find them online but the benefit here is that you can visit, see how the birds are kept, ask questions, and often choose your birds by hand.
Poultry Shows and Agricultural Shows
Poultry shows and agricultural shows run throughout the year and are a brilliant place to find quality, purebred birds. Poultry Australia is a great starting point for finding upcoming shows, and most state agricultural shows will have a poultry section worth exploring. Breeders who show their birds take pride in the quality of their stock, so you’re likely to come home with healthy, well-handled hens.
Animal Shelters and Chicken Rescues
It’s less well known, but animal shelters and chicken rescue organisations often have adult hens available for low adoption fees. Hens are sometimes surrendered or confiscated from previous owners, and shelters are keen to rehome them quickly since chickens don’t do well in a shelter environment. If you’re open to giving a hen a second chance, this is a genuinely rewarding route.
Australia has approximately 19 million commercial laying hens, and at around 18 months of age they’re typically considered “spent” and moved on from farms. A growing network of rescue organisations rehomes these hens into backyard flocks across the country. Let the Ladies Go operates across NSW, Til The Cows Come Home runs adoption days nationally, and the RSPCA occasionally has hens available for adoption. Search for a rescue group in your state – there are active organisations in NSW, VIC, QLD, and WA.
Farmers Markets
In rural areas, some farmers market vendors sell live birds, particularly in spring and summer. It’s not universal, but worth checking if you have a market nearby.
Chicks, Pullets, or Hens: Which Should You Buy?
Once you’ve decided where to source your chickens, you need to decide what age to buy. This is one of the most important decisions a new keeper makes, and the right answer depends on your setup, your patience, and how quickly you want eggs.
Here’s a straightforward comparison:
Day-old chicks: Lowest cost, brooder needed for 12 weeks, first egg in 4 to 6 months. Best for those who want the widest breed choice and want the experience of raising chicks.
Pullets (8 to 16 weeks): Mid-range cost, no brooder needed, first egg in 2 to 4 months. Best for those who want a head start past the most vulnerable stage.
Point of lay pullets (16 to 20 weeks): Mid to high cost, no brooder needed, first egg within weeks. Best for beginners who want eggs soon without the brooder setup.
Adult hens (20+ weeks): Highest cost, no brooder needed, eggs immediately. Best for those who want results from day one and don’t mind paying more upfront.
Day-Old Chicks
Chicks are the cheapest option and give you the widest breed selection, but they come with the most demands. You’ll need a brooder setup for around 12 weeks before they’re ready to move outside, and you won’t see your first egg for four to six months. They’re a brilliant choice if you enjoy raising birds from the start and want to bond with them early.
Pullets
Pullets (aged 8 to 16 weeks) are past the most vulnerable stage of life and don’t need a brooder, but they’re still a few months away from laying. They sit in a useful middle ground for keepers who want young hens without committing to full chick brooding.
Point of Lay Pullets
Point of lay pullets, typically between 16 and 20 weeks old, are the most popular choice for new keepers, and for good reason. They start laying within weeks of arriving home, require no brooder, and are generally robust and easy to handle. If you’re just getting started, this is the age we’d recommend.
Adult Hens
Adult hens cost the most upfront but lay immediately. The trade-off is that they have a shorter productive lifespan ahead of them. They’re a good option if you want eggs from day one and don’t mind paying a little more.
Rescue Hens
Rescue hens are typically point of lay or adult age, making them a great option if you want eggs quickly and are happy to put a little extra care in at the beginning. Many rescue hens settle in beautifully once they’re in a calm, well-set-up environment.
What to Check When Buying in Person
Whether you’re buying from a breeder, a shelter, or a show, always inspect the chickens before you take them home. Healthy hens should have:
Bright, clear eyes
A clean vent (no matting or staining)
Full, even feathering
Active, alert behaviour
No laboured or rattling breathing
If anything looks off, trust your instincts and walk away.
How to Hatch Your Own Chickens at Home
Hatching your own chicks is a different experience altogether, and it makes the most sense in a few specific situations: you want a breed that’s difficult to source, you enjoy the process of raising birds from the very beginning, or you have children who would love to watch it happen. It’s rewarding, but it does require planning ahead.
Two Routes to Hatching
Using an incubator is the most reliable method and gives you full control over the process. A good incubator should have an automatic egg turner (otherwise you’ll need to rotate the eggs manually several times a day), an internal thermometer and hygrometer to monitor temperature and humidity, and enough space for your chicks to move around once they hatch.
Waiting for a broody hen is the more natural route, but it’s less predictable. Unless you have a large flock and a rooster to provide fertilized eggs, it’s generally easier to use an incubator.
Sourcing Hatching Eggs
If your flock doesn’t include a rooster, you’ll need to buy fertile eggs from an external source, like hatcheries, local breeders, or specialist sellers.
The Timeline
Chicken eggs take 21 days to hatch under the right conditions. After hatching, your chicks will need 12 weeks in a brooder pen before they’re ready to move outside. That’s a total of around 15 weeks from egg to outdoor living, so hatching is not the fastest route to a laying flock.
For a detailed look at each stage of raising chicks, the Omlet blog covers the full journey from hatch to hen: Stages of Raising Chickens.
What You Need Ready Before Your Chickens Come Home
Whatever route you choose, the most important thing is being prepared before your chickens arrive. Having everything in place from day one reduces stress for both you and your new flock, and gets things off to the best possible start.
The Coop and Run
Your coop and run should be secure, clean, and ready before your chickens set foot in the garden. This is especially important for adult hens, who will go straight outside rather than into a brooder. Bedding should already be laid in the coop, and the structure should be checked for any gaps or weak points that a predator could exploit.
Chicken feeders and chicken drinkers should be filled and in position before your hens arrive, so they can eat and drink as soon as they’re settled in.
For Chicks Specifically
If you’re bringing home day-old chicks, you’ll need a brooder setup from the moment they arrive. That means:
A brooder box with enough space for your number of chicks
A heat plate or heat lamp set to 35°C
Chick starter feed
A suitable chick waterer (shallow enough that they can’t fall in)
Adding New Chickens to an Existing Flock
If you already have chickens, new flock members need a 30-day quarantine in a separate space before any introduction takes place. This protects your existing flock from any illness the new hens might be carrying. The Eglu Go and Eglu Go Up are both well-suited to this, as they comfortably house three to four birds and are easy to position away from the main coop.
Introducing New Hens Gradually
Once quarantine is complete, introductions work best when done gradually. Chickens should be able to see and smell each other through a barrier before they share the same space. The Omlet Walk In Run is a great option here, as you can add a Walk In Run partition down the middle so the two groups are separate but can see each other. When everyone seems comfortable, simply remove the partition and let them get acquainted properly.
Key Takeaways
The main places to find chickens are online hatcheries, local farm supply stores, private breeders, poultry shows, animal shelters, and farmers markets.
Hatcheries offer the widest breed selection and ship year-round, while local sources let you inspect birds before buying.
Chicks are the cheapest option but need the most time and setup. Point of lay pullets are the easiest starting point for beginners who want eggs soon.
Hatching your own chicks takes 21 days for hatching plus 12 weeks of brooding. It’s a rewarding experience, but you won’t get eggs straight away and it requires planning ahead.
New chickens being added to an existing flock need a 30-day quarantine before any introduction, followed by a gradual, supervised meeting through a barrier.
Having your coop, run, feeder, and waterer ready before collection day makes the whole experience smoother for you and your hens.
Omlet and your flock
Whichever route you choose, the right setup makes all the difference. The Eglu Cube is a brilliant beginner chicken coop, housing up to 6 large hens in a design that’s easy to clean, easy to move, and built to keep your flock safe. Paired with the Walk In Chicken Run, your chickens will have plenty of space to forage, perch, and explore from day one.
All of our products are designed to make chicken keeping enjoyable, whether you’re starting with a trio of point of lay pullets or building up a flock over time. We’re here to help you get it right.
The budgie is the world’s most popular pet bird. When the first specimens were brought to Europe from Australia in the 1840s they were an instant hit. The reasons for their popularity are clear to anyone who has spent time in the company of these wonderful little birds. They are pocket-sized parrots, with all the personality of their bigger cousins – clever, colourful, and with the seemingly magical ability to learn human words… sometimes!
1. Budgies don’t require much
Budgerigars are also easy to look after, and being small birds they have modest appetites, so they’re an inexpensive addition to the home. Their diet is based on seed, and as long as you source a good mix, without added colours or chemicals, the birds will thrive. They will also enjoy some fresh greens and other vegetables, but only in small quantities.
This reflects the birds diet in the wilds of Australia. They gather in large feeding flocks and seek out grass seeds. Most of these are fresh, of course, and in captivity the seed should be as fresh as possible too.
In terms of equipment, a good cage and basic accessories are all you need. You can give them simple things to play with, too, like ping-pong balls and bells. All very cheap, and incredibly cheerful.
2. Budgies Have Fantastic Personalities
Beautiful as a pet canary or finch may be, you can’t train them beyond the basic perching-on-a-finger level. Budgies, however, can take on board an amazing variety of skills, from coming to your hand when you call, to negotiating tunnels, skateboarding, and manoeuvring a ball around obstacles.
The key to these skills lies in bonding with your budgie. It’s more than simply taming – it’s a human and bird friendship, the kind of connection you can only form with an intelligent animal. Budgies are not alone in this, of course – the whole parrot family is renowned for its grey matter. But in a bird as small as a budgie, intelligence appears even more remarkable.
3. Budgies Can Talk To You!
Budgies talk, pretty much all day, with various moods that you soon come to recognise. Not all the ‘talking’ consists of recognisable words – in fact many, if not most birds, never master human words. But it doesn’t really matter. It’s great fun if your bird takes on board a few words and phrases, but even without them budgie sounds are a source of great pleasure.
Female budgies are less inclined to speak than males. Of these, around half may pick up human words. They have more chance of learning if you start teaching them in their first nine months. Some require lots of time and effort, while others seem to soak up words with relative ease. Talk-time tends to be after a good feed or a spot of exercise. The budgie will settle on his favourite perch and begin to chatter. The bubbling, clicking, whistling babble of speech sounds voice-like even when there are no human words in the mix. It’s a lovely, soothing backdrop to the day.
4. Budgies Don’t Like Vets!
In other words, budgerigars are generally very healthy and robust birds. As long as they have a super-healthy diet and a clean environment (cages should be spruced-up once a fortnight), they will be strangers to the vet.
Budgies also let you know on those rare occasions when they’re not feeling well. They will stop chattering non-stop, will sleep during the day, and will look sad and ‘droopy’ on their perch. Because, of course, there are potential illnesses, as there are with any animal. Give them a daily visual check – if they’re looking as happy and chirpy as usual, all is well. If you have any doubts, run through our checklist of possible problems, and have a word with a vet. Chances are they will never have met your budgie before!
5. Budgies Come in Endless Colour Patterns
Although there are just three basic colour combinations – green and yellow, blue and white, or a mixture of these – the variety of patterns within this mix is incredible. In some birds the white dominates, with other colours bursting through like flowers in a snowy meadow. Some birds have striking primary colours, while others have pastels, sometimes fading to just a hint of translucent colour. There are all-yellow budgies, all-white ones, birds patterned in just greys and blacks, and, of course, classic green and yellow budgies looking exactly like their Australian wild cousins.
Whichever variety of budgie you bring home, you are guaranteed a bird packed with enough personality to fill a dozen birds twice its size. And this will be a long-lasting friendship, as a healthy and well fed budgie can live up to 15 years. Enjoy your time together!
Finally there is a budgie cage as good looking as the budgies
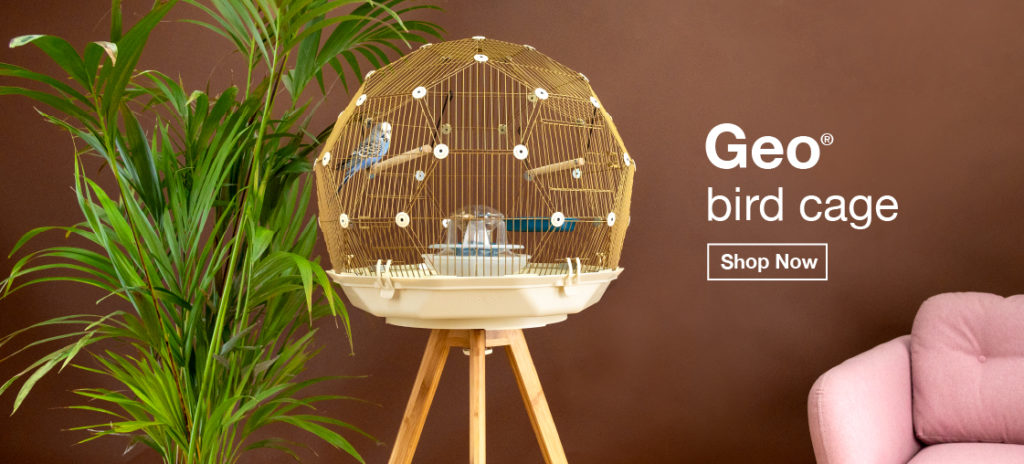
The revolutionary NEW Geo Bird Cage from Omlet is a breathtaking, contemporary design that redefines what a pet bird’s habitat can and should be. The geodesic shape defines a light and spacious habitat for your birds, creating the perfect environment to reveal their natural beauty.
Rigorous design and testing have refined the Geo Bird Cage into a final form that has nothing superfluous but leaves nothing out.
Simon Nicholls, Omlet’s Head of Design said “The inspiration for the Geo Bird Cage came from a really amazing polymath called Buckminster Fuller, who pioneered geodesic domes in the 50’s. Once we had the form we developed over 60 prototypes to ensure that every aspect was optimised for both the bird and the owner. I couldn’t be prouder of the finished product.”
A good example of the care and attention to detail throughout the Geo is the central feeder. A delight for both owner and budgie to use, it’s also a remarkable piece of engineering. It intelligently catches any dropped husks and seeds in a hopper making this the cleanest bird cage of its kind.
Pet birds are the 4th most popular pet in Australian households according to recent reports. Budgies have long been a favourite with children, parents and grandparents as they enjoy human company and can be easily trained to land on your hand and can even learn to speak. With Omlet’s latest innovation, keeping budgies is easier, cleaner and better looking than ever before!
Available in a choice of teal and cream base colours, and black, white or gold mesh, the Geo Bird Cage can be further customised with or without the stand. Made from solid bamboo, the stand elevates your Geo Bird Cage and makes it easier for you to interact with your pets. No other small bird cage creates such a captivating centrepiece for your home.
The Constellation Geo Bird Cage Cover is typical of the kind of thoughtful touches pet owners have come to expect from Omlet. Decorated on the inside with a map of the stars, when it’s placed over the Geo at night, budgies cantry to spot Orion, Ursa Major and maybe even a shooting star before they nod off to sleep!
The Geo Bird Cage is available exclusively at Omlet, from $180!
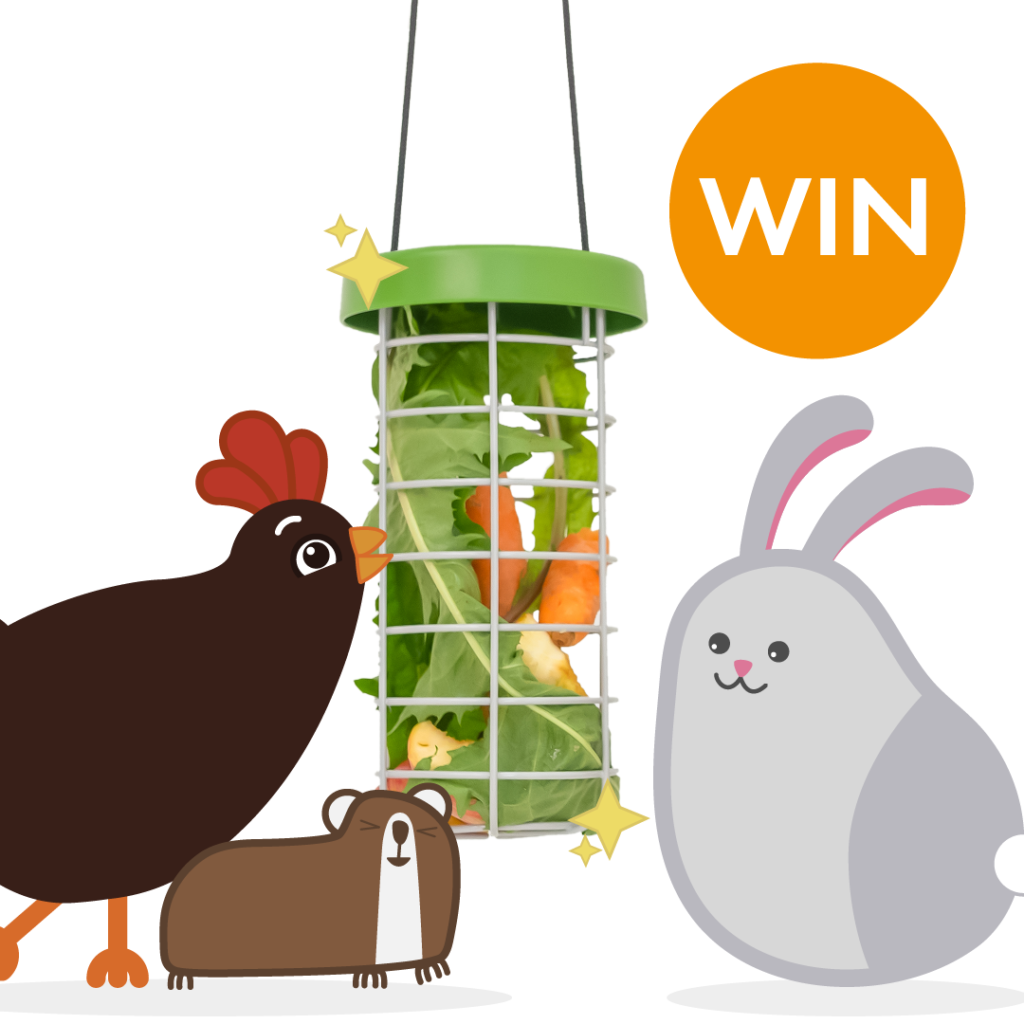
We are giving away 5 Caddi Treat Holders, an entertaining and stimulating feed toy for chickens, rabbits and guinea pigs, on our Twitter Page! All you need to do to enter is follow Omlet on Twitter and comment on the competition tweet with whether you have a ?, ? or ?.
Terms and Conditions The competition closes at midnight on the 20th April 2020. To enter please comment on the Caddi competition tweet on the Omlet Twitter page – you must also be following the page. Five winners will receive a Caddi Treat Holder for Chickens, Rabbits or Guinea Pigs. The winners will be randomly selected from all entries worldwide and notified within 7 days of the competition closing. If the winners do not respond to claim the prize within 7 days of notification, we reserve the right to withdraw the prize and pick replacement winners. Omlet reserve the right to withdraw or amend the competition at any point. Prize cannot be transferred to cash. This competition is not open to Omlet employees or members of their immediate families. All entries must be made on the relevant competition post. The winner agrees to the use of their name and any reasonable requests by Omlet relating to any post-winning publicity.
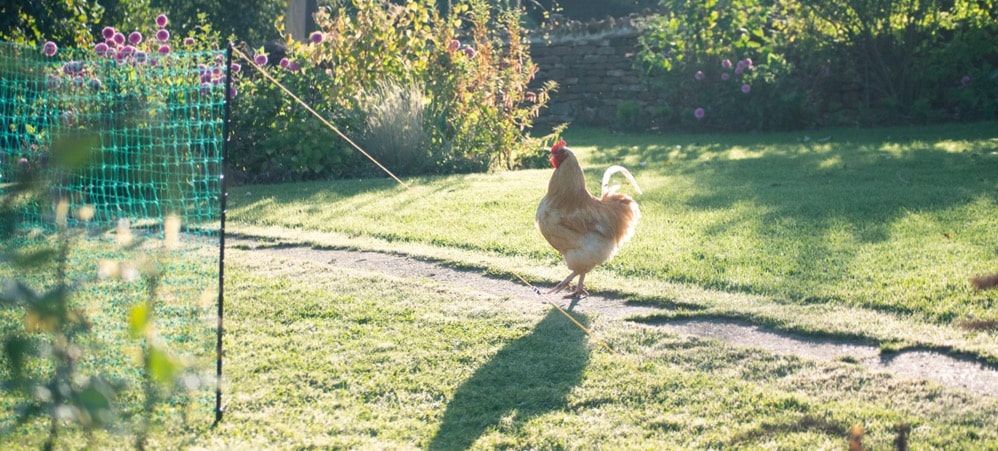
Omlet chicken fencing can be used to contain your chickens within an area, giving them more space to roam in your garden.
Our chickens provide us with entertainment, company and fresh eggs – and lots and lots of poo! While cleaning out the Eglu might not be the most fun part of chicken keeping, those droppings can be turned into what gardeners sometimes refer to as “black gold”, one of the most desired fertilizers out there – and you can get it for free! There are however a few things to think about when it comes to getting chicken manure right. Keep reading to find out more!
It can all be used
Unlike some other types of manure, chicken manure is too strong to use straight on your flower beds or vegetable patches. It will burn the roots or other parts of your flowers and crops, and can also contain harmful bacteria that can cause illness if ingested. This is why it needs to be composted!
While you can put the chicken droppings straight on a bed in autumn and cover it with dry leaves that will moult through the winter, your best shot is probably to be patient and let it mature in a separate place. Whether you do a weekly clean or pick up droppings in your Eglu every day, everything in the coop can be put straight onto your compost, including the bedding. Adding the bedding helps create the correct ratio or carbon (bedding) and nitrogen (droppings) needed to break down plant matter and waste. As chicken droppings are extremely high in nitrogen, you will probably want to add a larger ratio of other plant matter than you would in a normal compost. Dried leaves from the garden will make a great addition.
We recommend having a sealed container for your compost rather than a heap in a corner, as the latter can attract rodents and pets that should not be ingesting chicken poo.
Composting chicken droppings
Apart from carbon and nitrogen, your compost will need air, moisture and heat. This is easily done, all you need to do is to water your mixture thoroughly and turn the heap every few weeks to get air flowing through. This will automatically heat the compost, breaking down the plant matter and burning off unwanted bacteria.
If you want to speed up the process and become a composting champion, you can purchase a compost thermometer at a local garden center and keep an eye on the temperature in the middle of the heap. The ideal temperature is 50-65 degrees Celsius (130-150 degrees Fahrenheit), and this should be maintained for about 3 days, after which you will need to turn the matter completely and start over.
This is however not necessary, you can just leave the compost to do its magic, just turning it regularly. How long it will take depends on the conditions, but to be sure everything is properly composted you should leave it for 9 months to a year.
Adding black gold to your garden
Once composted, chicken manure adds organic matter to your soil and increases the soil’s capacity to hold water, as well as returning nutrients to the soil. It’s also an amazing fertilizer that provides your plants with nitrogen, phosphorus and potassium in much higher levels than other types of manure. Chicken manure can be spread on top of your vegetable patch or flower bed, or worked into existing soil. You can also put a handful of manure in a watering can and let it mix for a while before giving your flowers a very nutritious shower.
If you have composted the manure properly all the harmful bacteria will have been burned, and there is very little risk of you getting ill. However, if you’re on the worried side of things, make sure you clean your veg properly before eating them, or use the chicken manure on crops that are not touching the ground, like sweetcorn, peas or tomatoes.
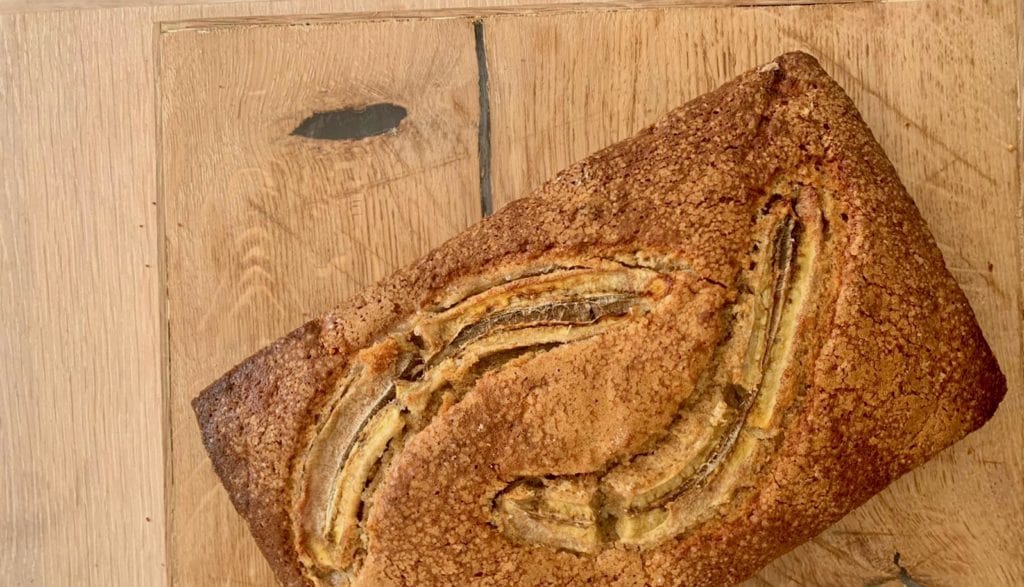
Mash 3 of the bananas and set to one side ready to fold into your mixture later.
Sieve the flour and baking powder into a large mixing bowl.
In a separate bowl, cream your softened butter with the sugar and then add the eggs 1 by 1 to the mixture.
Once all of the wet ingredients are combined and smooth, slowly fold in the flour mixture – try not to over mix it.
Take your mashed banana and carefully blend this into the large mixing bowl along with your vanilla extract.
Tip the mix into a lined loaf tin or ovenproof dish of your choice and decorate with the remaining banana peeled and sliced lengthways, sink into the mix.
Bake at 165 degrees c for approximately 1hr.
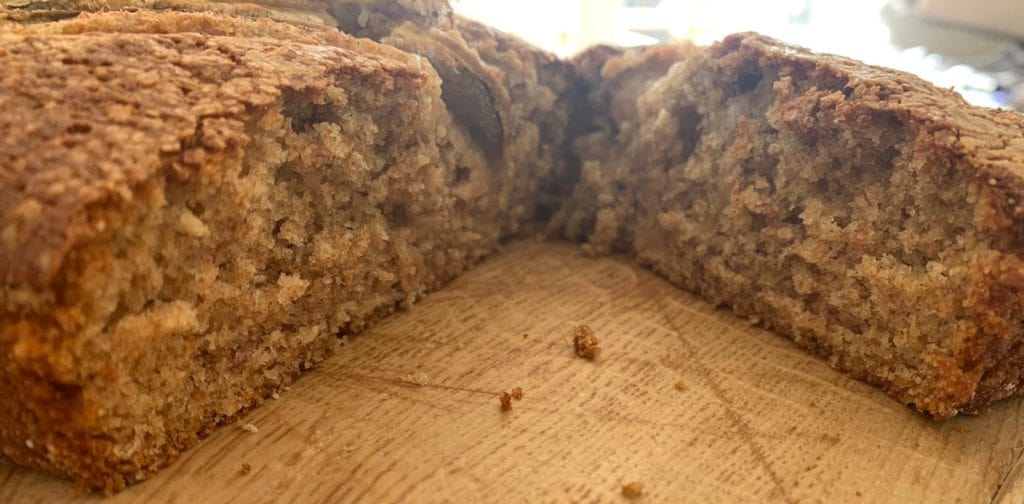
Take out of the oven once golden and cooked through, allow to cool and then enjoy with a cup of tea in front of your favourite boxset.
Eggs are truly amazing things, and sometimes we might take them for granted. For something that only takes the hen about 24 hours to make, they are eggstremely well engineered and cleverly constructed, as well as really delicious! Here are some cracking egg blogs that will hopefully make you appreciate the humble egg a bit more!
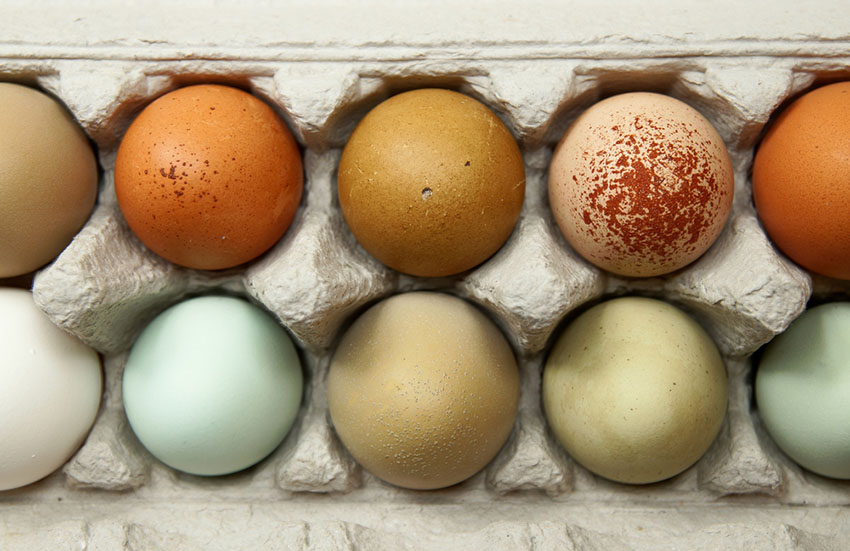
Why are chicken eggs different colours?
The ancestor of all chickens is the Red Junglefowl, Gallus gallus, a native of South-east Asia. All Junglefowl eggs have shells of a creamy white colour. And yet, as any chicken keeper knows, the eggs of domestic… Read more
The process of egg laying starts in the chicken’s eye. Sunlight enters the eye and activates a photosensitive gland, the pineal gland, located… Read more
As long as your chickens are laying and there’s a cockerel in your flock, you can hatch and incubate chicks all year round. However, traditionally the most popular time to breed your own chickens is in the spring. Hatching and rearing your own chicks from eggs… Read more
Why chickens hide their eggs and how to stop them doing it?
If you’re keeping chickens in your garden, you’ve probably become accustomed to your morning routine: wake up, drink a cup of tea or coffee and collect fresh eggs from your flock. Of course it’s an unpleasant… Read more
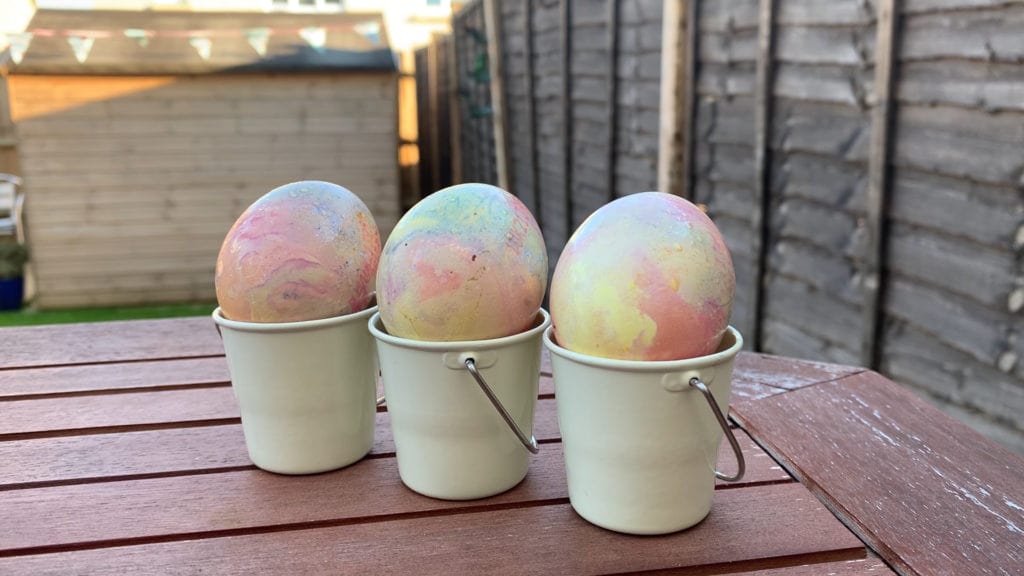
Make Easter more colourful with this super fun craft for the whole family – marbled eggs! Watch the video or follow the instructions below.
You will need: Eggs Food Colouring Vinegar Vegetable Oil
Instructions:
Take an egg and gently poke a hole at one end. Poke a hole at the other end of the egg which is slightly larger than the first.
Empty the egg by carefully blowing through the smaller of the holes, pushing the inside of the egg out into a bowl.
Set aside the egg mixture.
Add a tablespoon of food colouring to a bowl and mix with a splash of hot water and a tablespoon of vinegar.
Put the empty eggs in the bowls and let them sit there for a while, regularly turning them to get an even coating.
When the eggs has got some colour to them, drain and put on the side to dry.
Add a few drops of a different food colouring to a plate and mix with some water and a drop of vegetable oil. Roll the eggs on the plate to cover them in the second colour. They don’t need to be fully covered.
Repeat with a few different colours, adding more layers.
Let the eggs dry on a piece of kitchen roll.
You will now have some beautiful and truly unique marbled Easter eggs! Wash your hands thoroughly and scramble the eggs you put aside earlier for a delicious lunch!
By clicking "Accept All", you agree to the storing of cookies on your device to enhance site navigation, analyze site usage, and assist in our marketing efforts.
Privacy Preference Centre
When you visit any website, it may store or retrieve information on your browser, mostly in the form of cookies. This information might be about you, your preferences or your device and is mostly used to make the site work as you expect it to. The information does not usually directly identify you, but it can give you a more personalized web experience. Because we respect your right to privacy, you can choose not to allow some types of cookies. Click on the different category headings to find out more and change our default settings. However, blocking some types of cookies may impact your experience of the site and the services we are able to offer.
Manage Consent Preferences
Always Active
These cookies are necessary for the website to function and cannot be switched off in our systems. They are usually only set in response to actions made by you which amount to a request for services, such as setting your privacy preferences, logging in or filling in forms. You can set your browser to block or alert you about these cookies, but some parts of the site will not then work. These cookies do not store any personally identifiable information.
These cookies allow us to count visits and traffic sources so we can measure and improve the performance of our site. They help us to know which pages are the most and least popular and see how visitors move around the site. All information these cookies collect is aggregated and therefore anonymous. If you do not allow these cookies we will not know when you have visited our site, and will not be able to monitor its performance.
These cookies enable the website to provide enhanced functionality and personalisation. They may be set by us or by third party providers whose services we have added to our pages. If you do not allow these cookies then some or all of these services may not function properly.
These cookies may be set through our site by our advertising partners. They may be used by those companies to build a profile of your interests and show you relevant adverts on other sites. They do not store directly personal information, but are based on uniquely identifying your browser and internet device. If you do not allow these cookies, you will experience less targeted advertising.
 Free returns
  180-day guarantee
  10% off your first order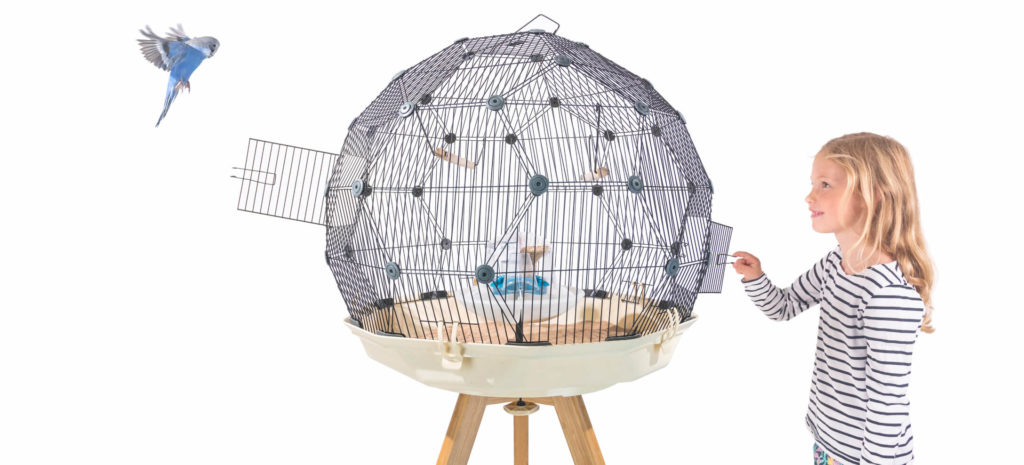
 STIMULATION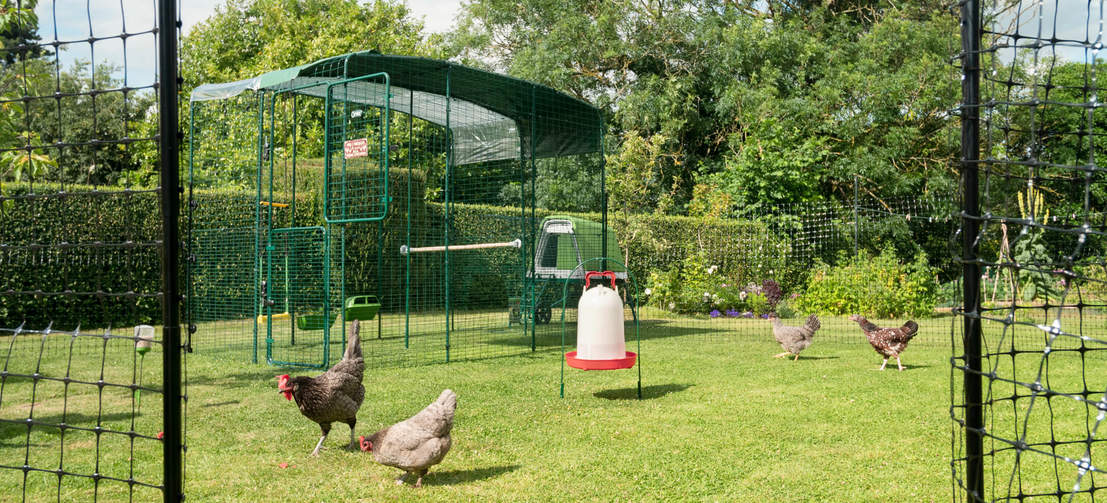

 Composting chicken droppings