Step by Step Guide to Hatching Chicks
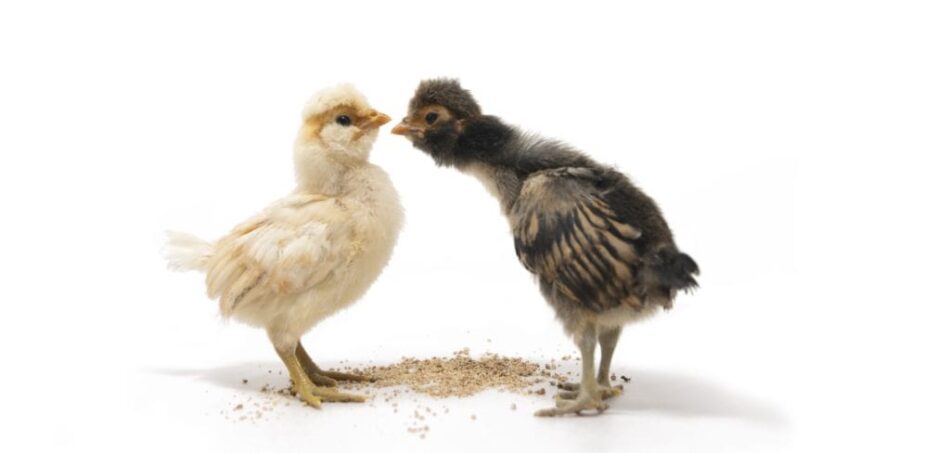
Hatching and rearing your own chicks from eggs is an incredibly exciting and rewarding process. There is nothing better than seeing your tiny chicks grow up in the knowledge that they are getting the best possible life from start to finish. The incubation period for chicken eggs is usually 21 days. The most reliable way to incubate your fertilised eggs and maximise the chance that they will hatch into healthy chicks is to use an artificial incubator. Here’s our step-by-step guide to hatching chicks:
1. Long Term Plan
Before the hatching starts, you will need to have a plan in place as to what you are going to do with the chickens once they hatch. It is a safe estimate that 25-50% of eggs will not hatch due to either not being fertilized or due to some mishaps during incubation. Among those which will hatch, approximately 50% will be cockerels and 50% will be hens. Everybody wants hens and hardly anyone needs cockerels, so there is a question of what to do with the latter. In many breeds, cockerels do not tolerate each other and they will fight vigorously unless they are completely separated.
2. Eggs
First of all, you need to be as sure as it is reasonably possible that the eggs are fertilized, so getting them from a good breeder / farmer is crucial. Eggs of some breeds are quite expensive, so every egg that will not hatch costs you money. A breeder can never give you a 100% guarantee that the egg is fertilized, but an experienced one can be quite confident they are.
The eggs should not have any deformations or bear any other visible defects. Any cracks in the eggshells are a no-go. Any defect of the eggshell might result in the chick having difficulty in hatching, being deformed, or not developing at all.
Once you have the eggs, it is a good practice to wash them with an egg disinfectant. Eggs are porous and the embryos get oxygen and water through their eggshells. If there are any toxins or bacteria on the eggshells, that might endanger the embryos.
3. Keep a Diary
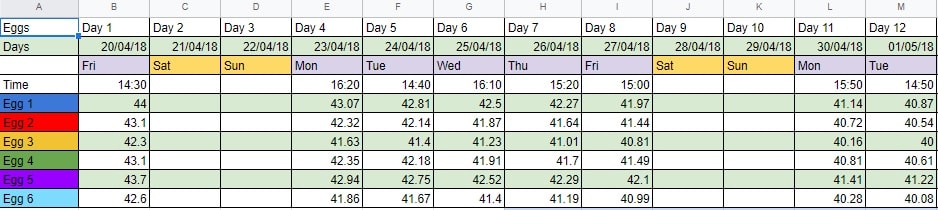
It is a really good idea to keep a diary of hatching. This includes numbering the eggs and keeping a daily record of each eggs weight. A developing egg will gradually lose weight in its 21 days of incubation. It will lose about 10-15% of its original weight over time. When the egg in the incubator is not losing weight it usually means it is not developing.
4. Incubator
Turning
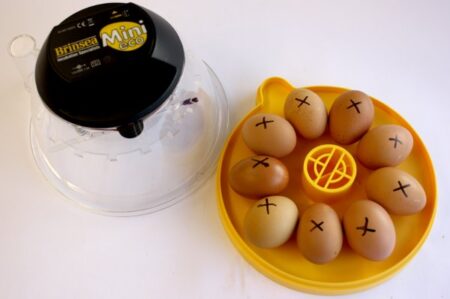
Choose your incubator carefully. Some incubators, such as the Brinsea Mini II Incubator have an Auto-turn mechanism built-in. Auto-turn saves you a lot of time and effort. Every egg during the incubation time needs to be turned every 90 minutes in order for the embryo to be positioned perfectly in the egg. A broody hen naturally turns all the eggs she is sitting on as she moves around the nest, so the turning simulates what naturally happens when a hen takes care after eggs. If the incubator does not have the Auto-turn option, you will need to turn the eggs manually. It is therefore a good practice to mark all eggs with a non-toxic marker just to be sure that every egg is being turned every time you visit them.
Temperature control
A good incubator will be able to keep a steady temperature within. One that we recommend is the Brinsea Mini II Incubator. The optimal temperature for hatching chicks is 37.5 degrees Celsius. A good incubator will set its alarm off if the temperature within drops below or rises above a certain threshold. Temperature in the room where the incubator is placed is crucial here, as it heavily influences the temperature in the incubator. You will be opening the incubator during routine controls of the eggs, so it is really important the eggs don’t get a temperature shock in the process – such a shock might kill the fetuses. We advise keeping a steady temperature of approx. 25 degrees Celsius in the room with the incubator. The room should also be draft free.
Humidity control
A good incubator will be able to provide a good humidity inside. Optimal humidity for the eggs during hatching is around 40-50% but needs to be increased on Day 19 in order to soften the eggshells and help the chicks to hatch out. With some Incubators such as the Brinsea II Mini Incubator, there are two water containers inside. Fill one up every day, and fill both of them from Day 19 onward. You can fill up the water container in the Brinsea without the need to open it which is very useful, since you generally don’t want to open the incubator too often. It is perfectly normal that some condensation starts to build up in the incubator after a few days due to high humidity.
5. Daily routine
Cooling
Day 7 is an important threshold. First of all, you need to start cooling the eggs for half an hour a day. It’s best to do this around the same time each day. A good incubator has a fan and you can set an automatic cooling time. If not, you need to cool the eggs down manually by taking them out of the incubator. The cooling temperature should not be shockingly different – a difference of 2 to 5 degrees Celsius will do.
Developing eggs keep their own temperature when exposed. That is how a hen tells the difference between a developing and a dead egg. When the hen gets off the nest to eat and drink, the dead eggs will go cold almost instantaneously. The hen will then get rid of the dead eggs from the nest.
Candling
You also need to start candling the eggs on Day 7 at the latest. Candling will show you which eggs are developing and which are not. If an egg does not show any signs of development on Day 7, it will not hatch. It is essential to take out any eggs which stop developing as they will start to decompose if left in the incubator. From Day 7 onward you should continue candling on a regular basis. It’s not necessary to do it every day, as you won’t see any significant progress on day-to-day basis, but it is a good practice to do it every third or fourth day. Weighing and candling combined are usually good indicators if the egg is developing or not.
From Day 7 up to Day 19 tasks should continue in a routine manner: daily cooling, weighing, and occasional candling.
6. Hatching
Day 19 marks the next important stage. You need to stop turning the eggs and cooling them, and lay out a hatching mat in the incubator (so the chicks won’t slip on the incubator’s surface on their first day of life). You also need to increase the humidity inside up to at least 65%. When using the Brinsea Mini II Incubator you can achieve this by filling up the second water container inside.
At some point during that period the eggs will start wiggling: the chicks will be moving around the egg to position themselves perfectly to hatch out. You might feel the temptation to check on the eggs often, but at this time it is best to leave them be and inspect the eggs every 6 hours or so.

Around Day 20 the chicks should peck out a small hole in their eggshells to catch their first breath of fresh air. It’s best to leave them be. Do not help them by making the hole bigger or breaking the shell apart. They will do it themselves in their own time. In that time they will also consume all the nutrients in their eggshells, so it is vital for them to stay inside for the time being.
Most of the chicken breeds hatch on Day 21 with only a handful of breeds hatching on Day 20 or 22. Do not help the chicks in hatching, they should be able to do it themselves – it’s their first test of strength. Only give a helping hand when a chick is really late (in comparison with its companions in the incubator) and/or the eggshell is really thick and the chick is evidently struggling to get out for a prolonged period of time.
Once the chicks hatch out, leave them in the incubator for another 24 hours. They should be well fed having eaten all the nutrients from their eggs. Apart from that, the incubator provides them with the optimal temperature and humidity.
Now watch our eggcellent egg hatching video to see how easy it is to hatch chicks!
This entry was posted in Chickens