Chicks grow up quickly and soon it will be time to transition your chicks into their Eglu chicken coop. Their brooder will start to feel crowded after a few weeks, and your fully feathered pullets will be ready to strut out in a coop of their own. We’re here to help you make moving day an easy and stress-free experience.
What age can chicks move into their Eglu chicken coop?
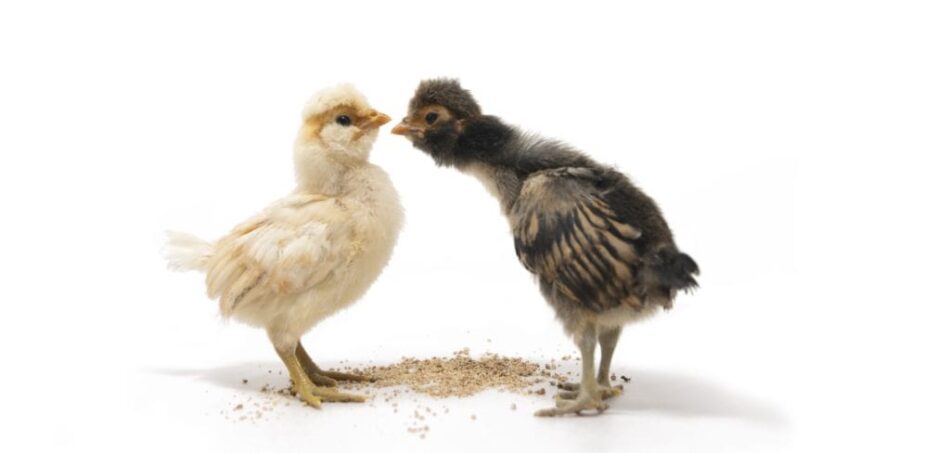
Chicks are usually fully feathered by the time they’re 6 weeks old, but not all chicks are ready to venture beyond their brooder at this age. Even though they’ve traded their fluffy down for mature feathers, they’re still very young. At Omlet, we recommend transitioning your chicks from their brooder to their Eglu chicken coop at 12 weeks of age.
Waiting until your chicks are 12 weeks old will give them time to become more coordinated and build the strength they need to navigate ladders, and give them plenty of time to become familiar with their rise-to-roost schedule.
From brooder to coop
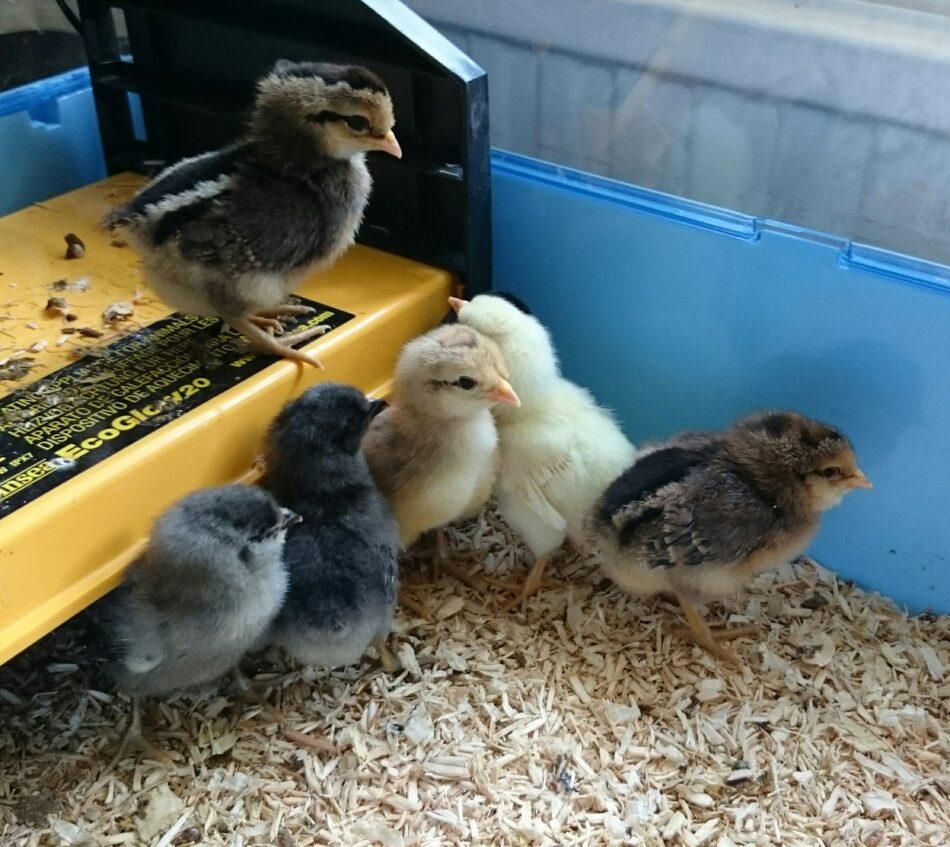
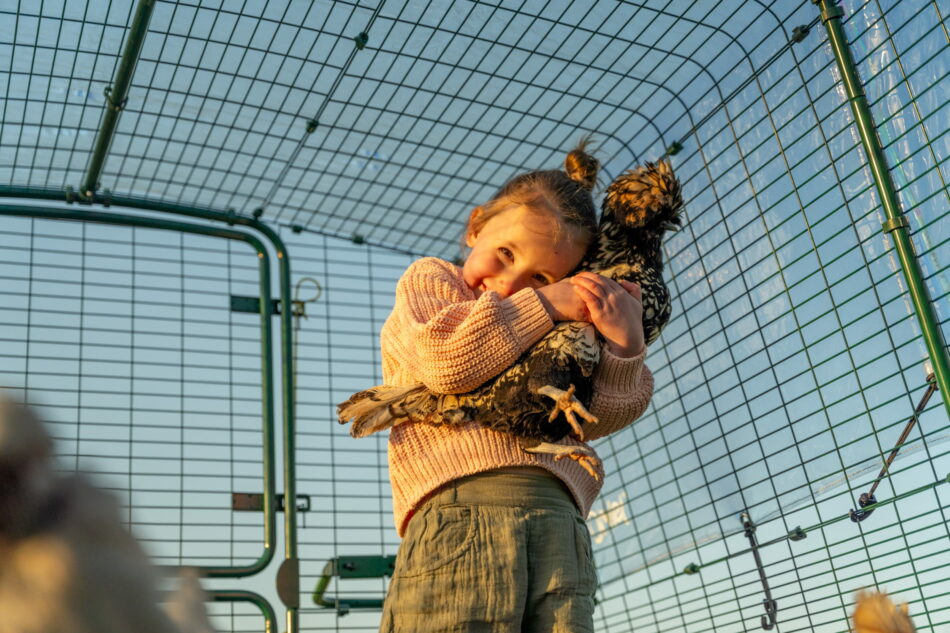
These 12 weeks will go by in a blink of an eye, so be sure to prepare for (and enjoy) your chicks’ time in the brooder. Caring for newly hatched chicks is exciting, and will set the tone for the rest of your relationship with them. Handling your chicks daily will help build a bond and before long your chicks will trust you, and there’s no better time than when they’re in their brooder to kickstart this relationship. Once your little flock trusts you, it will make their transition to their coop even easier.
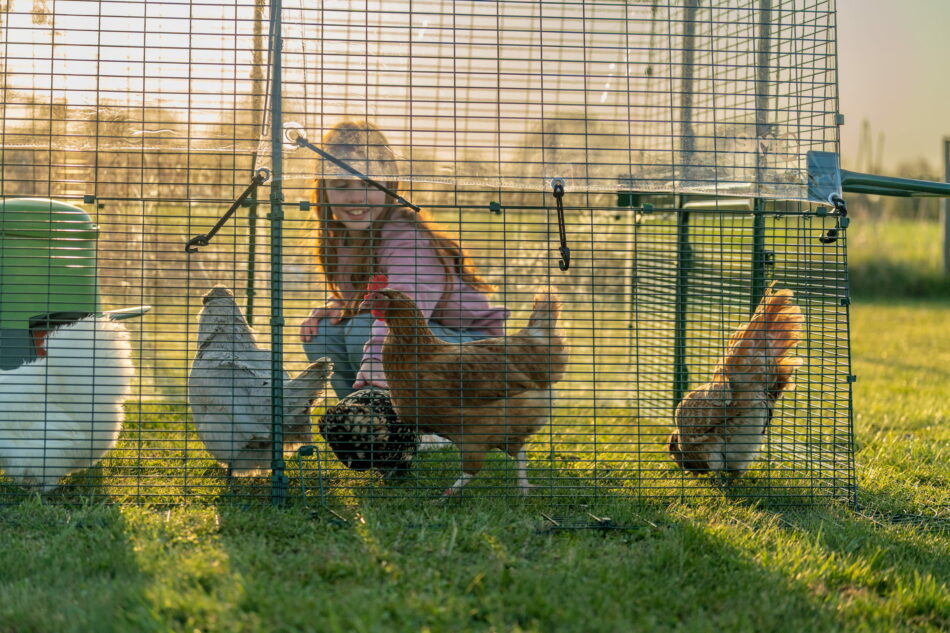
In the meantime, you can set up your flock’s walk in chicken run to take your chicks outside once they’re fully feathered. Keep these excursions short to make sure they don’t get chilled or draw the attention of other animals (including your other pets). If you plan to use an automatic chicken coop door, you can open and close it while your chicks are on their outing to get them used to the noise. Show your small flock where their chicken feeders and waterers are so that they’ll know where to find them once they move in.
Once your chicks are 12 weeks old and are all healthy and happy, it’s time to make the move to the coop. The big moving day should be based on the weather rather than a specific date. You want to look for a sunny day with moderate temperatures – ideally between 18-26°C Avoid moving your chicks on windy or wet days, and try to move them as early as possible so that they can experience a full day and be ready to head to bed when night falls.
Tips for your chicks’ first night
If your brooder utilises a brooding plate rather than a heat lamp, your chicks may already have the hang of going to bed at nightfall. But, being in a brooder is much different than being out in the big world, so even chicks that have an established sleep cycle may be caught off guard during their first night out.
First and foremost, you’ll want to keep your chicks safe from predators. The attached runs of the Eglu chicken coops are predator-resistant, but they will be much safer and more comfortable overnight in the roosting area inside of the coop. You may need to manually tuck your chicks in on their first night (or two) and close the door until they learn when bedtime is.
If you have an Autodoor, the coop light acts like a nightlight to guide sleepy heads to the roost. This is particularly helpful for chicks that were raised with a coop light – they’ll associate light with warmth and will seek it out when darkness falls.
New chicks and the existing pecking order
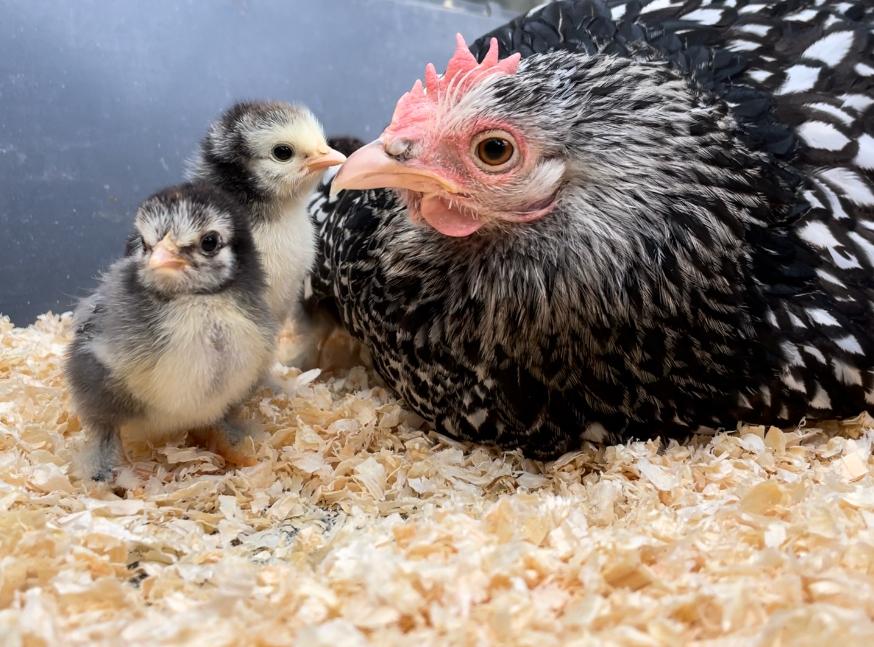
If you’re introducing your chicks to an existing flock, your older hens will help them learn the tips and tricks of the coop. But, older hens will also let newcomers know who’s in charge. Every flock of chickens has a hierarchy, and by understanding the pecking order in chickens you’ll be able to recognise what is normal hen behaviour, or what constitutes bullying and the need to remove your chicks for their safety.
Most chicks fall into line quickly, just as most hens at the top of the pecking order aren’t ruthless tyrants. There are exceptions to the rule though, so be on the lookout for concerning behaviour like:
Hens keeping chicks away from food or out of the coop
Scuffles severe enough to draw blood or cause excessive feather loss
Pinning chicks down
If you notice your hens not accepting your chicks into the flock, try setting up an adjacent run or add walk in chicken run partitions to your setup to allow them to get to know each other through a safety barrier. It’s rare for hens to forever hold a grudge against new additions, so be patient, but also conscientious of the safety of your chicks.
Omlet and your chicks
Our products are designed to keep your flock safe – no matter their age, and to make caring for your chickens less of a chore and more of an enjoyable activity. The Eglu Cube chicken coop is perfect for growing flocks, especially when paired with our walk in chicken run. And, by installing an Autodoor, you’ll have peace of mind from the start. Make moving day an enjoyable and memorable experience for you and your chicks, and set the tone for a lifetime of adventures together.
Whether you want a steady supply of fresh eggs or simply the joy that chickens bring to a backyard, the very first decision you’ll face is this: do you start with baby chicks, or do you skip straight to point-of-lay hens? For most beginners, the answer is adult birds. Specifically, started pullets (young hens on the verge of laying) offer the simplest, fastest, and lowest-risk entry into chicken keeping. That said, each path has its own appeal, and the right choice really does depend on your goals, your schedule, and how much hands-on care you’re ready to take on.
Here’s everything you need to know before you decide.
Should Beginners Start with Baby Chicks or Adult Chickens?
Most beginners are better off starting with adult birds, and here’s why.
Baby chicks are undeniably adorable, but they require a significant amount of hands-on care in their first weeks of life. You’ll need a brooder, a heat source, temperature monitoring, and special chick feed. They’re also fragile, vulnerable to temperature changes, and easy prey for predators. On top of all that, it takes around five months from hatch to first egg, which means a longer wait if you’re wanting your own flock for fresh eggs.
Adult hens are a different story. They’re robust, largely self-sufficient, and will typically start laying within a few weeks of settling into their new home. Set up a good chicken coop and run, introduce your birds, and you’re in business.
The bottom line: beginners absolutely can raise chicks, but you need to go in with your eyes open. If your primary goal is a healthy, productive flock with minimal stress, started pullets are the smarter starting point.
What Are Started Pullets and Why Should You Choose Them?
A started pullet is a young hen, typically around 16 to 20 weeks old, who is just about to begin laying eggs. She’s fully feathered, vaccinated, and ready to move straight into her new home without any of the intensive early-stage care that chicks demand.
The practical advantages
No brooder needed. Skip the heat lamps, temperature checks, and special chick starter feed entirely.
Outdoor-ready from day one. Set up your walk-in chicken run and coop, introduce your pullets, and let them settle in.
Eggs within weeks. Most pullets will begin laying shortly after they’ve adjusted to their new surroundings.
Guaranteed females. Reputable suppliers sell sexed pullets, so there’s no risk of ending up with roosters you can’t keep.
Easy to source. Local farms, feed stores, and hatcheries all stock started pullets, with the best availability in spring and early summer.
When chicks make more sense
The only real reason to choose chicks over pullets is if you specifically want the experience of raising birds from a young age. Hand-rearing chicks does create a strong bond, and many keepers find it deeply rewarding. Families with children often love the process too.
But if fresh eggs and a low-fuss introduction to chicken keeping are your priorities, started pullets are the brilliant choice for beginners.
Adopting Rescue Hens: A Rewarding Alternative
One option that often gets overlooked by new chicken keepers is adopting rescue hens, and it’s one of the most rewarding routes you can take.
These birds are typically commercially reared hens that the farming industry has deemed past their productive prime. Most are retired at around 18 months old, even though they often have another 18 months or more of good laying ahead of them. Across Australia, a growing number of rescue organisations work hard to rehome these birds before they’re sent to slaughter. NSW Hen Rescue, Melbourne Chicken Rescue and Brisbane Hen Rescue are among the most active, and Animals Australia maintains a national directory of adoption programs by state.
What to expect when your rescue hens arrive
Rescue hens can arrive looking a little rough. Missing feathers, timid behaviour, and pale combs are all common after a life in commercial housing. Don’t be alarmed. With good feed, clean water, and space to roam, the transformation is remarkable.
Within just a few weeks, most rescue hens are unrecognisable. Feathers grow back, personalities emerge, and eggs start appearing in the nest box. It’s genuinely one of the most satisfying experiences in chicken keeping.
A few things worth knowing:
Rescue hens from reputable organisations are health-screened before rehoming, so serious health conditions are unlikely.
They are typically free or available for a small donation, making them one of the most affordable ways to start a flock.
They will still give you around 4 to 5 eggs per week during their remaining laying years.
What You Need to Know Before Buying Baby Chicks
If you’ve decided that you do want the experience of raising chicks, there are a few things you need to understand before you commit.
Sexing: the most important thing to get right
Chicks have no obvious external differences between males and females. Any birds sold as “straight run” are an unsorted mix of both sexes, roughly 50/50. Most backyard keepers don’t want roosters, so the safest approach is to buy sexed chicks from a hatchery or breeder who can confirm the birds are female.
Before you buy anything, check your local council rules. All states and territories permit backyard chickens, but most councils have restrictions on roosters – and many suburban areas ban them outright. If sexed chicks aren’t available from your preferred supplier, it’s worth waiting until they are rather than accepting a flock that might include cockerels you’re unable to keep.
Where to source your chicks
Availability peaks in spring, so it pays to plan ahead and get on waiting lists early. Good Australian suppliers includeLibby’s Heritage Chickens (NSW),Grandchester Heritage Chickens (QLD) andBarter and Sons. Your local rural produce store or agricultural show is also a great place to connect with breeders in your area.
Be honest about your schedule
Chicks need regular attention during their first few weeks. If you travel frequently or have a particularly busy period coming up, it’s worth waiting until your schedule allows you to be present. The brooder stage is short, but it does require you to be around.
Setting Up a Brooder Box for Chicks
A brooder is a warm, enclosed space where your chicks will live for their first four to five weeks. You don’t need anything fancy to get started.
What you’ll need
A large cardboard box or a plastic storage tub works perfectly well as a brooder. The key priorities are warmth, ventilation, and protection from drafts.
Heat source and space
Use a heat plate or red heat bulb rather than a white bulb. White bulbs produce constant light, which stresses chicks and encourages feather pecking. Your chicks will tell you if the temperature is right: if they’re huddled directly under the heat source, they’re cold; if they’re pressing against the edges of the brooder, they’re too warm. Use the guide below for your week-by-week temperature:
Week 1: 35°C
Week 2: 32°C
Week 3: 29°C
Week 4: 26°C
Week 5: 24°C (or match outdoor temp)
Reduce the temperature by around 3°C each week until it matches the outdoor temperature and your chicks are ready to move outside.
Allow at least 40 square centimetres per chick and add more space as they grow. Cover the top with wire mesh to keep air circulating and stop the chicks jumping out once their wings develop.
Moving chicks outdoors
From around two weeks old, chicks can spend short supervised periods outside if it’s at least 18°C and dry. At around 12 weeks, they can move permanently into an outdoor coop and run. An Eglu Go chicken coop is a brilliant option at this stage, easy to clean and predator-resistant from day one. Remove the roosting bars from inside the coop at first, until the chicks are big enough to perch and walk across the bars safely, and add plenty of bedding to keep the chicks warm.
How to Breed Your Own Chickens from Fertilized Eggs
For experienced keepers who want to go one step further, breeding your own chickens from fertilized eggs is a deeply satisfying option. However, it does require more planning and equipment, so it might not be the right time if this is your first flock. Here’s what to know if you are considering it.
What you’ll need to get started
Hatching eggs can be ordered online from hatcheries or purchased from specialist breeders and farms. Or you can introduce a rooster to your flock to naturally mate with your hens. The rooster will do the rest, fertilizing eggs as part of the flock’s natural routine.
From there, you have two options:
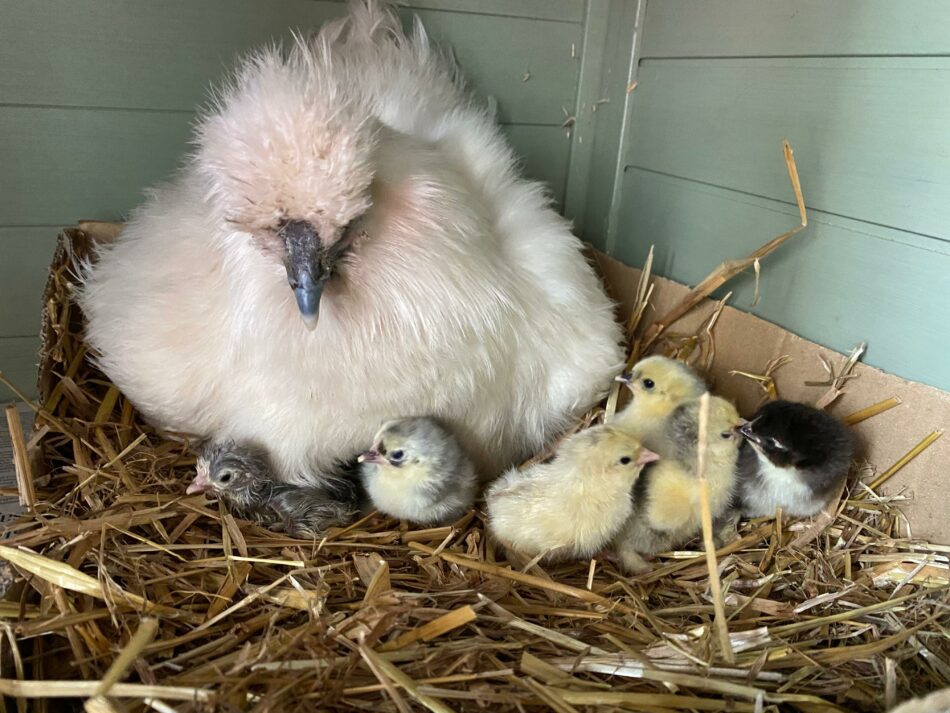
Let a broody hen do the work. If one of your hens goes broody (meaning she’s determined to sit on and hatch eggs), you can let nature take its course. A broody hen can typically manage 10 to 12 eggs, and she’ll turn them regularly without any help from you. This is by far the easiest hatching method.
Use an egg incubator. If you don’t have a broody hen, or you want more control over the process, an incubator is the alternative. Some modern incubators automate both temperature regulation and egg turning, which makes the process considerably more manageable for beginners to hatching.
The hatching process
After 21 days, the chicks will begin to hatch. This process can take up to 24 hours per chick and should never be rushed or interfered with. Resist the urge to help a chick out of its shell; the struggle is part of its development.
One important thing to plan for: hatching your own chicks means you’ll get a mix of males and females. Have a plan in place for any cockerels before you begin.
Which Option Is Right for You? A Quick Summary
Here’s a quick recap to help you decide:
Choose started pullets if you want fresh eggs as soon as possible, you’re new to chicken keeping, and you want a low-maintenance introduction to the hobby.
Choose rescue hens if you want an affordable, rewarding option and you’re happy to invest a little extra care in the first few weeks.
Choose baby chicks if you specifically want the experience of raising birds from a young age, you have the time to care for them properly, and you’re prepared to wait for your first eggs.
Choose to hatch your own if you’re an experienced keeper looking to expand or refine your flock, and you have the space and time to manage the process.
Omlet and your flock
Whatever route you choose, getting the housing right is the single most important thing you can do for your flock. Our chicken coops and walk-in runs are designed to make chicken keeping genuinely easy, whether you’re welcoming pullets, rescue hens, or a brood of fluffy chicks. We also have expert guides covering every stage of flock life to help you feel confident from day one.
As long as your chickens are laying and there’s a cockerel in your flock, you can hatch and incubate chicks all year round. However, traditionally the most popular time to breed your own chickens is in the spring. Hatching and rearing your own chicks from eggs is an incredibly exciting and rewarding process. There is nothing better than seeing your tiny chicks grow up in the knowledge that they are getting the best possible life from start to finish. The incubation period for chicken eggs is usually 21 days. The most reliable way to incubate your fertilised eggs and maximise the chance that they will hatch into healthy chicks is to use an artificial incubator. Here’s our step-by-step guide to hatching chicks:
1. Long Term Plan
Before the hatching starts, you will need to have a plan in place as to what you are going to do with the chickens once they hatch. It is a safe estimate that 25-50% of eggs will not hatch due to either not being fertilized or due to some mishaps during incubation. Among those which will hatch, approximately 50% will be cockerels and 50% will be hens. Everybody wants hens and hardly anyone needs cockerels, so there is a question of what to do with the latter. In many breeds, cockerels do not tolerate each other and they will fight vigorously unless they are completely separated.
2. Eggs
First of all, you need to be as sure as it is reasonably possible that the eggs are fertilized, so getting them from a good breeder / farmer is crucial. Eggs of some breeds are quite expensive, so every egg that will not hatch costs you money. A breeder can never give you a 100% guarantee that the egg is fertilized, but an experienced one can be quite confident they are.
The eggs should not have any deformations or bear any other visible defects. Any cracks in the eggshells are a no-go. Any defect of the eggshell might result in the chick having difficulty in hatching, being deformed, or not developing at all.
Once you have the eggs, it is a good practice to wash them with an egg disinfectant. Eggs are porous and the embryos get oxygen and water through their eggshells. If there are any toxins or bacteria on the eggshells, that might endanger the embryos.
3. Keep a Diary
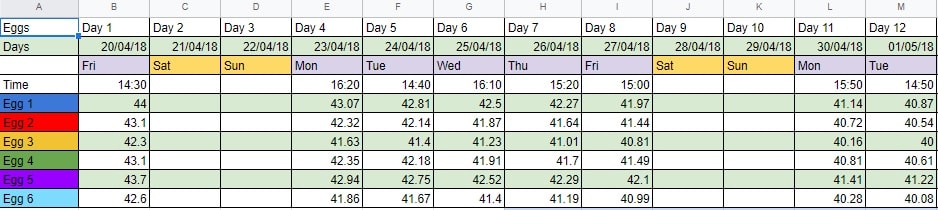
It is a really good idea to keep a diary of hatching. This includes numbering the eggs and keeping a daily record of each eggs weight. A developing egg will gradually lose weight in its 21 days of incubation. It will lose about 10-15% of its original weight over time. When the egg in the incubator is not losing weight it usually means it is not developing.
4. Incubator
Turning
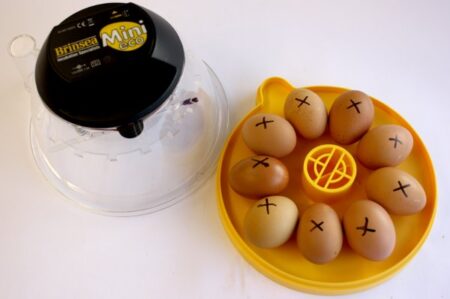
Choose your incubator carefully. Some incubators, such as the Brinsea Mini II Incubator have an Auto-turn mechanism built-in. Auto-turn saves you a lot of time and effort. Every egg during the incubation time needs to be turned every 90 minutes in order for the embryo to be positioned perfectly in the egg. A broody hen naturally turns all the eggs she is sitting on as she moves around the nest, so the turning simulates what naturally happens when a hen takes care after eggs. If the incubator does not have the Auto-turn option, you will need to turn the eggs manually. It is therefore a good practice to mark all eggs with a non-toxic marker just to be sure that every egg is being turned every time you visit them.
Temperature control
A good incubator will be able to keep a steady temperature within. One that we recommend is the Brinsea Mini II Incubator. The optimal temperature for hatching chicks is 37.5 degrees Celsius. A good incubator will set its alarm off if the temperature within drops below or rises above a certain threshold. Temperature in the room where the incubator is placed is crucial here, as it heavily influences the temperature in the incubator. You will be opening the incubator during routine controls of the eggs, so it is really important the eggs don’t get a temperature shock in the process – such a shock might kill the fetuses. We advise keeping a steady temperature of approx. 25 degrees Celsius in the room with the incubator. The room should also be draft free.
Humidity control
A good incubator will be able to provide a good humidity inside. Optimal humidity for the eggs during hatching is around 40-50% but needs to be increased on Day 19 in order to soften the eggshells and help the chicks to hatch out. With some Incubators such as the Brinsea II Mini Incubator, there are two water containers inside. Fill one up every day, and fill both of them from Day 19 onward. You can fill up the water container in the Brinsea without the need to open it which is very useful, since you generally don’t want to open the incubator too often. It is perfectly normal that some condensation starts to build up in the incubator after a few days due to high humidity.
5. Daily routine
Cooling
Day 7 is an important threshold. First of all, you need to start cooling the eggs for half an hour a day. It’s best to do this around the same time each day. A good incubator has a fan and you can set an automatic cooling time. If not, you need to cool the eggs down manually by taking them out of the incubator. The cooling temperature should not be shockingly different – a difference of 2 to 5 degrees Celsius will do.
Developing eggs keep their own temperature when exposed. That is how a hen tells the difference between a developing and a dead egg. When the hen gets off the nest to eat and drink, the dead eggs will go cold almost instantaneously. The hen will then get rid of the dead eggs from the nest.
Candling
You also need to start candling the eggs on Day 7 at the latest. Candling will show you which eggs are developing and which are not. If an egg does not show any signs of development on Day 7, it will not hatch. It is essential to take out any eggs which stop developing as they will start to decompose if left in the incubator. From Day 7 onward you should continue candling on a regular basis. It’s not necessary to do it every day, as you won’t see any significant progress on day-to-day basis, but it is a good practice to do it every third or fourth day. Weighing and candling combined are usually good indicators if the egg is developing or not.
From Day 7 up to Day 19 tasks should continue in a routine manner: daily cooling, weighing, and occasional candling.
6. Hatching
Day 19 marks the next important stage. You need to stop turning the eggs and cooling them, and lay out a hatching mat in the incubator (so the chicks won’t slip on the incubator’s surface on their first day of life). You also need to increase the humidity inside up to at least 65%. When using the Brinsea Mini II Incubator you can achieve this by filling up the second water container inside.
At some point during that period the eggs will start wiggling: the chicks will be moving around the egg to position themselves perfectly to hatch out. You might feel the temptation to check on the eggs often, but at this time it is best to leave them be and inspect the eggs every 6 hours or so.
Around Day 20 the chicks should peck out a small hole in their eggshells to catch their first breath of fresh air. It’s best to leave them be. Do not help them by making the hole bigger or breaking the shell apart. They will do it themselves in their own time. In that time they will also consume all the nutrients in their eggshells, so it is vital for them to stay inside for the time being.
Most of the chicken breeds hatch on Day 21 with only a handful of breeds hatching on Day 20 or 22. Do not help the chicks in hatching, they should be able to do it themselves – it’s their first test of strength. Only give a helping hand when a chick is really late (in comparison with its companions in the incubator) and/or the eggshell is really thick and the chick is evidently struggling to get out for a prolonged period of time.
Once the chicks hatch out, leave them in the incubator for another 24 hours. They should be well fed having eaten all the nutrients from their eggs. Apart from that, the incubator provides them with the optimal temperature and humidity.
Now watch our eggcellent egg hatching video to see how easy it is to hatch chicks!
By clicking "Accept All", you agree to the storing of cookies on your device to enhance site navigation, analyze site usage, and assist in our marketing efforts.
Privacy Preference Centre
When you visit any website, it may store or retrieve information on your browser, mostly in the form of cookies. This information might be about you, your preferences or your device and is mostly used to make the site work as you expect it to. The information does not usually directly identify you, but it can give you a more personalized web experience. Because we respect your right to privacy, you can choose not to allow some types of cookies. Click on the different category headings to find out more and change our default settings. However, blocking some types of cookies may impact your experience of the site and the services we are able to offer.
Manage Consent Preferences
Always Active
These cookies are necessary for the website to function and cannot be switched off in our systems. They are usually only set in response to actions made by you which amount to a request for services, such as setting your privacy preferences, logging in or filling in forms. You can set your browser to block or alert you about these cookies, but some parts of the site will not then work. These cookies do not store any personally identifiable information.
These cookies allow us to count visits and traffic sources so we can measure and improve the performance of our site. They help us to know which pages are the most and least popular and see how visitors move around the site. All information these cookies collect is aggregated and therefore anonymous. If you do not allow these cookies we will not know when you have visited our site, and will not be able to monitor its performance.
These cookies enable the website to provide enhanced functionality and personalisation. They may be set by us or by third party providers whose services we have added to our pages. If you do not allow these cookies then some or all of these services may not function properly.
These cookies may be set through our site by our advertising partners. They may be used by those companies to build a profile of your interests and show you relevant adverts on other sites. They do not store directly personal information, but are based on uniquely identifying your browser and internet device. If you do not allow these cookies, you will experience less targeted advertising.