-The Best Things In Life Are Sweet-_________________________________________
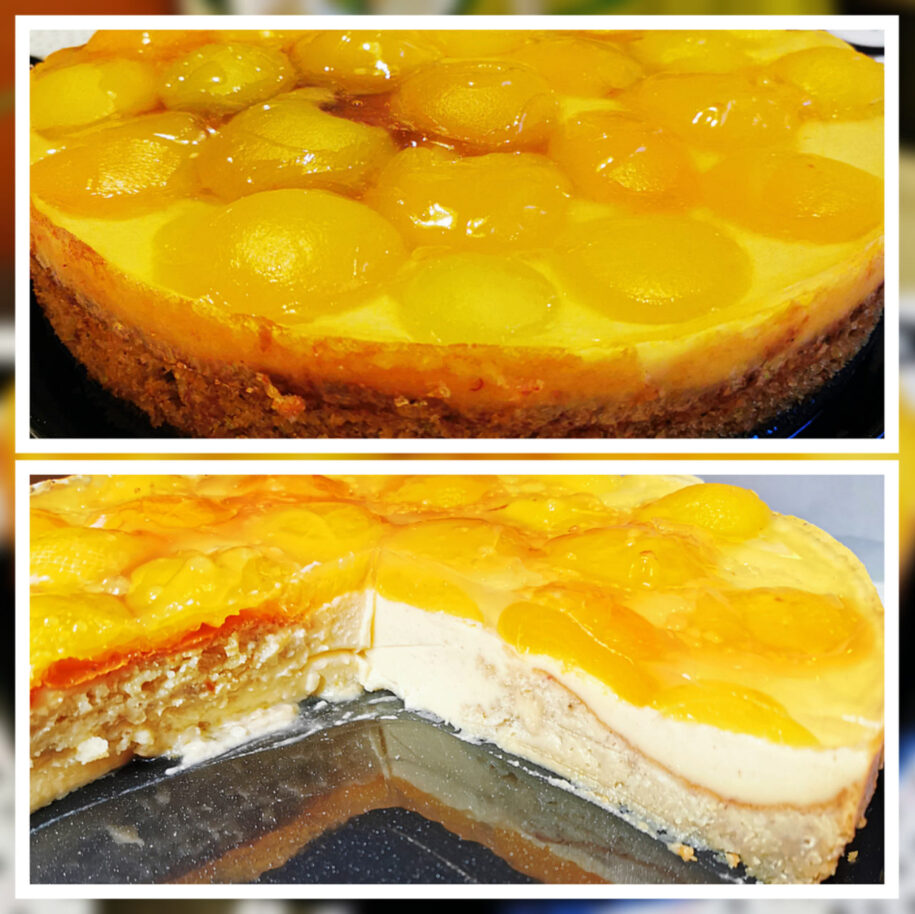
The OMLET (Omelette) Cake
 Ingredients for the cake batter (for a ÿ25 cm cake tin):
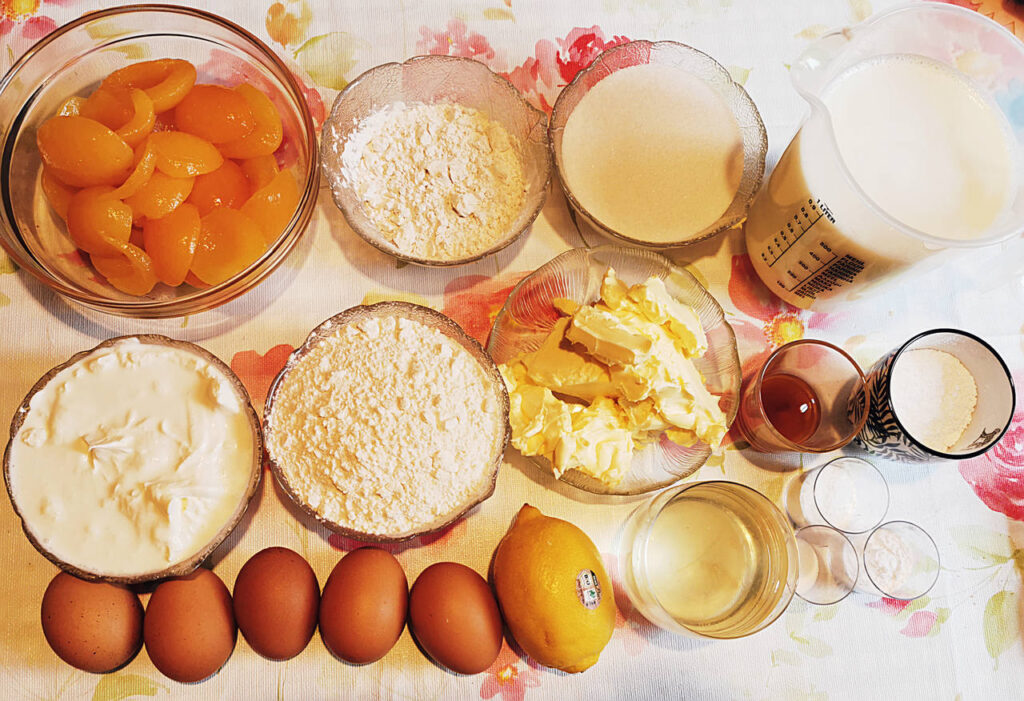
- 900 ml milk*
- 250 g sugar
- 250 g butter/margarine
- 4 tbsp lemon juice
- 5 eggs*
- 250 g flour
- 1 packet baking powder
- a pinch of salt
- 1 package of clear cake glaze*
- 1 can apricots halves (850 g drained net weight)
- 1 can apricots halves (425 g drained net weight)
Ingredients for pudding cream:
- 100 ml milk*
- 2 packets vanilla pudding powder
- 80 sugar
- 1 packet vanilla sugar
- 2 cups sour cream*
*For a plant-based or vegan option:
As a milk substitute you can use any non-dairy milk (e.g. almond or oat milk). As 1 egg substitute use 1/2 mashed banana (5 eggs = 2 ? bananas) or 70 g apple puree (5 eggs = 350 g). You can buy vegan sour cream or soy yogurt. Instead of the clear cake glaze you can use agar-agar powder.
Instructions
- Grease a cake tin (ÿ25 cm). Preheat oven to 170 degrees C/338 degrees F (convection oven).
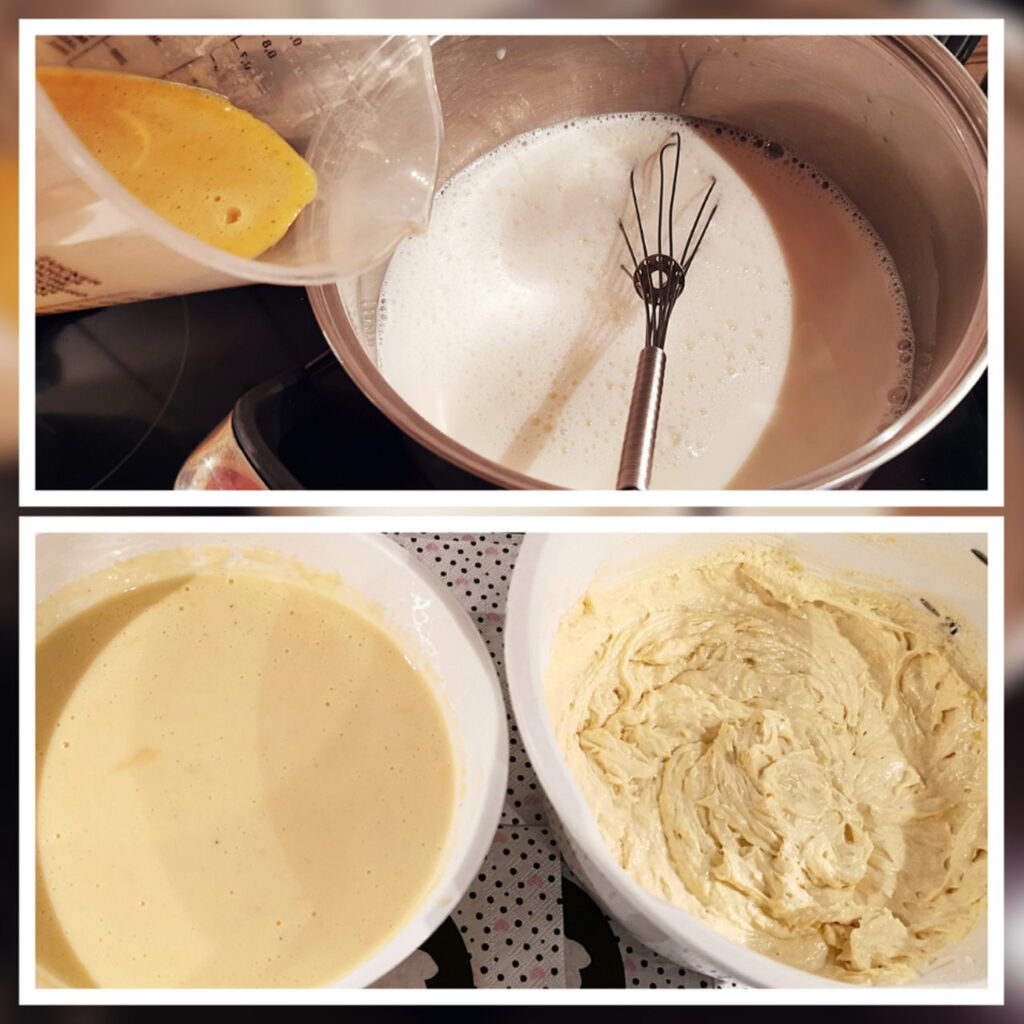
- Boil 900 ml milk in a saucepan. Mix in a bowl the remaining milk, 80 g sugar and vanilla pudding powder until smooth, stir into the boiling milk and cook well for 1 minute while stirring. Pour into a bowl and let cool, stirring several times.
- Mix butter/margarine, 200 g sugar, 1 pinch of salt with the mixer until you reach a creamy texture. Mix in eggs one at a time. Mix flour and baking powder and stir in 2 tsp of lemon juice. Put the batter in a greased cake tin and bake on the middle shelf for 20 minutes.
- In the meantime, drain the apricots well and collect the juice. Stir the pudding again, and now stir in the sour cream with a whisk. After the 20 minutes baking time, spread the pudding cream evenly on the batter. Cover the cake with apricots and bake for another 20-30 minutes. Let cool down.
- Mix the icing powder, remaining sugar, 1/4 liter of apricot juice and remaining 2 tsp of lemon juice in a saucepan and bring to the boil while stirring. Now spread the glaze with a tablespoon over the apricot halves so that it looks like egg white. Allow to become firm.

You can use peaches instead of apricots as well.
If you want to bake the ultimate “Omlet”-cake with a ÿ12 cm cake tin, use 1/2 of the ingredients and only one apricot halve on top of it.
If you prefer a more traditional Easter cake, here is a super delicious yet easy recipe:
_________________________________________
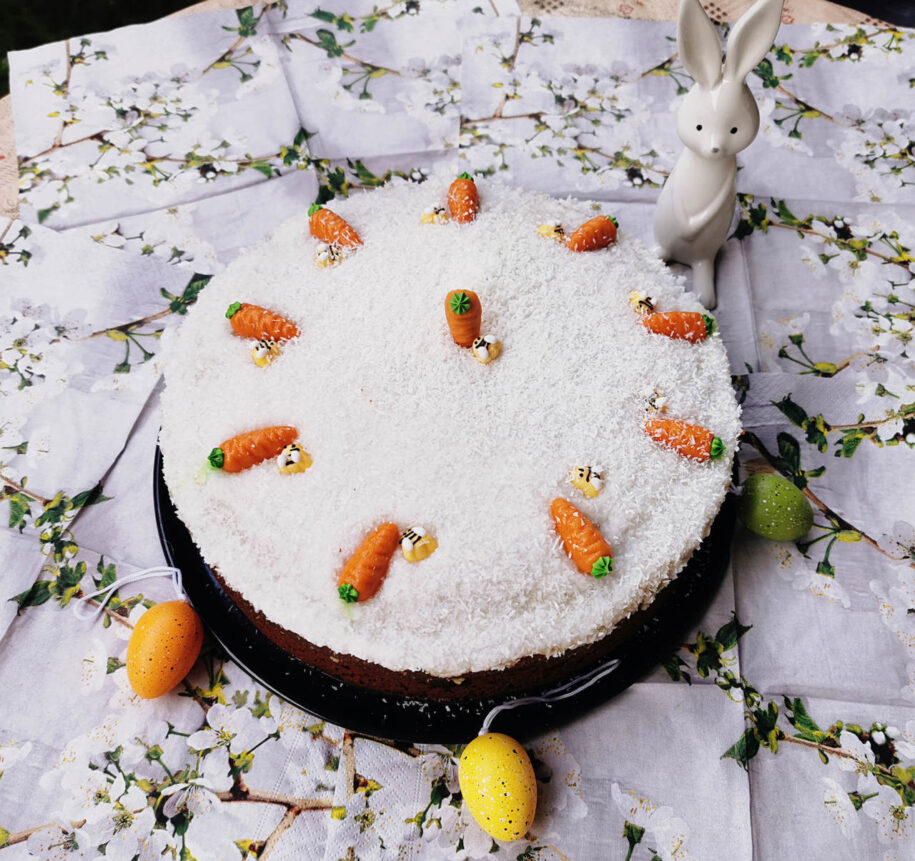
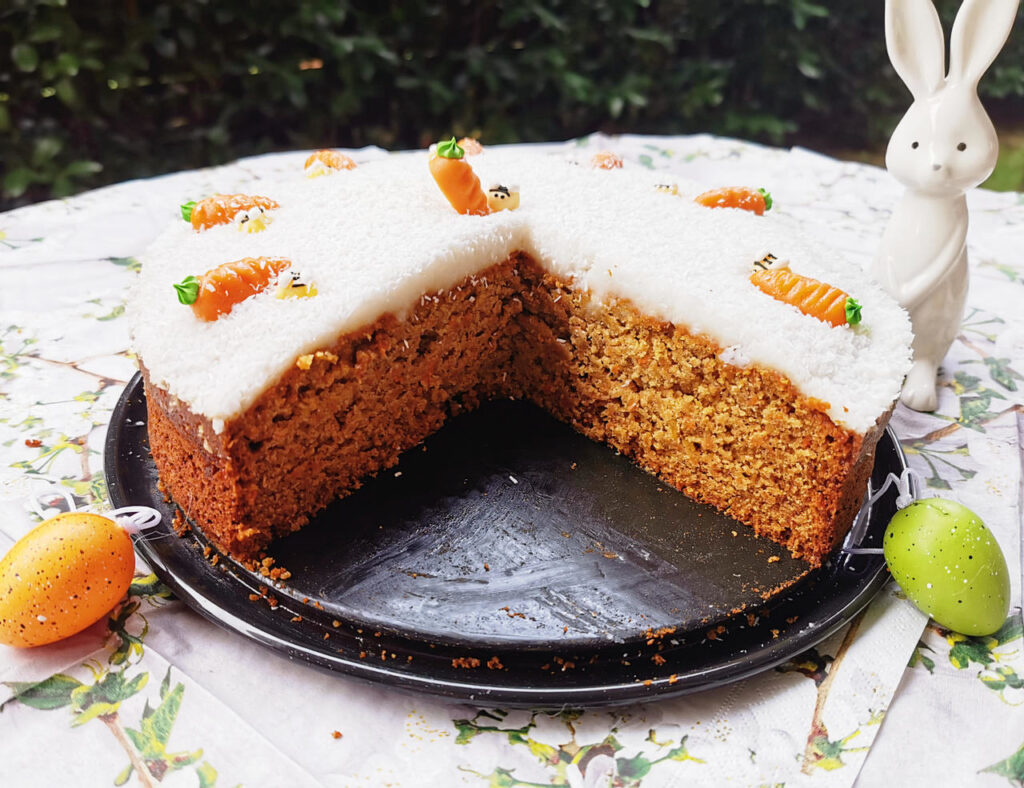
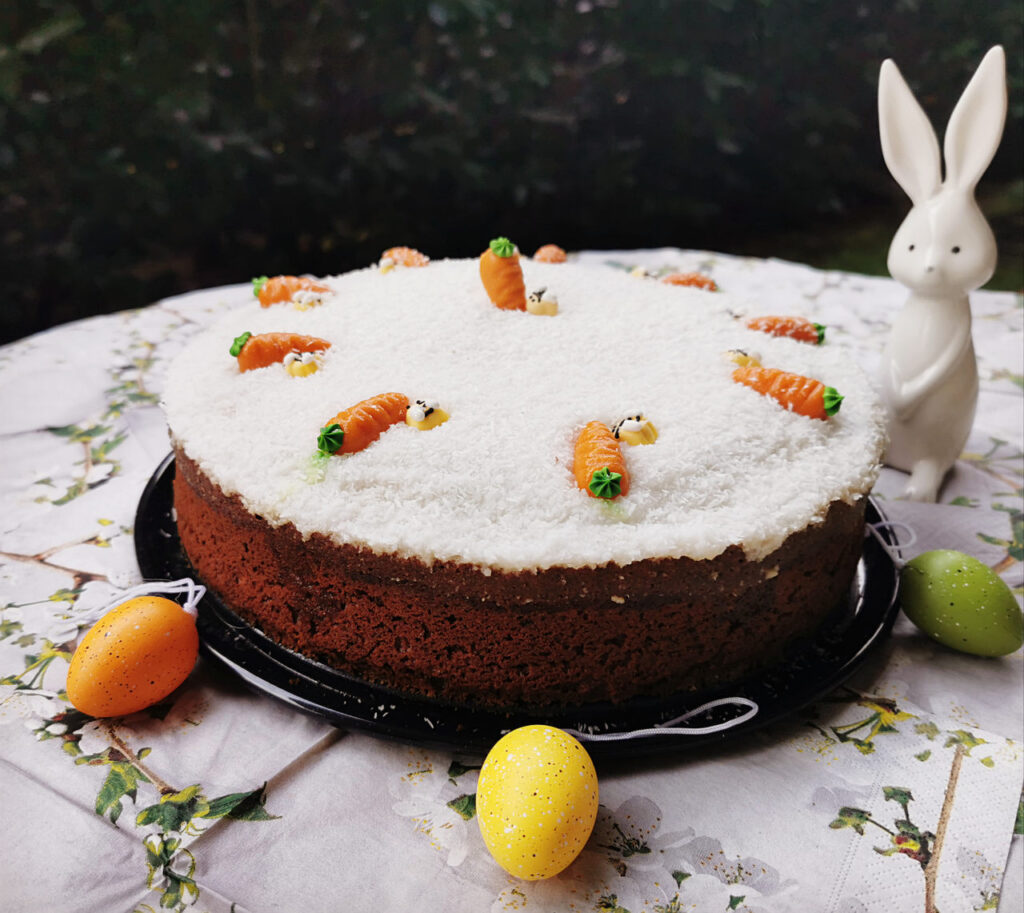
Carrot-Marzipan-Cake
Ingredients for the cake batter:
- 350 g wheat or spelt flour
- 4 eggs*
- 400 g carrots
- 100 g ground hazelnuts
- 100 g ground almonds
- 200 g sugar
- 1 packet vanilla sugar
- 1/4 tsp vanilla extract
- 1 vanilla pod
- 1 tsp cinnamon
- 1 packet baking powder
- 1 tsp baking soda
- 200g marzipan
- 200 ml rapeseed or sunflower oil
- 200 ml milk*
- juice of 1/2 lemon
- extra portion love
Optional adult version: 150 ml advocaat
Frosting:
- 70 g icing sugar
- 200 g coconut yogurt
- 30 g coconut paste
- shot of lemon juice
optional: food colouring, e.g. green colour
Decoration: e.g. Marzipan carrots, chopped pistachios, dried flowers, grated coconut
*For a plant-based or vegan option:
Use 2 tsp baking soda and 2 tsp cider vinegar or alternatively banana/apple puree as egg substitute (1/2 mashed banana per egg; 70 g apple puree per egg).
As a milk substitute you can use e.g. almond milk or oat milk, or any other non-dairy milk you prefer.
Instructions
1. Grease a cake tin (about ÿ25 cm) or use baking paper. Preheat oven to 175 degrees C/347 degrees F (convection oven).
2. Mix dry ingredients (flour, hazelnuts/almonds, sugar, baking powder, baking soda, cinnamon) and the eggs in a bowl with a mixer. In a separate bowl, peel and grate carrots and mix them with the wet ingredients (vanilla extract, oil, milk, lemon juice).
3. Now slowly heat the marzipan in a saucepan, stirring repeatedly until it becomes a liquid mass. Mix the dry and wet ingredients together and gradually add the marzipan (and optional advocaat) to the batter, mix well.
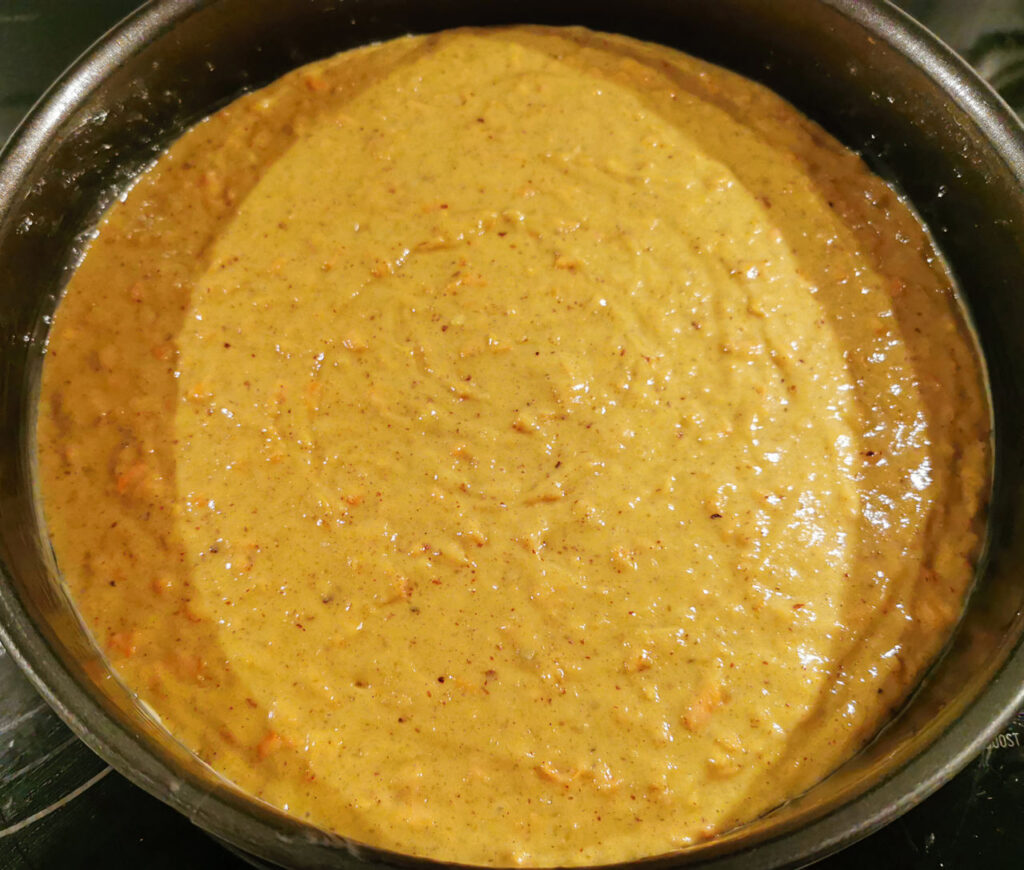
4. Pour the batter into the cake tin, smoothen it and bake it for about 50 minutes (skewer test).
5. Let the cake cool down and prepare the frosting in the meantime. Mix the sifted icing sugar with yoghurt and coconut puree and season with more icing sugar and a shot of lemon juice. You can add food colouring to the frosting if you wish. Now spread the frosting on the cooled cake and decorate as desired, e.g. with marzipan carrots, chopped pistachios or dried flowers.
Enjoy!
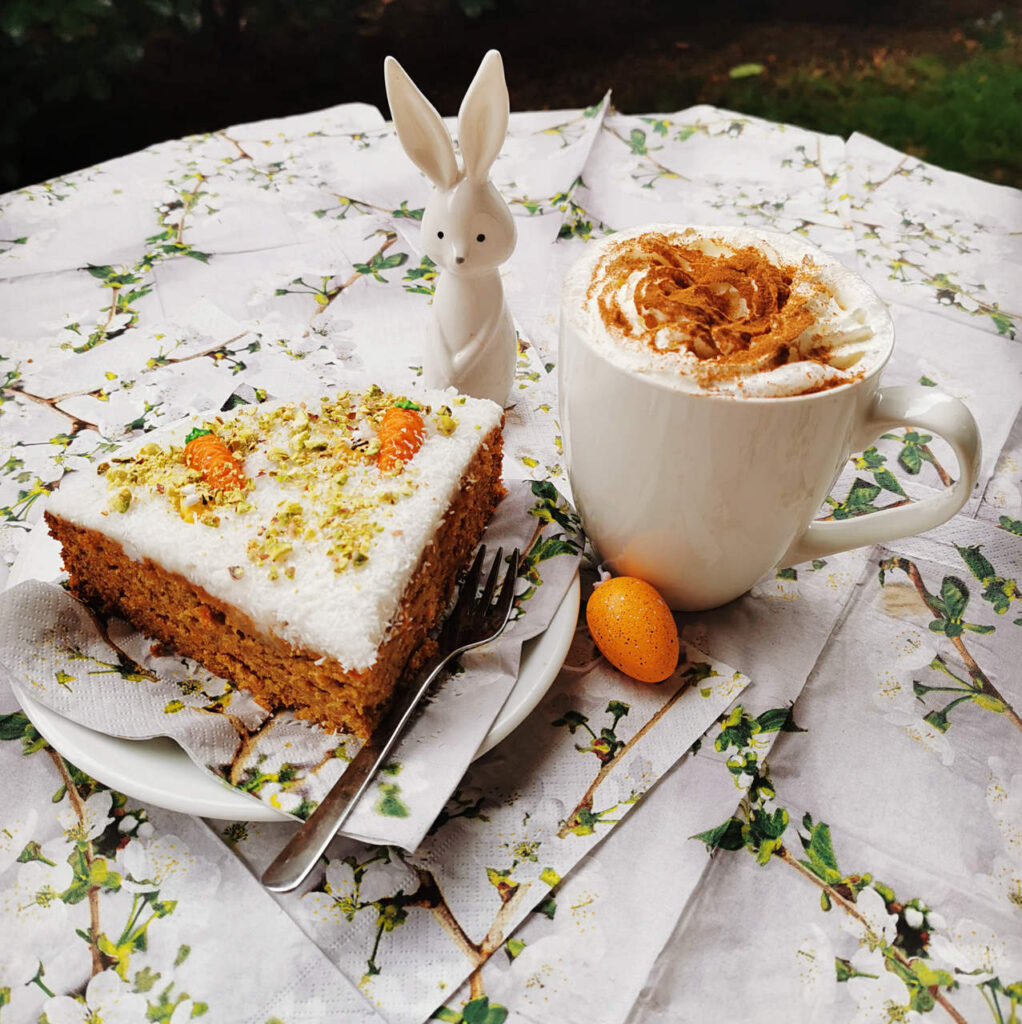
Bon appÈtit
&
Happy Easter from the Omlet Team!
Tag us on social media (Instagram: omlet_uk) with an image of your cake!
This entry was posted in Food on March 31st, 2021 by alisa.deluca

Are you eggcited about Easter? Easter is the second biggest family gathering of the year, so let’s celebrate it with some extra “hoppy” Easter games! This year, Easter will be celebrated in a small circle, but this doesn’t mean you have to miss out on all the great fun. Here are 5 festive Easter games that will keep the whole family entertained!
1- Easter Tic-Tac-Toe
This is mostly played by young children but makes a great strategy game for adults too! To make this game extra “hoppy” for Easter, you could paint real or plastic eggs in different colours or decorate them to distinguish each player.
Players then take it in turns placing their egg on the spaces in a 3×3 grid. The player who succeeds in placing three of their eggs in a diagonal, horizontal, or vertical row is the winner!
2- Hula Hoop Aim
This is a great game for families or groups, where everyone will be entertained – and it’s super easy. Set up five hula hoops on the floor and assign a point value to each (example: the closest hoop is 10 points, the second closest 20,…, and the furthest hoop is 50 points). Give each player five plastic eggs. Have them toss the eggs into the hoops to see who can rack up the most points!
You can decorate the eggs together with your children by painting them in individual colours, so that each player has their own coloured egg. Let the fun begin!
3- Bunny Hop Sack Race
Old but gold: the hoppiest game in our top picks! Since bunnies hop, having a good old-fashioned sack race is a great fit for Easter, your children will love racing you!
Set up each player with a burlap sack — decked out with a bunny tail — and have them race to the finish line. Make sure you’re on a soft ground. Just don’t forget to whip up some yummy Easter treats for the grand prize winner!
4- Pin Rabbit Tails
This game is for the whole family! Get pom poms and attach double-sided sticky tape to each of them. The players then have to stick the rabbit tails (pom poms) to one another…whoever ends up with most tails on them after 5 minutes of playing loses the game!
Once the game is finished, your children can get creative and do some Easter crafts. The possibilities are endless!
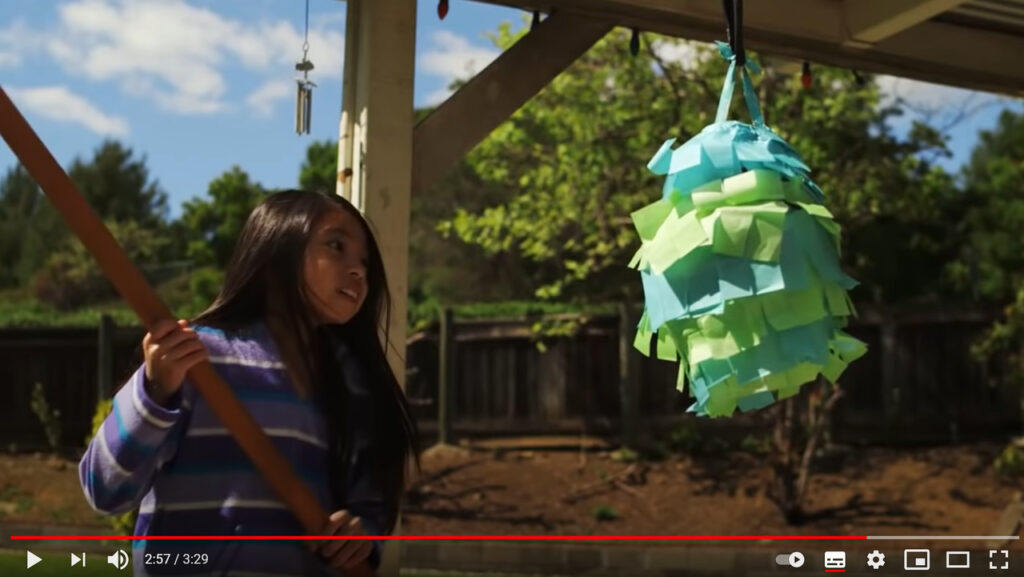
5- Easter Egg Piñata
Piñatas are great for any celebration but they’re also fun to make! Kids will have a blast making these as much as they will enjoy tearing them down.
You’ll need the following supplies:
- balloons (small, middle and/or big
- craft glue
- 2 cups water
- tissue paper and/or crepe paper streamers
- 1 cup flour
- decoration
- newspaper
- craft knife
- wire, string, ribbon or rope (to hang the piñata)
- piñata bat (e.g. baseball bat)
Step 1: Blow up the balloon, tie it closed and tear or cut newspaper into strips.
Step 2: Mix water with flour to create paste. Dip the newspaper strips in the paste and apply the moistened strips to the balloon. Repeat this until the balloon is completely covered – three layers will help make the piñata strong. Make sure not to cover the knot. This is where you’re going to put the treats later. This part is messy but the kids will love getting their hands dirty. To hold the balloon in place while applying the newspaper strips, place it on top of a plastic container that will act as a stable base.
Step 3: Let the piñata dry for at least 24 hours, making sure to rotate it so all sides dry.
Step 4: After it’s completely dry, cut different coloured tissue papers in strips and give the kids freedom to choose their colours and start adding stripes with craft glue to cover the base layer. Decorate as you wish. Now pop the knot with a craft knife and pull out the balloon. Punch two small holes around the main hole. Tie a string or ribbon to the holes to create a loop.
Step 5: Now fill your piñata with some delicious treats, like mini chocolate eggs, jelly beans, marshmallows or any other sweets… whatever you prefer!
Step 6: Glue down some crepe paper on top of the hole, or use masking tape. The goal is to prevent the filling of the piñata from falling out before you’ve actually hit it. Tie another piece of string, ribbon, or rope to the loop you’ve already made and use this to attach the piñata to whatever you’d like to hang it from.
Here is a video about how to make a piñata and who explains it better than kids itself?
BONUS
Here comes an eggstra game! Everything’s a bit more fun with a little mystery. Check out this super cool secret Easter egg hunt!
Let the children – and adults – hunt for the eggs but this time, write a letter on each egg. In the end, when all eggs are collected together, they have to decode the message and they’ll get the clue where the Easter gift is actually hidden. For example: if you hide the gift in the garage, place the letters “G”, “A”, “R”, “A”, “G”, “E” individually on each egg. If they put the letters together, they know where to go for a successful egg hunt! – You can also use Kinder eggs and put individual messages inside.
Omlet wishes you Happy Easter &
a successful Egg Hunt!
This entry was posted in Crafting on March 31st, 2021 by alisa.deluca
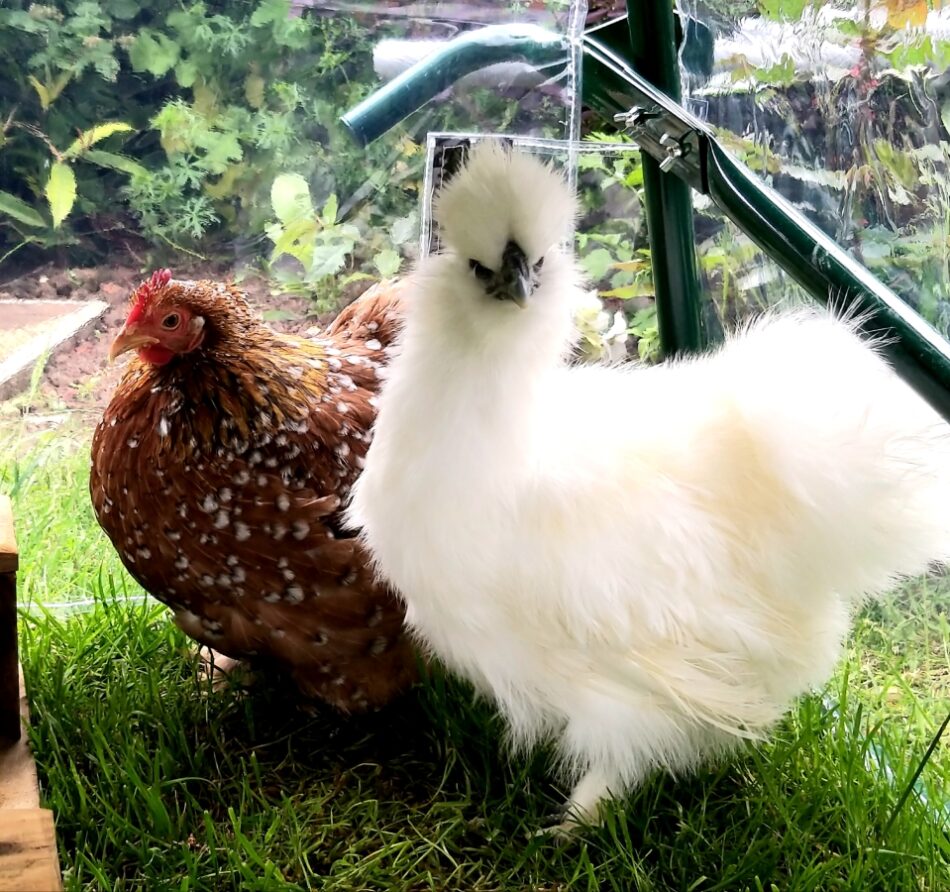
Spring is the perfect time of year to set up a chicken coop and bring home new hens. As your garden begins to stir from its winter slumber, your chickens will benefit from the first fresh greens that become available – essential to your hens’ diets. As well as this, the warmer and longer days mean that your chickens will start producing more eggs again after the winter lull. Plus, raising chickens in the gentler climate of the season also means that you’ll have a happier and livelier flock.

When should I buy point of lay chickens?
Have you ever heard of the term ‘spring chicken’? Well, it actually stems from its literal meaning when in the early 1700s, farmers realised that chickens born in spring were being bought at better prices than those who had already been through their first winter. Most breeders now hatch eggs in December and January, so spring is the time of the year when point of lay, or ‘spring chickens’, become available.
A point of lay chicken is a hen approximately between 16 and 22 weeks old that is just about to begin laying its first eggs, hence ‘point of lay’. This is a good time to get hens, as they are old enough to take care of themselves but happy to be moved and introduced to a new home. When point of lay occurs, however, can vary somewhat between breeds and other external circumstances. For example, larger hens such as Orpingtons will not reach their point of lay potentially until they are 26 weeks old. For further information on when your hens will begin laying, have a read of our previous blog.
How long will spring chickens produce eggs for?
Having fresh delicious eggs is one of the main reasons why many chicken keepers decide to keep hens to begin with. Therefore, choosing the right time of year to get chickens is something to consider to ensure that you have a frequent supply of eggs for as long as possible.
Chickens will stop laying when they are around six years old, with egg production becoming more infrequent as your hen gets older. Bringing hens home during spring when your chickens are at the very beginning of their laying lives will give you at least three years of dependable egg production. To give your hens a helping hand with their egg supply, you should supplement their diet with plenty of calcium to strengthen the quality of their eggs. An egg shell improver is a perfect way to get this essential mineral in for your flock.
Spring means happy, healthy chickens
Now, this isn’t to say that your chickens will be unhappy should you get them during any other season that isn’t spring- far from it in fact. If you prepare accordingly for more extreme weather that other seasons bring, your flock can flourish any time of the year.
However, spring makes raising chickens that little bit easier. The season follows on from a cold winter when your flock would have had less grass to peck at and have spent more time cooped up as opposed to out in their runs or running free-range. Furthermore, the wintertime means that just like us, some chickens with a weak constitution can be more vulnerable to illness, whilst in summer your flock needs that extra bit of help to stay cool. The spring climate on the other hand is just right! This being said, there are also some other advantages to getting chickens during winter, autumn, and summer, which we’ll discuss later in the blog.
Red mite control
Something to be aware of as a prospective chicken keeper when getting hens in spring is red mite. Red mites can be a problem in chicken coops but fortunately, their numbers drop drastically in the winter. Early spring, therefore, is a good time to spray your chicken coop and run against these tiny blood-sucking creatures before the warmer weather causes a population boom.
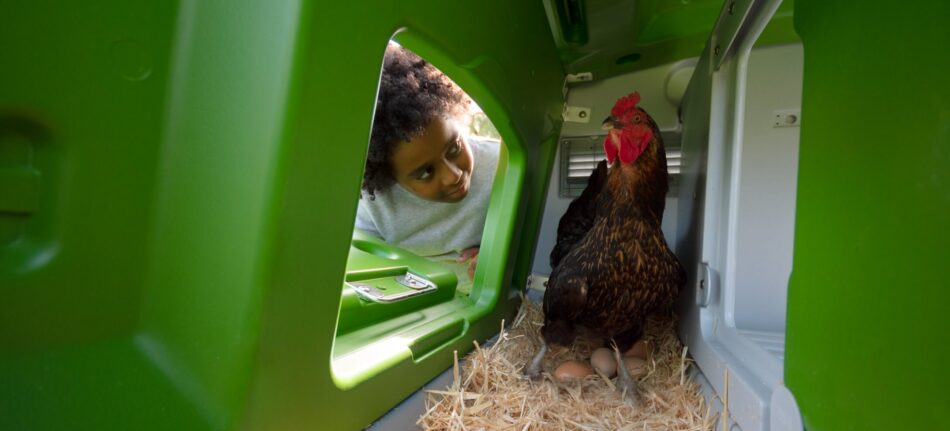
Red mites love traditional wooden coops, with plenty of nooks and crannies for them to get into. Should you run into a problem with red mites in your coop, a suitable mite spray should do the job. However, an even better year-round preventative action is to give your spring chickens a coop that is practically mite-free. Keeping chickens in a state-of-the-art plastic chicken coop such as the Eglu Cube gives these pests nowhere to hide. Since the Omlet Eglu chicken coops can easily be washed in a few simple steps, red mites don’t stand a chance!
While you’re zapping the red mites, spring is also the best time of year to treat hens for parasitic worms. You should also continue to give them their regular chicken general health check during this season. Again, there are relatively few of these parasites in the environment at the end of winter, so treating the chickens now is a great preventative measure.
Hatching chicks in spring
Now we’ve established that spring is the perfect time of year to get point of lay hens, can the same be said about buying baby chicks, or even hatching them yourself? Deciding whether you should get/hatch baby chicks over choosing a slightly older point of lay pullet is dependent on what your priorities are as a chicken keeper.
As we discovered, should you opt to get a point of lay hen over this season, then they’ll of course be ready to start laying during the spring and summer when we have the most daylight. This is something to bear in mind as if you hatch/buy a baby chick in spring, you could be waiting six months before they’ll produce their first egg. For example, if you hatch an egg in April, it might not be until October when they begin egg laying, and with fewer daylight hours, chickens produce fewer eggs.
This being said, spring is still a very popular time to get baby chicks for many chicken keepers. Other than how utterly adorable they are, raising chicks is also an incredibly rewarding process, watching them grow up from the very beginning. More specifically why spring is a great time to raise chicks is because you have the advantage of warmer, but not too hot, weather. When your chicks have reached four to five weeks, they can be moved permanently to their outdoor chicken run, so your young chicks can enjoy plenty of time having fun in the sunshine that winter chicks would miss out on until they’re older.
If you decide that you would like to hatch chicks, Omlet has a wide range of supplies and guides to help you along your journey. Have a read of our step-by-step guide to hatching chicks blog for some tips on where to begin.
Expanding your flock with new breeds in spring
If you’ve been chicken-keeping for a while now and considering introducing a few new birds to your flock, then spring is the ideal season to expand. Should you expand your flock with purebred chickens, they will generally only lay between spring and autumn, making this season the perfect time to maximise egg laying for the year ahead.
Whilst general advice says to keep your flock the same breed, this doesn’t necessarily have to be the case. A range of chicken breeds can live in harmony, what’s more important is that they are of a similar age and size. Furthermore, having an understanding of the personalities of your existing flock and the traits of the breeds you plan on introducing is something else to consider, to ensure they don’t clash.
Summer chickens
If you’re rehousing barn hens as opposed to point of lay chickens, summer is a great time to do so. Whilst rehomed barn hens will enjoy all that spring has to offer, they also enjoy a bit more sun where they can live happily as newly-liberated chickens! Ex-barn hens (and ex-battery hens too, in parts of the world where batteries are still allowed) make great pets. In spite of having been ‘retired’ by their former owners, they will have up to two years of good laying left.
Another advantage of getting chickens in summer is that if you let your hens free range in the garden during this time, they will pick off pests such as slugs and flies. However, just be mindful that as chickens are very partial to tender young plants, you may want to protect young shoots and flower beds.
If you do opt to get any chicken, be it rehomed hens or baby chicks, during this time of year, you need to be sure to keep them protected from any extreme temperatures. The hot weather, therefore, is one potential drawback of getting chickens in summer as opposed to in the spring. If you live in an area that experiences particularly hot summers, make sure your birds have plenty of shade and a well-ventilated coop. Fortunately, the Omlet Eglu chicken coops are perfect for keeping your flock cool and with an Eglu coop weather protection shield, you’ll be able to provide a shaded environment for your chickens all day long. Take a look at our guide to keeping happy, healthy hens in summer for a bit more guidance on keeping chickens over this season.
Autumn and winter chickens
Autumn is another great season for chickens and chicken keepers. There are lots of juicy bugs to scratch for in the still-soft ground and leaf litter, and if you have any fruit trees, there are rich pickings for the birds in the shape of windfalls.
Hens often moult in the autumn, so they need a good diet to help them stay healthy and grow new feathers. Extra chicken vitamins and minerals will support them, and a little apple cider vinegar in their water will aid in ensuring they maintain a healthy, glossy new plumage.
Most chickens don’t mind the colder temperatures of winter at all. However, they do prefer not to get wet, so it’s a good idea to provide a bit of extra protection with a cover for the coop. Unless you live in a particularly cold climate, your chickens will rarely get too chilly. They are hardy birds (with the exception of some of the more delicate, decorative breeds), and will adapt to the climate. Nonetheless, it’s always a good idea to assist them wherever you can. The Omlet Eglu extreme temperature protection range is great for harsher winters, offering that extra level of insulation for your flock. An insulated chicken coop such as the Eglu Cube will also go a long way towards ensuring your birds’ health and happiness in the winter months.
Something else to note over this season is that your run will get a bit muddy! A top tip to prevent this as much as you can is to cover the ground with bark chippings.
Omlet and your flock
Spring is an ideal time to introduce new hens to your garden but with Omlet products, we can support your chicken-keeping journey at any point of the year. With the right care and equipment like our innovative chicken coops, chicken runs and coop weather protection, your flock can thrive in any season!

This entry was posted in Chickens on March 31st, 2021 by alisa.deluca
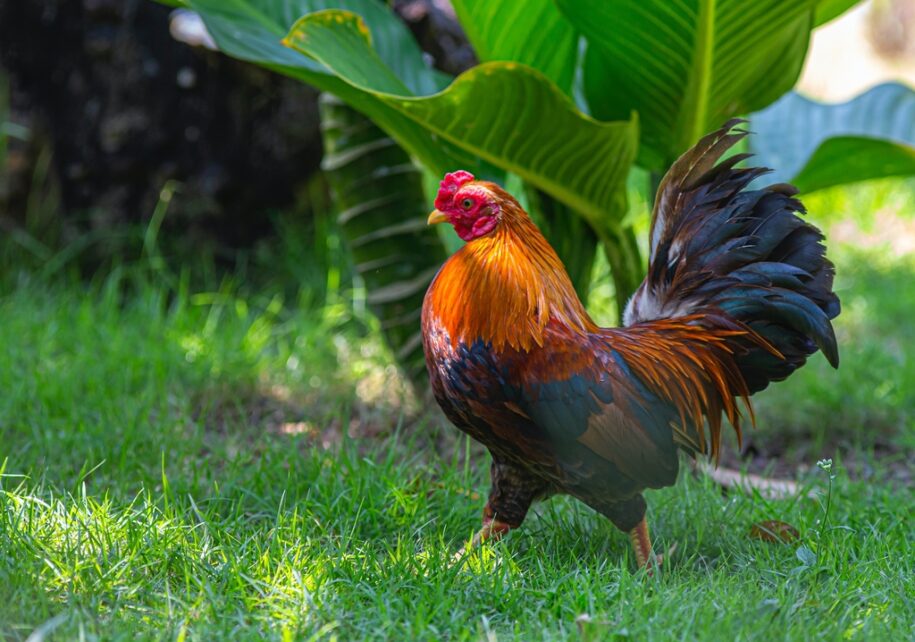
Photo Photo by Erik Karits from Pexels
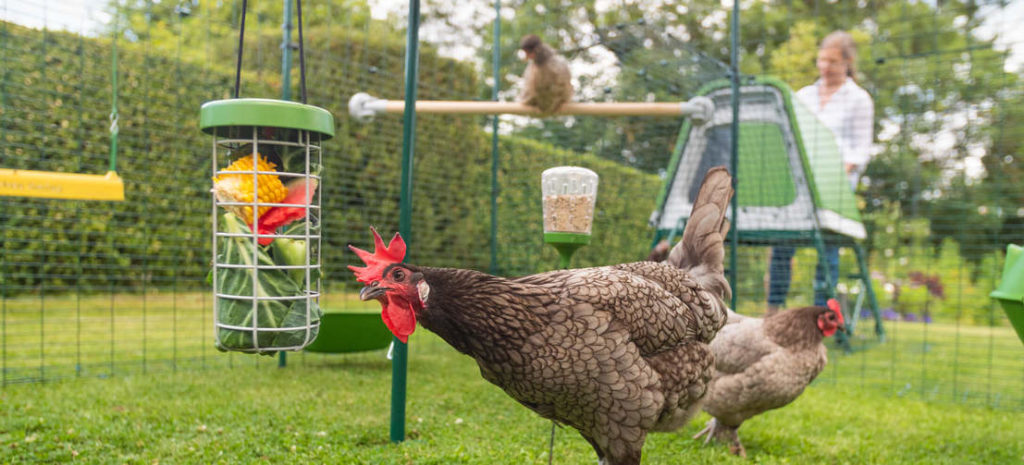
Chickens and green eco-living go hand in hand. Hens are a great part of the ecosystem of a healthy garden, and they also ‘recycle’ a lot of food that would otherwise be thrown away.
Converting scraps into eggs is a powerful symbol of eco-friendly living. Keeping your own hens is also a significant step in the direction of a ‘green’ lifestyle. No intensive rearing, crowded barns or other ethical issues involved!
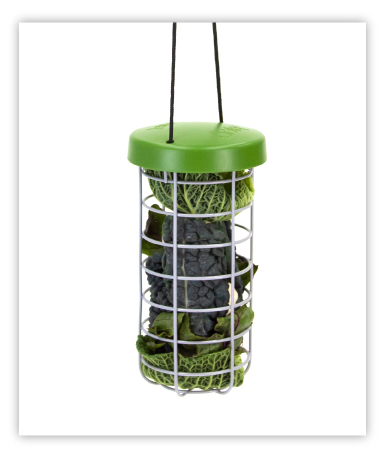
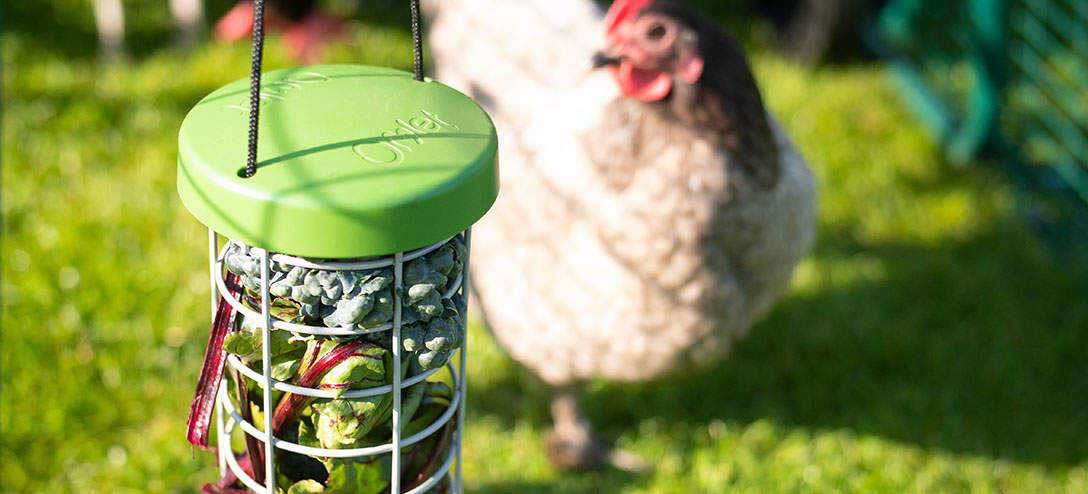
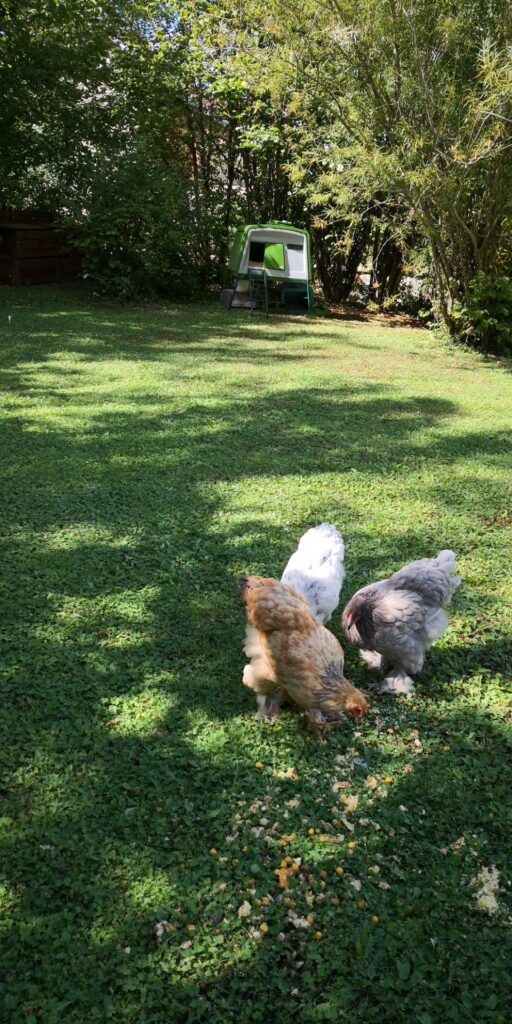
Kitchen scraps can be a healthy supplement to your hens’ pellet-based diet. Chickens are omnivorous and will eat most of the things you offer them, including cooked pasta, wholemeal bread (soaked in water to avoid it swelling in the bird’s crop), green vegetables, cereals, cooked meat (nothing cured or salted), banana, sunflower seeds, alfalfa, pumpkin, courgette, butternut squash, sweet potatoes and cucumbers. If you hang a cabbage or broccoli stalks in the chicken run, the hens will have great fun pecking at it.
Treats such as bread, cereals and pasta should only be fed in moderation, as they have little nutritional value and can cause your chickens to pile on the pounds. Dairy products and too much lettuce (especially Iceberg varieties) can cause diarrhoea, so these should also be avoided.
Chickens enjoy many garden plants, including nettles and dandelions. There are several toxic wild foods, though, and this is a hazard when feeding wild-sourced foods. A good starting place is the Plants and Foods that are Poisonous for Chickens page in Omlet’s online chicken guide.
Foods that should never be given to chickens
 Potatoes, tomatoes, and aubergines (eggplant) are in the Nightshade family, and they are toxic for chickens. That applies to all raw forms of these foods. The toxic ingredient, solanine, is broken down when the plants are cooked, and so cooked potatoes or tomatoes will not cause problems.
The other everyday foods that you should never feed to chickens are apple seeds, avocados, chocolate and other confectionary, salty foods such as bacon, cheese and crisps, dried raw beans and pulses, and raw garlic, onions and leeks.
Citrus fruits are mildly toxic, and although they will not kill your chickens, if fed in excess they will cause diarrhoea and a drop in egg production.
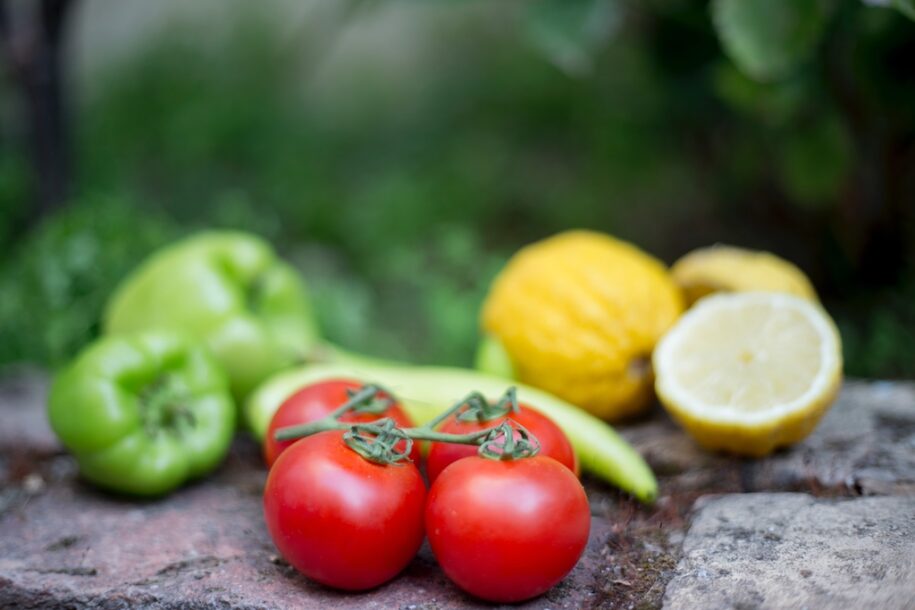
Photo by Tetiana Bykovets on Unsplash
It also needs emphasising that all kitchen scraps offered to chickens should be fresh. Any mouldy food should be thrown away and not fed to chickens, other pets or wild birds.
Overripe and wilted vegetables or stale bread are all fine as long as there is no mould present.
You should only feed wild plants to chickens if you know they are safe. First, you need to identify the plant. If you are in any doubt, don’t give the plant to your chickens.
Photo by Ayda Oz on Unsplash
…And don’t forget the chicken manure
The food waste fed to chickens isn’t all transformed into eggs, of course. Some of it is ejected as chicken poo, and this is an excellent fertiliser once it has been rotted down. Chickens droppings should never be applied fresh to vegetable or flower beds, but should be added to the compost heap along with the soiled bedding from the coop.
In intensive hen farms, waste is a big problem, as run-off from accumulated chicken droppings can pollute rivers. On the small scale of backyard hens, though, composted chicken poo is a great benefit to the garden.
How chickens help you stop wasting food
When you feed kitchen scraps to chickens, you suddenly become aware of what you and your family are wasting. Those scraps are all things that were being routinely thrown away before you invested in a chicken coop and a few hens.
This may make you reassess your buying and cooking habits, and it puts the notion of food waste into a new perspective. As a result, you may stop cooking more than you need, and you may stop bulk-buying and keeping veg in the fridge until it rots. If finances are tight, these details can make a big difference to the family budget.
To begin with, you may have enjoyed taking all those leftovers out to the hens, but once you start to question the cost of it all, it gets you thinking. How much are you effectively ‘spending’ on kitchen waste for your chickens? After all, the hens can get all the nourishment they need from a diet of layers pellets, grain, grit and lots of dandelion leaves. They don’t actually need those kitchen scraps.
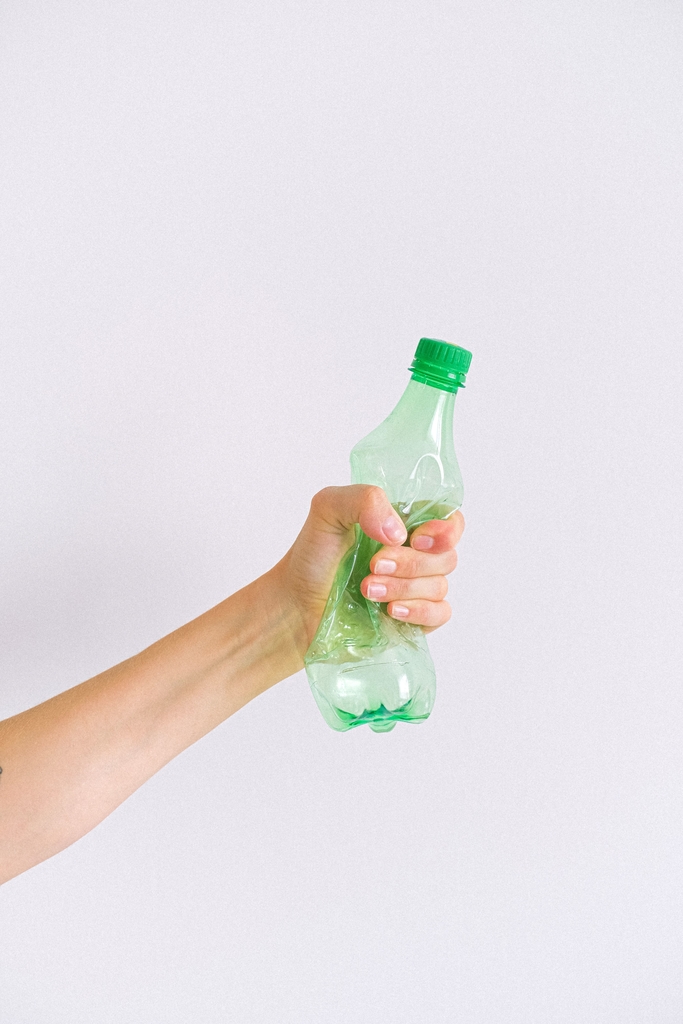
Once you’ve found a balance here that suits your lifestyle, it can lead to other positive changes in your attitude to waste and sustainability in general. Your chickens can teach you, in a roundabout way, to reduce food waste, and that poses the question – what other waste could you reduce? The list here is endless, but it begins with single-use plastics and other environmentally unfriendly products and packaging. We’ve moved a long way from the throwaway culture of previous decades, but there’s still a long way to go.
Photo by Anna Shvets from Pexels
How local communities use chickens for anti-waste campaigns
Some communities have taken this thinking to its logical conclusion, reducing personal waste on the one hand and, on the other, making sure nothing is wasted. Chickens are the beneficiaries here. Any appropriate waste food – from households, restaurants or shops – is collected and fed to the communal flock. The hens convert the waste into eggs, which are enjoyed by everyone involved in the community scheme. There is very little extra expenditure involved, so people are, in effect, getting their eggs for free.
To give a large-scale example of this, in Austin, Texas, a local authority pioneered a zero-waste food programme a few years ago, paying people in the area to keep backyard chickens. The hens were fed solely on waste food, of sufficient variety and high quality to satisfy the birds’ nutritional requirements. The goal was to reduce the amount of food entering landfills. In redirecting it to backyard chickens instead, there has been a substantial reduction in landfill-derived methane emissions.
Some schools in the UK, the USA and elsewhere have taken up this anti-waste challenge too, channelling the community’s waste food to their chickens. It’s certainly food for thought!
The thought of household waste being converted into fresh eggs is a very pleasing one. Taking that concept to the community level is an exciting idea, and it’s possible that such schemes are about to become commonplace.
This entry was posted in Chickens on March 30th, 2021 by juliakretzner

This article is a part of our Pride of Omlet series, a collection of amazing stories which shine the spotlight on extraordinary pets and share their selflessness, bravery, talent and compassion with the world.
-Written by Anneliese Paul
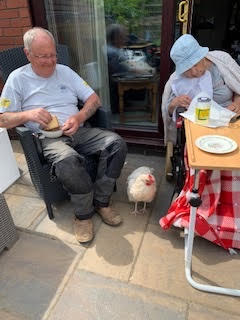
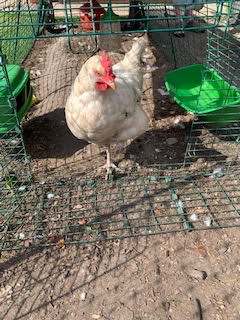
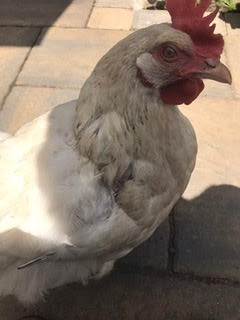
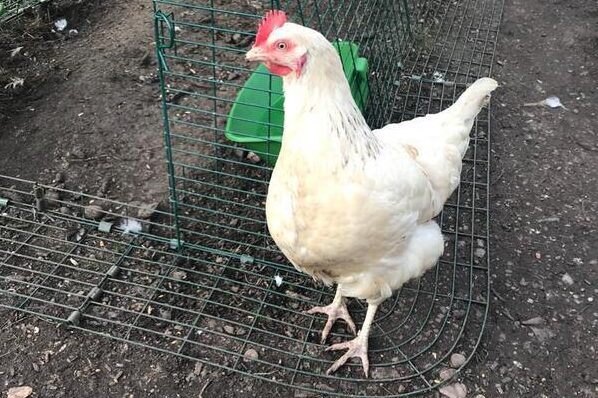
Martha’s humans Nicola and Ben bought chickens to bring joy to Julia, their mother who they cared for at home. The family could never have imagined that a chicken would become a caring companion to Julia in the advanced stages of dementia.
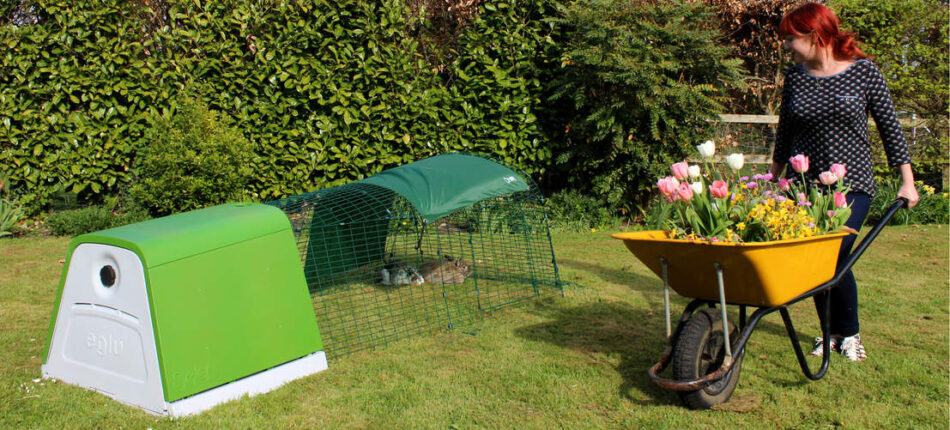
Julia used to have chickens as a child. She fondly told Nicola stories about dressing up the chickens and wheeling them around the garden, like babies in her toy pram. But it wasn’t until her 90th birthday that Julia owned chickens again. It was a dream come true.
Nicola and Ben always thought they didn’t have enough space in their bungalow garden, but whilst visiting relatives in Ireland, Ben saw an Omlet ad and brought it home to show Nicola. “That’s just what we need,” she said. Their Eglu arrived soon after, and then their two hybrid chickens moved in. Julia named them Martha and Mary.
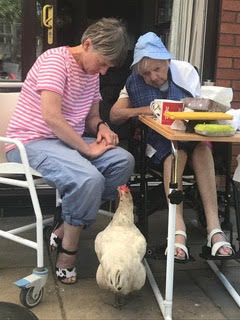
Whilst Mary was always shy and kept her distance. From day one Martha ran to Julia, Nicola’s mum. “She was mums best friend from the beginning,” says Nicola.
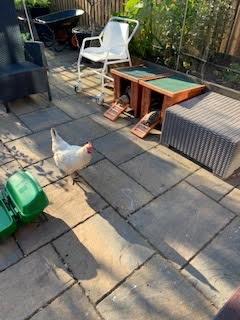
Unfortunately, Mary died and then there was a near miss for Martha. Like most people, the family like to let their hens roam free in the garden for a bit, but one day a fox came into the garden and attacked Martha. Nicola and Ben heard her squawking and went to the window. The fox saw them and ran, leaving poor Martha very shaken and suffering from a broken wing. But Matha was brave, and luckily the wing has completely healed. Now Ben and Nicola have extended the run so the chickens only come out when they’re in the garden.
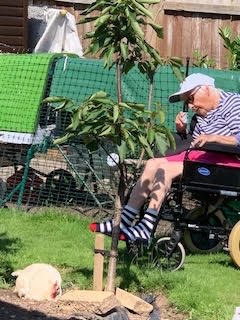
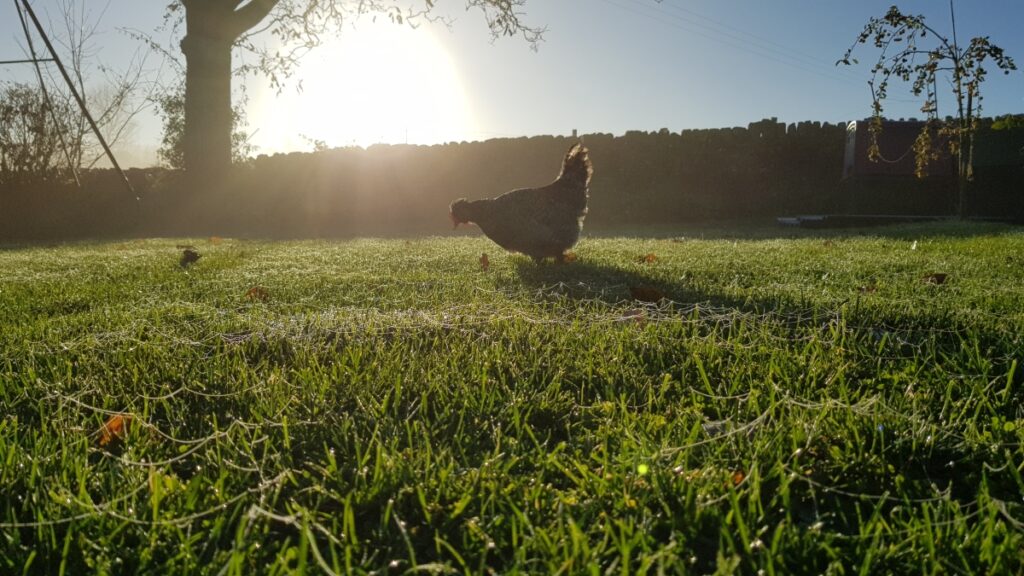
When it was sunny, Julia liked to sit outside in the sun watching Martha. Julia had to use a wheelchair, and Martha would jump (in a very ladylike way) onto the footrest to warm her feet. Last summer when Julia could no longer speak in sentences, she’d make gentle noises and Martha would answer back. She’d sit for hours by the wheelchair with Julia, having quiet conversations.
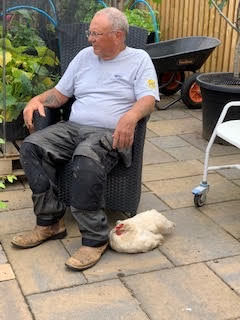
Nicola couldn’t deny Martha had a human quality. She didn’t just come for crumbs because she was there when there weren’t any. Martha cared.
“She went from a chicken, running around the garden then in those moments with mum, it was like she knew. It was beautiful.”
Nicola began to trust Martha to squawk loudly if something was wrong. When she went into the house to make a cup of tea, she’d leave Julia in the garden with Martha.
“It was weird,” says Nicola “ Martha would squawk, and I’d go out to find Mum had dropped something, or something had fallen off the table, or Mum was confused because she didn’t remember where I was.”
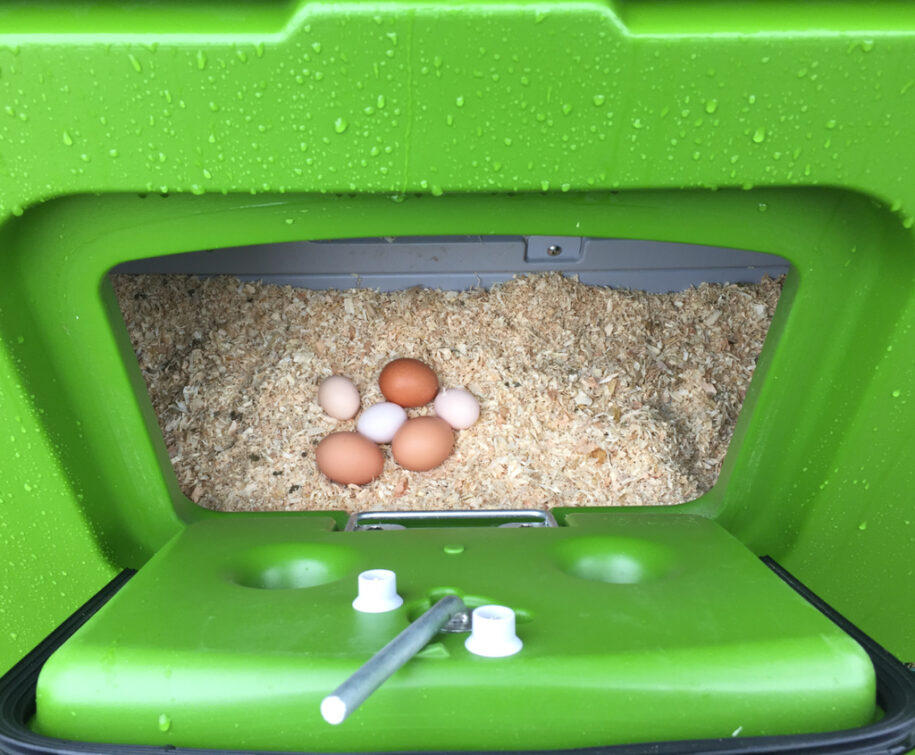
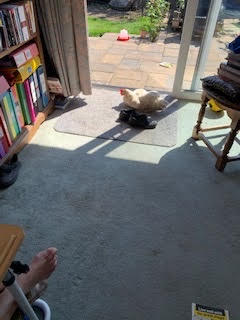
Martha was the thing that made Julia smile every time, and her eggs brought so much joy to Julia in the advanced stages of dementia. Boiled was her favourite, and Martha would let them all know when it was ready to be collected. When Martha lays an egg, she stands at the edge of the run and squawks and squawks as if to say, “Come and get my egg!”
Julia loved holding Martha’s warm eggs. Once, when Julia was having a lie-in, Nicola took her the freshly laid egg. She’d just woken up, and a big smile spread across her face, then she fell asleep again holding it. A couple of hours later, Nicola went to wake her up. Julia sat up. All of a sudden, the egg rolled out from behind her as if she’d laid it on the bed. Incredibly it was completely intact. “Are you laying eggs now?” asked Nicola. Julia understood, and that made them all laugh. It was the happiest occasion, just an egg rolling along the sheet. Julia kept the egg in her hand for the rest of the day. Moments like that are precious memories to Nicola and Ben.
Sadly, Julia died in September. When Julia was alive, it was Mum and Martha, Nicola says. She never thought she’d take to chickens. But having seen how Martha cared, chickens have become constant companions.
“ I think we’ll probably always have chickens because they get under your skin. Well, no, that’s a bad expression. They become part of you. They’re like a little family.”
This entry was posted in Chickens on March 30th, 2021 by alisa.deluca
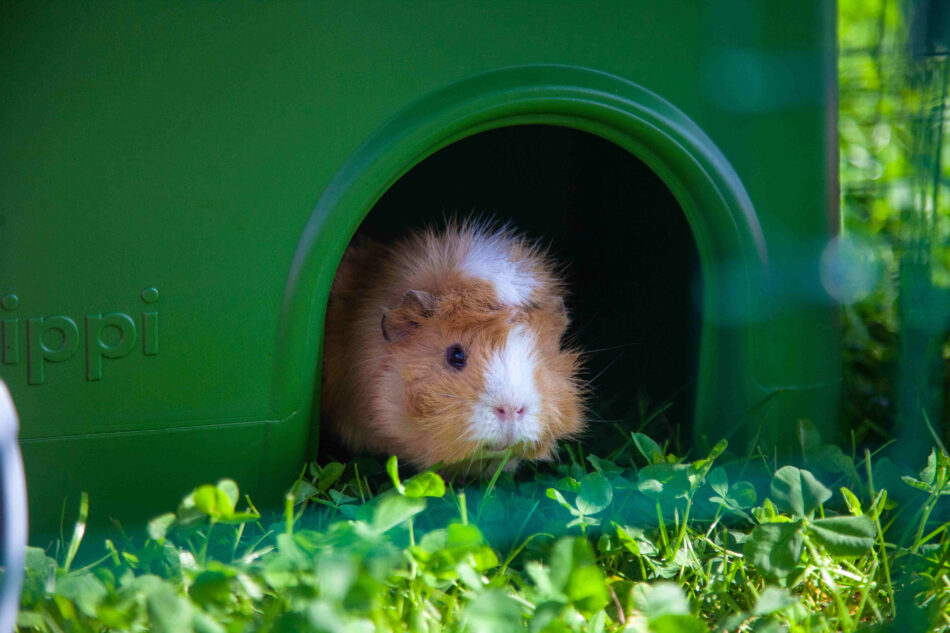
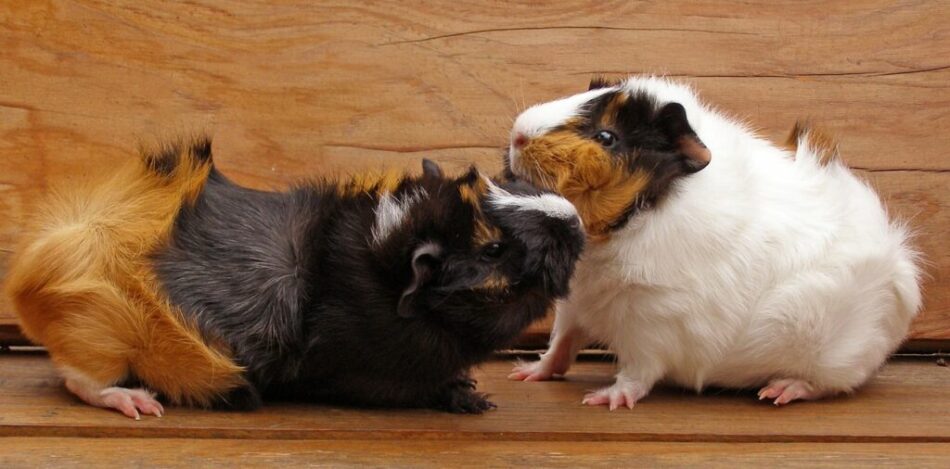
Guinea pigs are very popular small pets! Not only are they adorable and cuddly, but are great with children, making them a top pick.
But, it can be initially tricky to get to grips with the behaviours of cavies. However, by using sounds and postures, guinea pigs can say a lot. Though you may not understand all their body language and the noises they make, you can learn to understand what have clear meanings.
Positive sounds – how do you know your guinea pig feels comfortable?
Chutting: AKA “I’m having fun!”. Sometimes referred to as a “clucking” sound, like a mother hen would make, this is a sound of guinea pig contentment. Your cavy may make this sound towards you when you’re interacting with them, or towards their house mates, when enjoying the moment. They may also make this sound when they’re curious and exploring their surroundings.
Cooing: This sound communicates reassurance. It’s a sign of affection that cavies do for humans they love and for their young.
Purring: Guinea Pigs who feel contented and comfortable while being petted or cuddled, will make a deep purring sound, accompanied by a relaxed, calm posture.
Snoring: Yes, you’ve heard right. Guinea pigs can snore as well. If your buddy is relaxing on your lap and snores, it means he feels comfortable. Please note that if your guinea pig begins to make similar sounds to snoring or wheezing/clicking when breathing, be sure to check for any symptoms of illness with your vet.
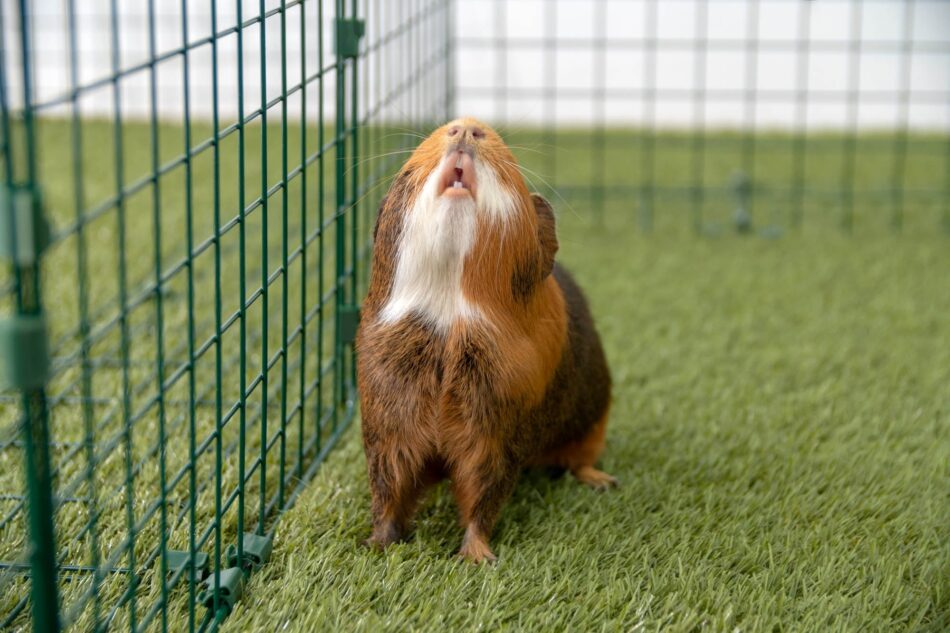
Wheeking: AKA “Feed me!”. This is a distinctive and common vocalisation made by guinea pigs and it’s most often used to communicate excitement or anticipation of getting some tasty treats when their owner opens the treat box. It sounds like a long and loud squeal or whistle.
Whistling: Guinea Pigs may sometimes whistle without intending to because they are very excited about something.
Negative sounds – how do you know your guinea pig feels uncomfortable?
(Teeth) Chattering: AKA “Stop that!”. This is an aggressive vocalisation and shows an agitated or angry guinea pig which is ready to attack. As the name implies, teeth chattering is often accompanied by the guinea pig showing its teeth, which looks like a yawn.
Purring: If the purr is higher pitched, it’s often an indicator of annoyance and sometimes sounds like a piercing vibration. A short purr may indicate fear or uncertainty and you will notice your guinea pig remain motionless. In both circumstances, it is best to reassure your guinea pig softly.
Hissing: Like chattering, this is a sign of a guinea pig who’s angry or aggressive. It’s just like the hissing noise that a cat makes.
Shrieking: A piercing, high-pitched squeak called a shriek is a fairly unambiguous call of alarm in terms of fear or pain a guinea pig feels. If you hear this sound, check on your guinea pig to make sure everything is alright and it’s not hurt.
Squealing: You will hear this sound if your furry friends are feeling unhappy or distressed. Usually this sound comes when they’re bullied or bitten by other guinea pigs.
Whining: AKA “I don’t like this.” A whining or moaning type of squeak can communicate annoyance or dislike for something you or another guinea pig is doing.
Chirping: Just like a bird, chirping is perhaps the least understood or heard noise that guinea pigs make. This sound is made when cavies are taken away from their family. A chirping guinea pig may also appear to be in a trancelike state.
Body Language – what are positive postures?
Popcorning: This gesture consists of hopping straight up in the air, sometimes repeatedly, just like popcorn does while it is popping. The usual reason is happiness and excitement. They’re simply having a good time, they become excited, and pop – they are literally jumping for joy! Not all guinea pigs entertain their owners with “popcorning”, but most do. For more information on this, please refer to our previous blog Why Do Guinea Pigs Popcorn?.
Licking: This is a super friendly signal! If your guinea pig is licking you, it is usually a sign of affection, that they’re content and are trying to groom you – it’s possible though that they just like the taste of salt on your skin.
Sprawling out: This is usually a sign that your guinea pig is feeling comfortable and safe with you while relaxing on your lap.
Body language – what are negative postures?
Backing away: If you’re trying to pick up your small friend and they’re backing away from you, this could be a sign that they feels threatened and uncomfortable. Please back away and give your pet some space. It’s important not to forget that guinea pigs are prey animals, so their instinct is to run away if they feel threatened.
Fidgeting or biting while being held: This can often be a sign that your guinea pig just needs to go to the bathroom. On the other side, it can also indicate that your guinea pig feels uncomfortable, stressed or even scared – or is just tired of being held. Either way, try returning your guinea pig to its cage for a bit.
Freezing: If a guinea pig is startled or uncertain about something in its environment, it will stand motionless. Reassurance will release them from their nervous freeze.
Strutting: Moving side to side on stiff legs can be seen as an act of dominance or aggression, often accompanied by teeth chattering.
Tossing head in the air: A guinea pig will toss its head back when it’s getting annoyed being petted as a way of asking you to stop.
Standing on two legs: If your cavy stands on two legs and bares its teeth, it could be a sign that a fight is about to happen among him and his mate(s). To prevent injuries, it may be necessary to intervene here. It is recommended and important to try and prevent this behaviour if you’re introducing other guinea pigs for the first time.
What are neutral sounds & postures?
Mounting: This can be either sexual behaviour (males to females) or behaviour used to show dominance within the guinea pig herd’s social structure, especially between females.
Scent marking: Guinea pigs will rub their chins, cheeks, and hind ends on items they wish to mark as theirs. They may also urinate on things or other mates to show their dominance.
Sniffing: Sniffing is a way to check out what is going on around them and to get to know others. Guinea pigs particularly like to sniff each other around the nose, chin, ears, and back end. Sniffing is a way guinea pig’s explore.
Raising heads: This is usually a sign of dominance when they raise or stretch their heads with their cage mates.
Rumbling: A guinea pig rumble or rumble strutting is deeper than a purring noise. A male guinea pig makes this sound while trying to mate with a female, it is part of their mating ritual and often accompanied with a typical “mating dance”.
Running away from being picked up: Guinea pigs tend to be timid, especially at first. If they’re running away from you it’s not a rejection intrinsically but rather a natural defence mechanism. Just give them a bit of time and patience and they’ll be happy being picked up for cuddles and playtime outside of the cage from time to time.
Yawning: Like raising heads, your guinea pigs could be showing dominance when exposing their teeth to others.
Be sure to take a careful note of your furry friend‘s behaviours and after a while, you‘ll have a better understanding of it. Remember it may take a while for your furball to get used to being handled. Your guinea pig may interact with you differently than the way it does with their mates.
To provide your cavy a happy and healthy life and in order to prevent stress or depression, socialising and playtime are important parts of a guinea pig’s life. If you want to know how to teach your furball some nice tricks, check out our previous blog How to Teach Your Guinea Pigs and Rabbits Tricks.
This entry was posted in Guinea Pigs on March 28th, 2021 by alisa.deluca
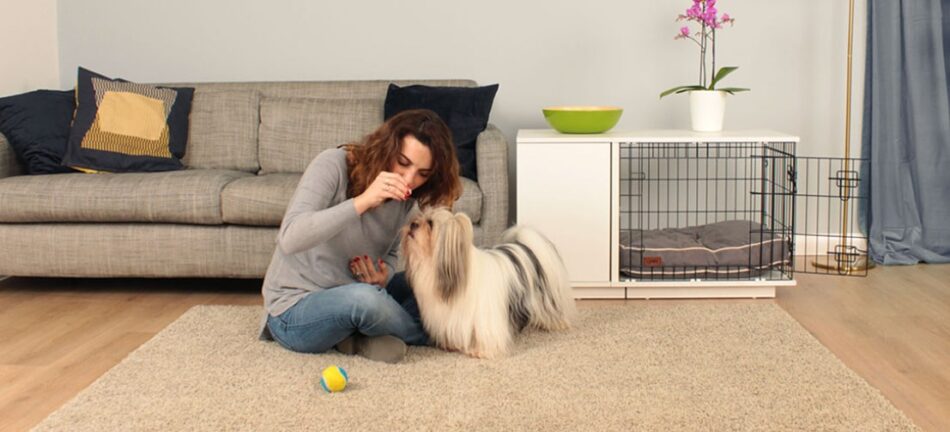
Teaching your dog tricks is not that difficult. Your pet is very intelligent and in fact, training a dog is much easier than training other animals! We know that sometimes it’s hard to find inspiration and ideas, so we’ve put together a list of 5 must-do tricks to teach your dog!
Dogs are very attentive to their environment, they are able to learn several commands and quickly assimilate what you tell them. However, you will need to be patient and rely on rewards and encouragement to get results. Never spend more than 10 minutes on an exercise per day and make sure you are in a good mood to praise your dog. Frustration must be put aside or your dog will feel it and may perform less well.
Do you know that the tricks and exercises taught to your dog will stimulate him physically and mentally? They also allow you to enrich the bonds that unite you.
This list is far from exhaustive and we assume that your dog already knows “sit”, “down” and “stay”.

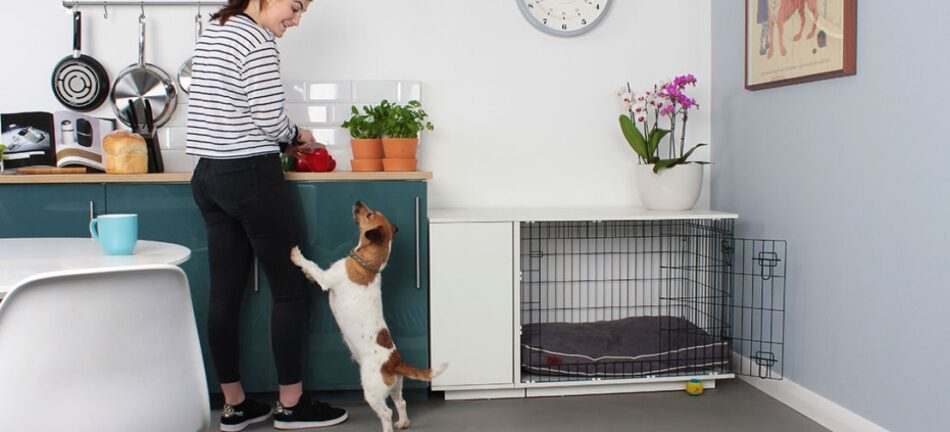
1- Pawing or shaking hands
As you may have noticed, dogs sometimes instantly raise their paws when they ask for food. So this trick is not fundamentally complicated to teach your dog. You just have to find the right word, the right signal to give your dog to obey.
Omlet’s tip: Keep the treat in your hand, show the treat to your dog and tell him to wait. Slowly lower your hand and when your dog lifts his paw, make the sound you want to associate with the command. “Shake”/”Paw” is an easy sound for your pet to remember, so use short words. Add emphasis to the word and enthusiasm. Once the dog has the treat in his mouth, congratulate him with a pat.
Gradually, you won’t need to lower your hand too much. Each time you repeat this command, make sure you raise your hand a little higher so that your dog’s paw is raised to chest level. Repeat with the same paw.
Once your dog has mastered this command, you can train him to lift the second paw. However, the sound/word should be different from the previous one. Use the word “other” for example.
Afterwards, you can easily teach him the “high five” command. You will have to show him your palm and encourage your dog to go even higher with his paw. Once your dog does this, reward him.
2- Rolling over
This is a trick that many owners want to teach their dog, but many don’t know how.
Omlet’s tip: First, you get your dog to “lie down”. Place a treat in your hand and let your dog smell the treat without giving it to him. The goal during this exercise is that your dog should not get up. If it does, don’t get upset and try again.
Use your hand to guide your dog. You must make the movement and the trajectory that you want your pet to follow. Use your hand to turn your dog’s head and make a backward movement. As your dog tries to turn his head to grab the treat, he will end up rolling. Repeat the exercise several times, but don’t spend more than 15 minutes doing it. You can come back to the exercise later in the day.
3- Speak
This command can be easy to learn for expressive dogs but a little more complicated for calm dogs.
Omlet’s tip: Excite your dog a little with your voice. Ask him to sit and put a treat in your hand. Wave your hand but don’t give him the treat. Repeat the word/command you want him to learn several times, perhaps “bark” or “speak”. Wait for him to bark or whine. After a few seconds give him the treat and praise him. If you want your dog to calm down, repeat the word “quiet” or “enough” and walk away.
Never encourage or praise your dog when he barks out the window or at people. Barking can be frightening to some people.
4- Dance
Good news, your dog can also learn to dance! Maybe he can even dance better than you…
However, this trick is easier to learn for small dogs. Larger dogs have a harder time standing on their two hind legs. This trick is also not recommended for dogs with back problems.
Omlet’s Tip: Ask your dog to sit. Put a treat in your hand and put your hand over your dog’s muzzle slightly backwards. Your goal is to get your dog to sit on his hind two legs, and he will only do so if he sees no other way to get his treat. Once both front legs are up, praise and encourage your dog. Repeat this trick several times until he can quickly stand on both paws.
Once he does, you can move on to the next step. When your dog is on his two feet, hold the treat and move your hand in a small circle over his head. After a few seconds your dog should be able to twirl or at least move both paws on the ground. As you do the movement, remember to say the word you want to associate with the command. In this case that word could be “dance”. Once your dog has taken several small steps, give him the treat and praise him.
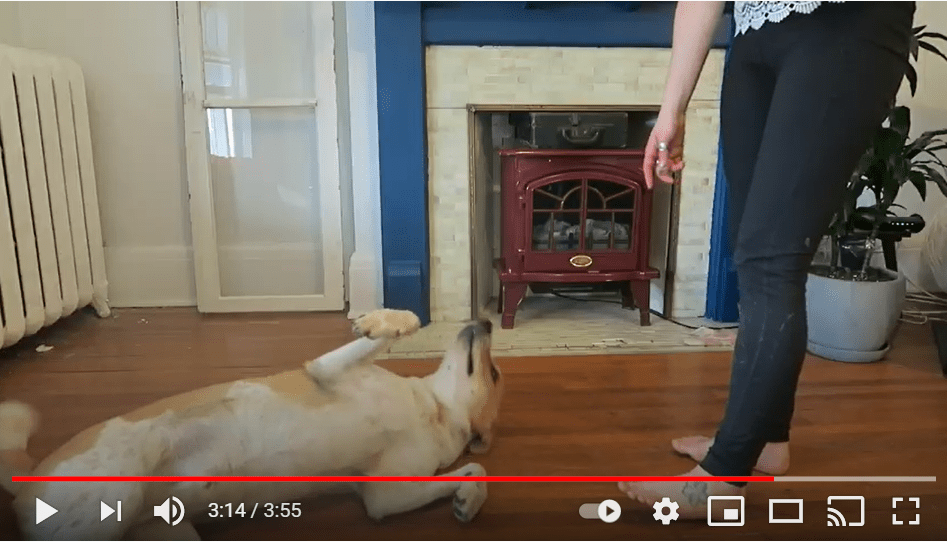
5- Playing dead
This is a challenging trick! It’s a great way to impress those around you, although it is not so easy to teach your dog, especially if he tends to be dynamic. However, nothing is impossible, you will just need more patience.
Omlet’s tip: As with the “roll over” command, have your pet lie down. Take a treat in your hand and put it over his head. Once your dog turns around, stop the process by asking your dog to stop moving. Repeat this process several times until your dog understands that it should not move. It is very important to say the word you want to associate with the command. For this trick it could be “Bang”.
This trick is not easy to describe, a video is sometimes worth a thousand words. We advise you to watch this video to teach your dog to play dead.
No matter what tricks you teach your dog, patience is the key and the only way to succeed and achieve your goals. Never forget to congratulate and encourage your pet. Finally, never force him. If he doesn’t want to learn a command or doesn’t understand it, don’t be obstinate. If you are afraid of doing the wrong thing, many resources are available on Youtube. Don’t hesitate to watch several videos to find the best technique for your dog.
Tag us on social media if you manage to do one of these tricks with your dog. We would love to share your pet’s achievements.
Tag us on Instagram omlet.au or send us your video to the following address: blog@omlet.com.au
This entry was posted in Dogs on March 25th, 2021 by juliakretzner

This article is a part of our Pride of Omlet series, a collection of amazing stories which shine the spotlight on extraordinary pets and share their selflessness, bravery, talent and compassion with the world.
-Written by Anneliese Paul
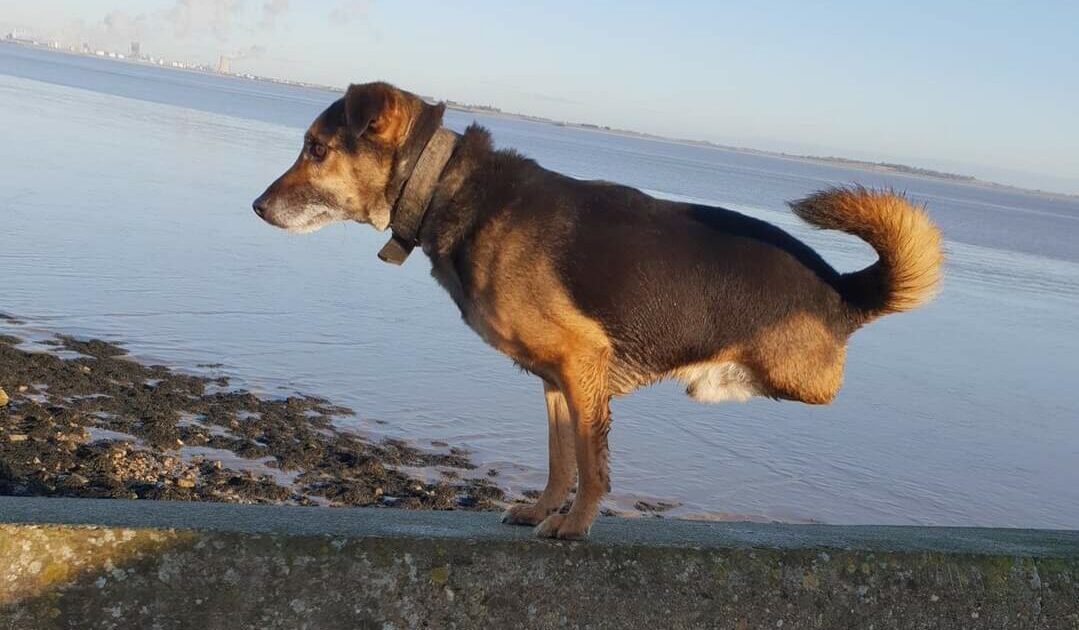
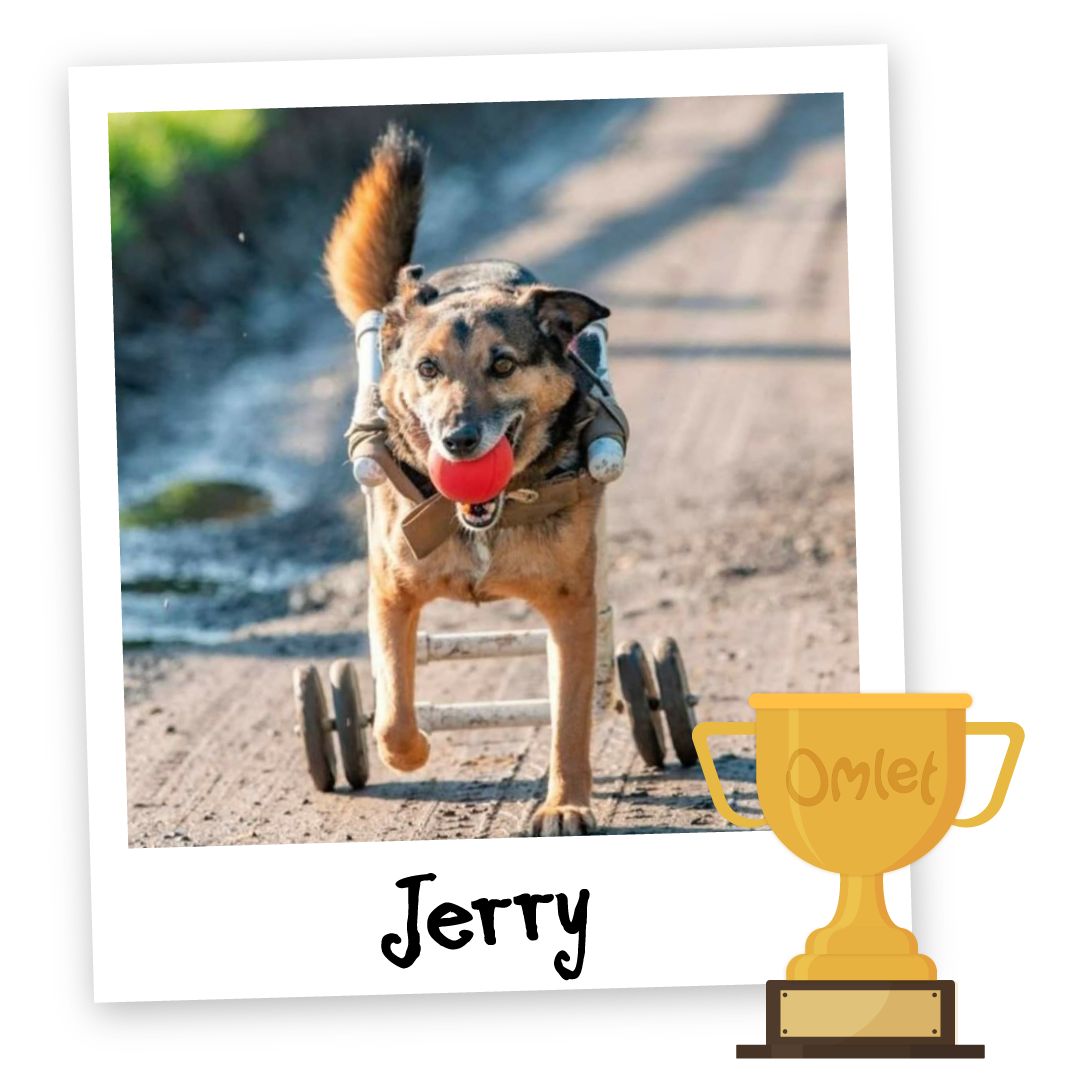
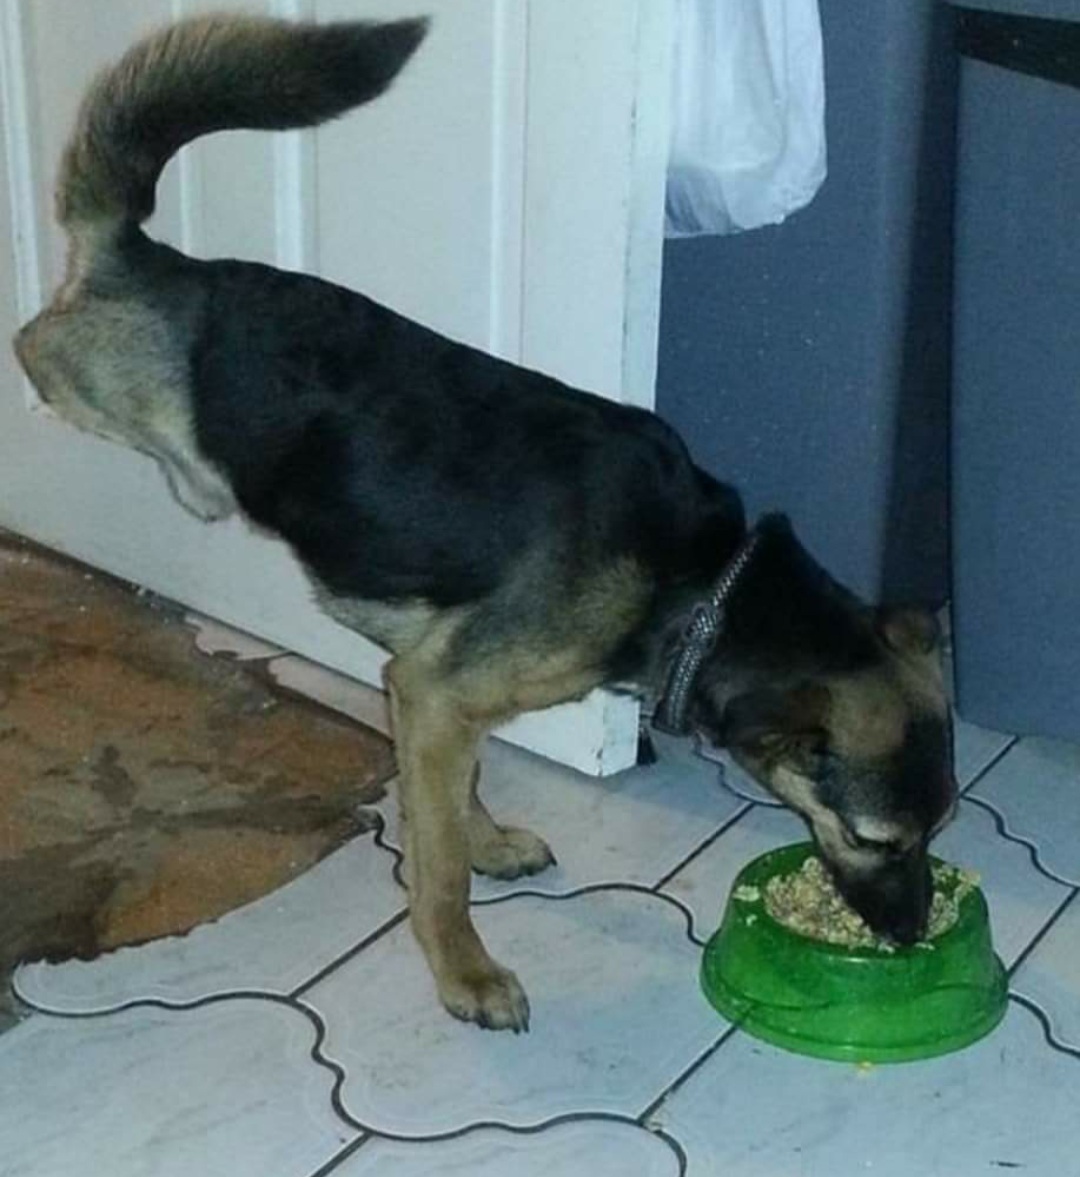
Jerry’s a cheeky, playful and boisterous rescue dog from Romania who can do a handstand! He landed on his feet when Shena gave him a home and inspired her to start a rescue centre specialising in disabled animals.
When you see a dog with two legs, what do you think? Many people would give up on them. On her first visit to the vet, Shena was advised to put Jerry to sleep. But Shena’s couldn’t do that.
Shena had four dogs, worked for the NHS in cancer care and was studying for a degree in Social Care. Then a friend sent her a video of a puppy in Romania, and her heart melted.
Jerry was paralysed, an unwanted street dog who had probably been hit by a car and left for dead. Shena couldn’t get the image out of her head, “What’s one more?” she thought and decided to bring him home.
The first time Shena met him, Jerry jumped out of the car, a bundle of energy. It was love at first sight. He was a playful six-month-old puppy. Shena’s four dogs gladly accepted him, and he slotted into the pack straight away.
Having been through so much already, it was perhaps no surprise that after the operation to remove his hind legs, Jerry bounced back again even after a few falls while he perfected his balance.
Jerry can walk on two legs around the house and garden and manages well, but he wears his wheels on walks. They’re made from plumbing pipes, and at first he was a bit wobbly on them, but with a couple of days of practice, he was charging off. Now on his 3rd set of wheels, Jerry loves chasing balls. Nothing can stop him. Shena thinks he’s probably faster than the other dogs!

Jerry kicked off a following on Shena’s social media, and people started coming to her for advice about disabled animals. Jerry now has two more two-legged dog friends and a special relationship with Flo, another Romanian rescue. In 2013, just a few months after getting Jerry Shena and her husband Ian decided to set up PUDZ officially. PUDZ is an animal sanctuary that specialises in disabled animals.
Until last year Shena and Ian looked after 170 animals, including dogs, cats, rabbits, chinchillas, guinea pigs, chickens, ducks and turkeys from their North Lincolnshire home.
Because of their disabilities, many of the animals Shena and Ian care for wouldn’t be here. With Jerry for inspiration, they’ve recently been able to raise enough money to buy a one-acre plot of land so their excellent work can continue and the animals in their care can lead the happy lives they deserve.
“Jerry changed my life completely. I’ve met so many people. Animals don’t get as much care as people, but we don’t give up on people who are disabled, so why should we give up on animals? Everyone deserves a chance in life.”

This entry was posted in Dogs on March 24th, 2021 by alisa.deluca
Wondering how to teach your guinea pigs and rabbits new tricks? One of the most rewarding experiences you can have with your pets is through teaching them tricks— and it’s a lot easier than you might think. Rabbits and guinea pigs are social animals that benefit from spending time with their owners through learning and playing. Discover how teaching your pets new tricks is a fun way to build their trust and confidence.

How to start training your guinea pigs and rabbits
Training rabbits or guinea pigs is most effective when you can repeat it every day – even if it’s only for five or ten minutes. Not only will your pets appreciate the extra attention, but having a repeated routine will help them remember the tricks you’ve taught them.
To teach your guinea pigs and rabbits tricks, the first thing you’ll need is a quiet space free from distractions. Zippi Rabbit Runs and Playpens are ideal, giving you a secure and familiar space where you and your pets can focus. You will also need some of your rabbits’ and guinea pigs’ favourite treats to encourage them and reinforce their learning.
It can be helpful to separate your pets when training them, but some pets can benefit from learning from each other. For example, if you have an older trained rabbit and a young, untrained one, the young rabbit can learn tricks easier by copying their more experienced friend. And don’t worry about old dogs and new tricks – your pets are never too old to pick up new things.
Rabbit and guinea pig tricks for beginners
When you start to train your guinea pig or rabbit, it’s all about patience and perseverance. Your pet might not seem interested in learning initially, but as you continue to reinforce their learning with treats, you will find them routinely coming back for more. Start with something simple, such as “circling” — a perfect trick for both rabbits and guinea pigs.
Training your rabbit or guinea pig to circle
To teach your pet how to perform a circle, grip a treat tightly between your fingers and hold it close to your pet’s mouth. Then lead your pet around in a circle with the treat, so that it spins in a tight circle. Repeat this until your pet spins around without you leading them, occasionally reinforcing them with the treat. It’s important that you only give them a reinforcement treat when they successfully do the trick. Eventually, the flick of your wrist will be all the encouragement that your pet needs to perform this trick — provided that there’s a treat in store for them after their performance.
Don’t worry if this takes some time to learn – the first trick can be the hardest for your rabbit or guinea pig, but once they have mastered a circle, you’ll both have the confidence to learn even more tricks. If your pet is struggling learning how to circle on command, try encouraging them to turn in the other direction. Like us, our pets are either left or right-footed, so the direction you ask of them needs to be in line with their natural inclination.
How to make rabbits or guinea pigs come when called
Another great first trick is teaching your rabbits or guinea pigs to come when they’re called. Not only is it endearing and impressive, but it’s also practical for your pet to approach you on command.
As with many tricks, the key to teaching your rabbit or guinea pig to come when called is food. Offer a treat when you are close to your pet while saying their name. Eventually, they will come to associate their name with the treat. The next step is to call your pet from farther away, showing them the treat. Repeat their name as they take their reward. After two weeks of this regular exercise of calling and treating, try calling your rabbit or guinea pig’s name without showing them a treat.
Moving on to more advanced tricks
Once you and your guinea pigs or rabbits have mastered a first trick, it’s time to move on to more advanced feats. The more tricks your pet learns, the more confident they will become — and the closer your bond will be.
How to teach rabbits and guinea pigs a ‘figure of eight’
Challenge yourself and your pets by encouraging them to walk in a figure eight between your legs. As with teaching them to circle, hold a treat in front of your rabbit or guinea pig while encouraging them to follow a figure of eight pattern through your legs. Reward them with the treat as soon as the pattern is complete. Some pets may need a treat halfway through their pattern to maintain their focus — but eventually they’ll learn to complete the figure eight before expecting their reward.
How to make rabbits and guinea pigs jump through hoops
To teach your rabbit or guinea pig to jump through a hoop, you’ll need a stick and some treats. Begin this method of stick-training, hold the tip of the stick near your rabbit or guinea pig. When they turn to investigate it, offer them a treat. This will reinforce the idea that the stick is associated with treats.
Once they’re familiar with this routine, hold a hoop close to your rabbit or guinea pig, slightly off the ground. Hold the stick on the opposite side of the hoop, and wait for your pet to hop through to the stick. Offer a treat as soon as they’ve completed the hop. Once your rabbit or guinea pig is hopping through the hoop toward the stick, you can offer the hoop without the stick. Reward them with a treat as soon as they hop through.
You can slowly increase the height of the hoop for rabbits, but keep in mind that guinea pigs will only be able to perform a slight hop. Rabbits can reach impressive heights thanks to their acrobatic prowess, so be sure to offer a challenge to them.
Remember: treats are in moderation
Don’t forget that the treats given to your pets are a part of their diet — and if you’re sticking to your daily training, you may need to incorporate healthier snacks as training-treats to make sure their diet remains balanced. Leafy greens, green beans, carrot tops, or herbs are all great treats that are both healthy and satisfying for your guinea pigs and rabbits.
Omlet and your guinea pigs and rabbits
Help your rabbits and guinea pigs reach their full potential and amaze yourself in the process. With Zippi Tunnels and Zippi Run Platforms, you’ll be able to teach your pets new tricks with ease, and give them the elements they crave in their environment between training sessions. And, with our outdoor rabbit and guinea pig runs, you’ll have the space you need to achieve all of your trick-teaching goals.


This entry was posted in Guinea Pigs on March 19th, 2021 by juliakretzner
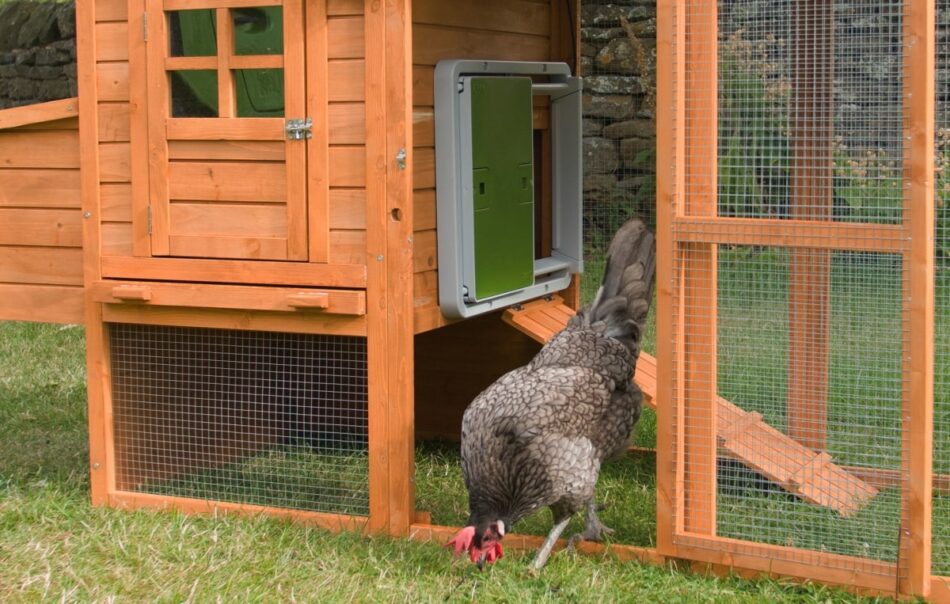
The Omlet Autodoor is a trusted coop companion for thousands of chicken keepers across the world and offers ultimate flexibility and convenience for you and your chickens. Here’s 5 reasons you need the Autodoor for autumn…
1. No more early mornings!
The Omlet Automatic Chicken Coop Door allows you to open your coop door in the morning without even getting out of bed, perfect for a weekend lie in while your chickens want to get out and stretch their wings.
2. Light sensor adapts to the changing season
You can set your Autodoor to open and close at a selected time, or you can use the clever light sensor and set the door to open and close at a certain light percentage, meaning the timings will adapt with the changing season so you don’t have to remember to do it yourself.
3. More play time for your chickens
As daylight time gets shorter and shorter, your chickens will be desperate to make the most of the sun. Now they can step out at dawn, and they won’t have to wait for you to start their day!
4. Improved coop security
The Omlet Autodoor opens horizontally making it far safer than other vertical, guillotine-style automated coop doors which can be easily lifted up by predators.
5. Get 15% off green Autodoors now…
when you sign up to the Omlet newsletter! Get life changing coop flexibility and save $40.49 for a limited time only! Sign up to the Omlet newsletter here to claim your discount code.
Don’t just take our word for it, here’s why our customers think the Autodoor is an essential coop accessory…
Donald – “We chickens have had our automatic door for about a month and we love it. When it gets light the door opens and when it gets dark it closes. We no longer have to wait for our humans to come out late in the morning with some excuse about having overslept. I mean, really people?! There are bugs to be had and things to scratch and explore!” ?????
Becky – “I love this door. No need to rush out when I just want to lay in bed 5 more minutes. They put themselves away at night and I don’t have to worry about something getting them. They are safe and sound. Battery last long, easy to program. Tested the sensor and it worked perfectly. Very happy with this purchase!” ?????
Mary – “OMG. We installed the door a few nights ago and stood outside the coop like it was New Years Eve to watch the door shut. I can’t tell you the freedom this gives us. No more worrying about getting home to shut the coop door, no more getting up at dawn through all sorts of weather. And the door is very secure. No animal can possibly pry it open. I just ordered a second one for my other coop!” ?????
John – “My wife was skeptical when I ordered the Omlet auto door! The fist morning she looked out of the window and saw all of our Girls out of their coop and roaming the pen without having to get out of bed, she said it was LIFE CHANGING!” ?????
15% off Green Autodoors when you sign up to the Omlet newsletter!
Terms and conditions
This promotion is only valid from 17/03/21 – midnight on 21/03/21. Once you have entered your email address on the website you will receive a discount code that can be used at checkout. By entering your email you agree to receive the Omlet Newsletter. You can unsubscribe at any point. This offer is available on the Green Autodoor only. The offer does not apply to the Grey Autodoor. This offer also excludes the power adaptors for Autodoor, Autodoor Replacement Wire and Duracell Batteries. Offer is limited to 2 green Autodoors per household. Subject to availability. Omlet ltd. reserves the right to withdraw the offer at any point. Offer cannot be used on delivery, existing discounts or in conjunction with any other offer.
This entry was posted in Chickens on March 17th, 2021 by chloewelch
 Having some feathered friends in your garden who regularly lay eggs for your enjoyment – that sounds good, doesn’t it? But there are a few things to consider before raising and keeping chickens in your backyard. Whether your garden is suitable for chicken keeping or the actual costs which are involved… In this respect, we’re going to be egg-ucating you today about some advice and guidance!
What does it cost to keep chickens?
The regular running costs include feed, bedding, sand, lime, water and electricity. Depending on the breed and age of your chick and the type and quality of the feed, you should expect about £12 for five chickens/month. If your chickens also find a lot of feed in the run, you can keep the costs quite low, while high-quality organic feed costs significantly more. You can also budget stuff such as cabbage, cauliflower leaves or spinach to supplement their pellets, as hens do need a bit of greenery in their daily diet. Bedding cost approximately £15.
 In addition, there are costs for the vet, which can hardly be calculated. The vaccination costs are still quite manageable, the vaccine itself is a maximum of £15. Depending on what you want to vaccinate your chickens against and whether you also deworm regularly, the costs naturally increase. With other health supplements we can calculate £60/year.
To answer simply, the maximum cost to raise chickens in your backyard will be £50/month, for a flock of 5 hens. Basically it can be said, chicks are cheaper than other pets like dogs or cats and we even receive some delicious eggs from them.
Please be aware that all prices listed here are very general estimates and can vary greatly from state to state and between cities and towns.
Besides these running costs you should definitely purchase a convenient and practical chicken coop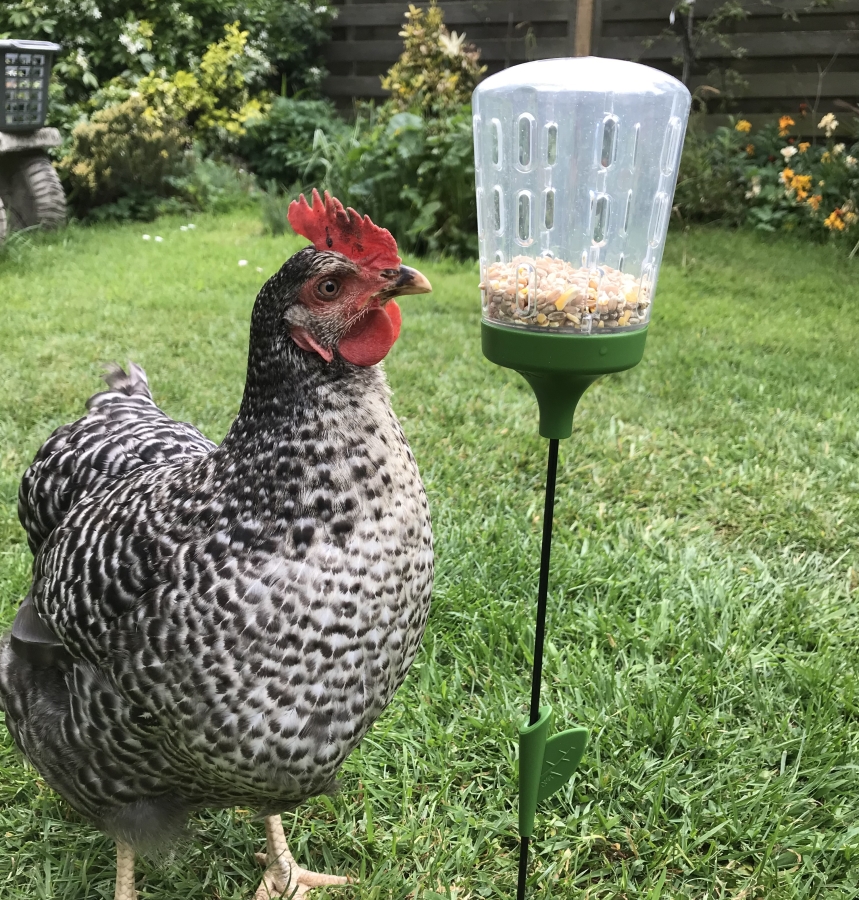 to keep your pullets safe. You can buy a pre-made coop or you can build your own.
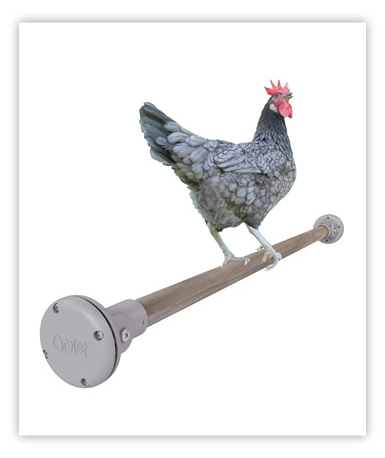
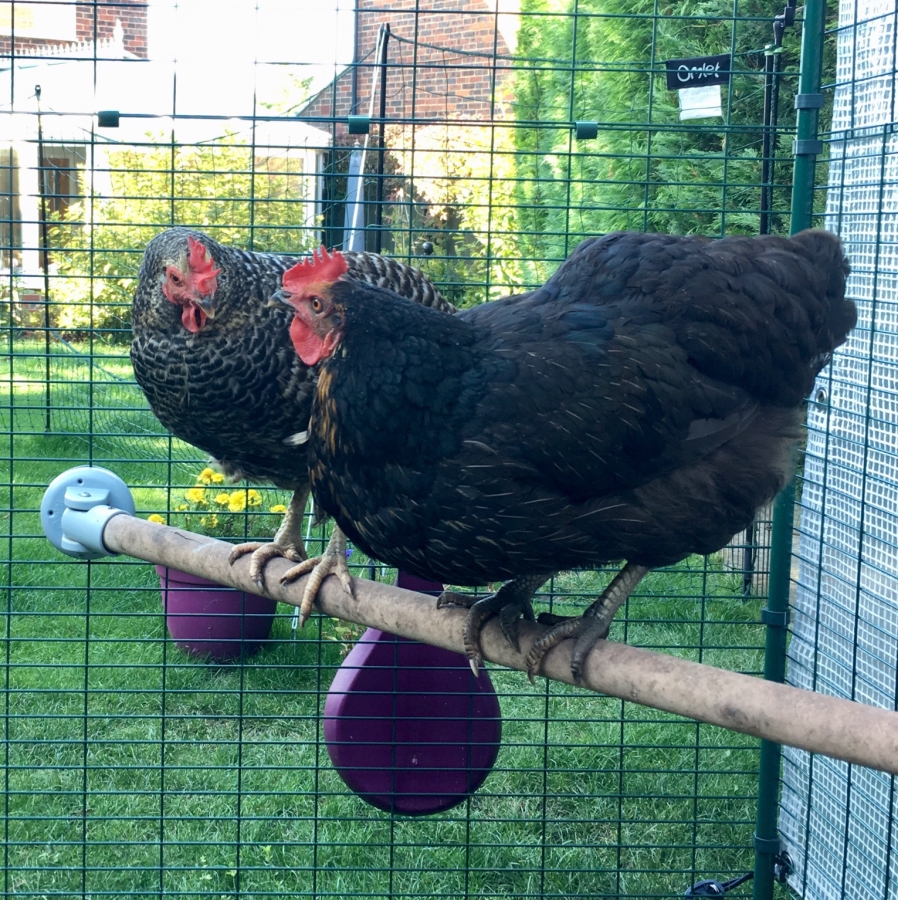
The Omlet Chicken Perch
Something that definitely needs to be on the list is a food and water dispenser, a perch and at best some peck toys and a treat holder for the cleanest and healthiest way to feed treats to your flock.
And don’t forget the costs of chickens themselves. These costs depend on the breed and their age. A good starter flock usually consists of 4 to 5 birds aged 16 to 24 weeks. If you’re up for a special breed or pedigree chickens, the prices might be more expensive. The chicken costs may vary between £3 and £12 per chick.
Please visit our guide ‘How Much Do Chickens Cost?’ for specific information:
Toyhttps://www.omlet.co.uk/guide/chickens/should_i_keep_chickens/how_much_do_chickens_cost/ The Omlet Peck Toy
What is the workload and do I have enough time to keep chickens?
The daily workload depends on the size and age of your flock, and how well you pre-planned. It’s a matter of course that newly hatched or baby chicks might need much more of your time than adults. For finding out which chicken age is more suitable for you, please refer to our previous blog: ‘Chicken keeping for beginners: adult chickens or baby chicks?’ (insert the link).
Generally you can say, the more chickens you have, the more work there is to do – but also the more eggs that will make you and your family happy each morning! However, keeping chickens in a small flock with around 6 animals is much easier than keeping a dog. You will need to feed your flock and change their water daily, and give them all a quick daily health check. Moreover, you should let your chickens out of their coop at least once a day, either on a free-range basis or in an enclosure, which will ensure to keep them safe from predators.
Another important factor you should keep in mind is your working hours. If your work starts in the early morning or in the late evening, it’s difficult to manage letting your chickens out of the coop and back inside again. However, this doesn’t necessarily imply that you are not able to keep chickens at all. For this, it’s a good alternative to purchase an Automatic Chicken Coop Door, which can completely open and close automatically, even when you’re not there!.
With an effort of approximately 10-15 minutes workload per day, you will be able to take the essential actions to keep happy and healthy chickens (plus any extra play and cuddle time you choose!).
Is my environment suitable for keeping chickens?
 In order to keep healthy and happy chickens it is necessary to have a safe outdoor area with plenty of space, where they can exercise, enjoy the sunshine and fresh air. Your chicks should be able to express normal behaviours, such as scratching, foraging and dust bathing.
The selection of the chicken breed as well as how many chickens you want to keep are the key indicators for the necessary space requirement. You should definitely give your chickens plenty of green space to enjoy their freedom. However, it is important to have a coop and an outdoor enclosure to keep your chickens safe from predators when you’re not around.
Who takes care of my flock if I’m away?
Whether you’re planning a short time away from your flock or a longer trip – with appropriate planning there are ways to manage it, so you can leave your chickens without a guilty conscience.
The most convenient and easy way would be to ask a friend, family member or your neighbour to have an eye on your flock while you’re away. If you’re unlucky and can’t find someone around you, don’t worry. Ever heard of a chicken sitter? Yes, they do exist. Investigate in your local area whether a chicken sitting or boarding service is available. As for dogs or cats the same goes with chickens: the ideal chicken sitter is one who knows poultry well.
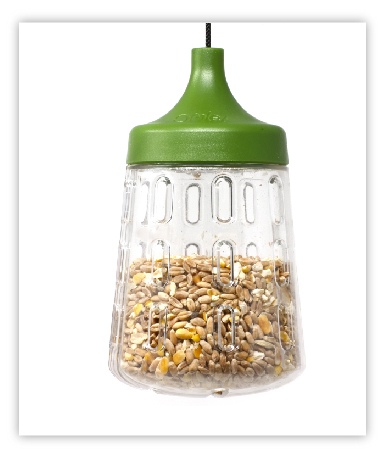
An alternative is to invest in an automatic feeder. It allows your flock to get access to food all day at will and keeps rats or other unwelcome guests away. Another great item would be an Automatic Chicken Coop Door, where you can set the time via the control panel, when the door will open and close the coop at a certain time or based on the rising and setting sun, so they can still enjoy their freedom when you’re not home.
Can I mix different breeds of chicken?
Yes, in most cases you can mix breeds of hens, while it is better to let roosters be on their own.
If it comes to age, older chickens can sometimes bully chicks simply because of a
pecking order issue. Suddenly, there are new chickens in the coop, and the older chickens want to establish themselves at the top of that pecking order but this is a natural conscious behaviour and has nothing to do with the breed itself.
Real problems may occur by “mixing” breeds when you have e.g. five chickens that are very similar looking (like Rhode Island Reds and New Hampshire Reds) but only one chicken with a very different look. Chickens who look entirely different from the rest of their flock can get picked on.
Some crested chicken breeds e.g. the Polish do not see very well, because their crest feathers are in the way, which can be a disadvantage and might lead to getting pecked.
The most important thing to remember when integrating new birds into an existing flock is to isolate or quarantine all new birds for at least 30 days. This gives you time to observe all new birds for symptoms of disease and/or signs of external parasites and to treat them if necessary. Then once the 30 day isolation period is completed, introduce new chickens or chicks to the flock and always monitor the interactions between old and new chooks up close and personal until you’re sure that all is well. When they feel comfortable and get along, a simple daily check-up will do fine. For acquaintance, allow your chickens to free range and mingle together. More information regarding introducing new chicks to your flock you can find here: https://blog.omlet.co.uk/2020/04/26/how-to-introduce-new-chickens-to-your-flock/
Always remember, your feathered friends are living animals and you’re making a commitment to care for them properly. Make sure you have sufficient time and space for them to live happily and healthily.
If you keep your chickens in the above stated conditions, they will be grateful and thank you with some snuggles and delicious eggs. The better the pre-planning, the more relaxed you will be and the more satisfied your chickens will be.
This entry was posted in Chickens on March 13th, 2021 by emmaibadioune
Are your chickens ready for autumn?
Keep boredom at bay this season, with exciting toys your chickens will love from Omlet’s popular hentertainment range, all now available with 20% off for a limited time only.
Use code: READY4AUTUMN
Terms and conditions
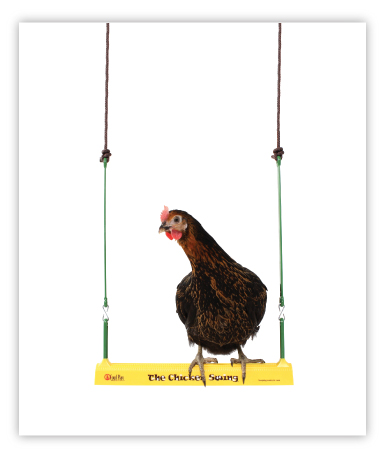
Promotion of 20% off hentertainment products runs from 12/03/21 until midnight on 15/03/21. Use promo code READY4AUTUMN at checkout. Includes 1m and 2m Omlet Chicken Perch, Poppy Peck Toy, Pendant Peck Toy, Caddi Treat Holder and Chicken Swing. Excludes twin packs. Excludes all other chicken products and toys. Subject to availability. Omlet ltd. reserves the right to withdraw the offer at any point. Offer cannot be used on delivery, existing discounts or in conjunction with any other offer.
This entry was posted in Chickens on March 12th, 2021 by chloewelch
Pets are like children. In search of adventure and new experiences, they will tend not to see the danger. Carefree, they want to touch everything and are always very curious. Greedy by nature, they do not distinguish between what is good or bad for their health. However, even if you are conscientious and careful, your home can often be a source of danger. We have put together a list of 10 products to keep away from your lovely animals.
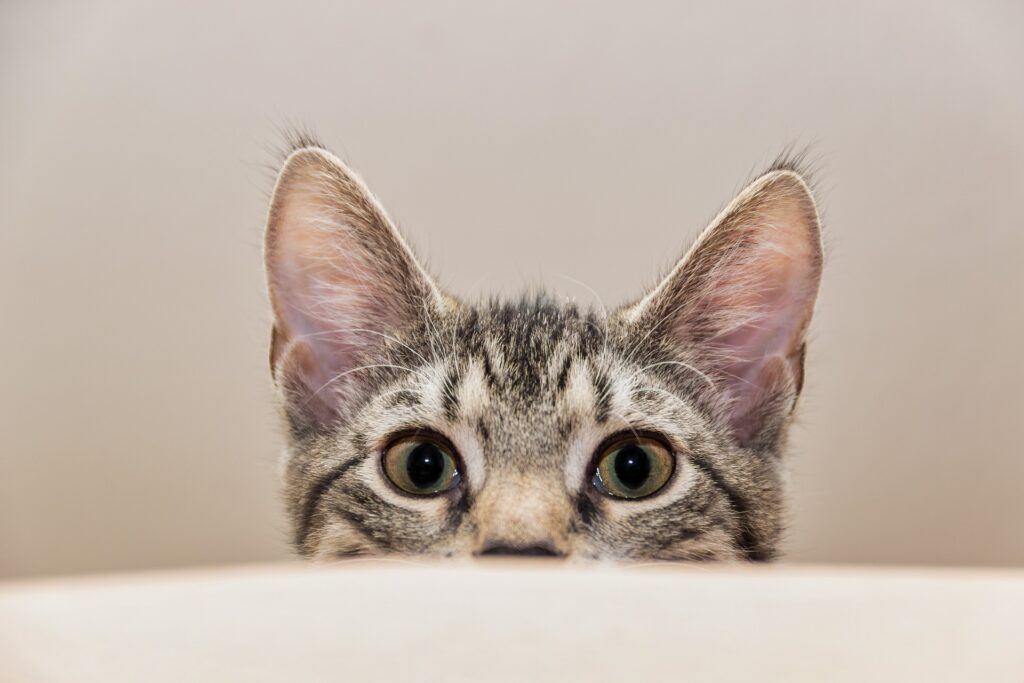
Image by Gundula Vogel from Pixabay
If you have read our article on “Pet Days to Celebrate: The Top List in 2021” you should know that March is a month dedicated to the prevention of pet poisoning.
When owning an animal, there are precautions to take. Be aware that many visits to the vet are caused by poisoning due to ingestion of toxic products. It is therefore important to store certain items in secure cupboards and only use them when your pet isn’t around. Swallowing or breathing toxic substances can be dangerous for your pet and can lead to death. Ensuring that the environment in which your pets grow up is safe should be a universal reflex.
10 items dangerous to pets
We will focus on10 common products, but this list is not exhaustive and you should use your instinct and common sense to detect any form of danger for your companion.
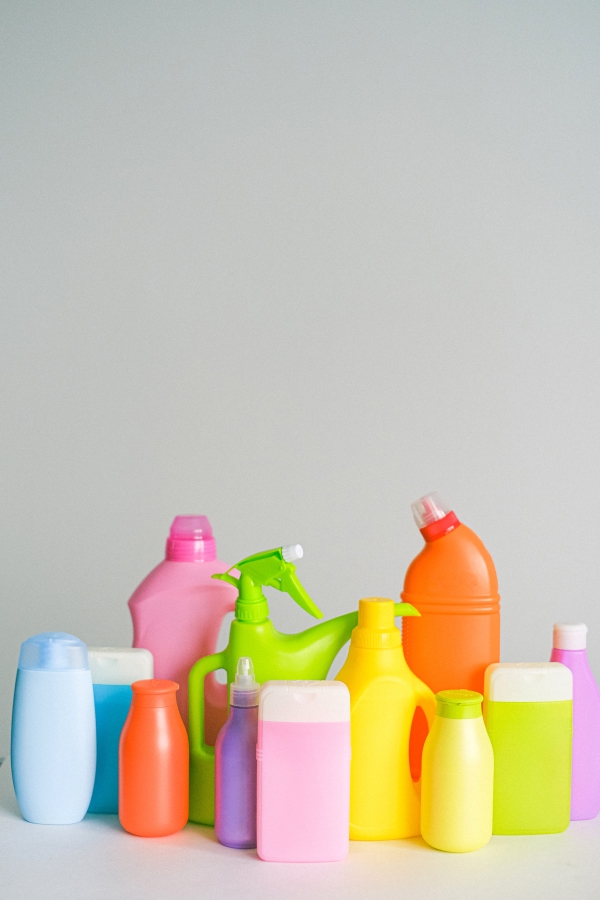
1. Toxic household products for your pet
Most of the time, these are corrosive products that cause chemical reactions by coming into contact with your pet’s fur or skin or by causing internal burns after ingestion. Detergents should be raised or stored. This includes your dishwashing liquid, hand soap, and laundry detergent. Keep your pet away from any of these products or the foam created by any of these products. The risks: diarrhea, vomiting, abdominal pain, breathing difficulties and even the risk of pneumonia.
Cleaners should also be kept out of the reach of your pets. Often composed of harmful chemicals, they can cause serious risks to your pet. Deodorants, drain openers, bleach and toilet cleaners should also be kept away.
With COVID-19, we tend to leave our disinfectant gels lying around. Be careful that your pets don’t go near them. They could easily want to play with it.
Be careful with garden products for your plants, patio and paddling poo tool.
In order not to end up at the vet, we advise you to put your products in cupboards, to raise them up high or to opt for non-toxic products. Indeed, some non-toxic products exist in specialised stores and if you have time and desire you can even create them yourself.
Image by Anna Shvets from Pexels
2. Food for Humans
Not all food is good for animals. Chocolate is one example which should not be given to your pet. Don’t leave your cookies lying around on the table (your cat could easily pass by) and watch out for crumbs left on the floor.
Theobromine and caffeine are intolerable substances in our animal friends. When ingested, your pet may start shaking, may have palpitations, abnormal blood pressure, and stomach upset. In severe cases, consuming theses foods can also result in death, therefore, this is not something to be taken lightly and remember to clean up well after eating.
Avocado, grapes and raisins should also be avoided in your dog’s diet, as should alcohol, Xylitol, garlic and macadamia nuts.
3. Pest traps and insecticides
Do you want to get rid of insects or pests? Pay attention to the traps you install. Your pets may want to play with them or be attracted by the smell. The modern bait that we can find on the market uses few chemical and toxic products. However, be sure to read the instructions and restrictions on the packaging. Products to be avoided include substances such as methomyl and metaldehyde.
Mouse traps are also to be avoided because the food in them may attract your pet. Rat poisoning consists of alpha-chloralose and anticoagulants, which can cause nerve damage and blood disorders.
Image by Charles Deluvio from Unsplash
4. Medicines for your pet but also yours
Medicines for humans should never be given to an animal. Consider them all as toxic! Acetaminophen and ibuprofen are very good examples. They should not be given to your pet if it is not feeling well.
It is imperative to always consult your vet.
Don’t leave your pet’s medication lying around. Some medications may be flavoured to make them easier to swallow. However, they may be perceived by your pet as a treat who could consume an excessive dose by mistake.
Also remember not to mix cat medications with dog medications if you have more than one pet. Professional advice is essential to avoid mistakes and missteps that could result in a trip to the animal hospital!
5. Plants
Stomach problems often cause your pets to chew plants. It is necessary that you check the plants and flowers in your garden and your home to determine if they may be toxic to your pet.
Dogs, for example, cannot tolerate chrysanthemums, yew, amaryllis, cyclamen, rhododendrons, oleanders and narcissus and hyacinth bulbs.
For cats here are some plants to avoid: ficus, Philodendron or Monstera Deliciosa, lily of the valley, cyclamen, aloe, Yucca, Sansevieria…
6. Fertilisers
Fertilisers are potentially dangerous for your animals. They come in many kinds and forms. Depending on the nature of the fertiliser, the toxicity can vary. Choose them well and try to go for as natural as possible. Avoid products composed of phosphorus, potassium and nitrogen, as well as additives such as herbicides and insecticides.
The potentially toxic dose in a dog is estimated to be 5g/kg if ingested by your canine animal.
Organic fertilisers are not necessarily good for your pet’s health. Always check the packaging or ask for information from specialised professionals.
Image by cottonbro from Pexels
7. Heavy metals
Care should be taken with lead and Zinc, which can have negative effects on your pet. Pick up your pennies when they fall on the floor and don’t leave your coins lying around.
Ingesting heavy metals can cause stomach aches and even lead to anemia.
Also be careful when restoring old buildings and houses, lead could easily be ingested by your pet.
8. Essential oils
Although they have many virtues, essential oils are not harmless. They are powerful active substances that must be kept away from your animals. Essential oils can cause digestive and nervous damage and can cause burns if touched.
9. Nicotine, tobacco and other drugs
Nicotine is as harmful to humans as it is to animals. Do not smoke in front of your pet and avoid leaving a pack of cigarettes on your coffee table. If ingestion or inhalation of high doses occurs, your pet may have respiratory or even cardiac problems.
10. Some cosmetic products
Cosmetic products for humans contain many substances that are often harmful to your pet. Keep your deodorant, varnish, solvents and perfumes away.
Do not brush your pet’s teeth with conventional toothpaste. While fluoride is good for our teeth, it is absolutely not good for our beloved pets. Fluoride is toxic and could be accidentally swallowed by your pet.
My pet has been in contact with an item on this list, what should I do?
If you notice symptoms (red skin, loss of appetite, fever, severe salivation, vomiting, difficulty breathing, joint and abdominal pain, sudden fatigue, etc.), contact a vet immediately. They will tell you what to do. Any information helping to identify the source of the poisoning should be given to the professional contacted.
Do not try to make your pet vomit, give it water or medication, which would only make the situation worse.
Loving your pet also means protecting it from danger. The house is their main playground, protect your pet from these common dangers by taking care to secure them away out of reach.
This entry was posted in Uncategorised on March 8th, 2021 by alisa.deluca
 Cats meow for various reason and the a barrage of short meows that greet you when you arrive home, are perhaps the most satisfying for a cat owner.
Cats also meow to get your attention – usually because they want some human contact, but also when they are feeling unwell. The meowing of a cat who wants feeding is another familiar variation on the theme! Cats may also meow if something in their environment is stressing them. It is also common for older cats with Cognitive Dysfunction Syndrome to start meowing in confusion, often at night.
Which Cat Breeds Meow the Most?
Some cats are more vocal than others, and although this is partly to do with the individual cat’s personality, the type of breed plays a role too. The cat breeds famous for their vocalisations include the Birman, Maine Coon, Oriental Shorthair and Siamese.
Siamese cats are perhaps the loudest when it comes to meows. The Maine Coon has a variation on the standard cat meow, making a lovely chirping sound when they feel playful – which is most of the time!
Are There Cats That Don’t Meow?
At the other end of the scale, some of the quietest cat breeds are said to be the Chartreux, Cornish Rex, Persian, Ragdoll and Russian Blue. There will always be cats that defy the meowing stereotypes, though, which is why you may well see the Bengal cat in online lists of the quietest cat breeds and the loudest cat breeds!
Why Do Cats Stop Meowing?
There are various reasons why a previously loud cat has gone quiet. These are some of the commonest reasons for a cat to lose its meow.
1. Change in surroundings. If you move home, introduce new furniture or bring strangers home, your cat may go quiet. In these situations they are weighing up the situation, deciding whether or not it’s safe to have ‘business as usual’. This is not actually a bad thing, as a cat who is genuinely anxious or afraid is more likely to meow and cry loudly rather than fall silent.
2. Temporary loss of voice. Cats that have been making a lot of noise – after spending all night fighting off intruders in the garden, for example – may have a hoarse voice or lose their voices altogether. This is the equivalent of you losing your voice the morning after a party where you had to shout all evening to make yourself heard. The cat’s meow will soon return.
3. Upper respiratory infection. This is are uncommon, but if it strikes it is likely to stop your cat meowing. Feline herpes, colds, and calicivirus are common causes, leading to laryngitis. These ailments will come with other symptoms, including runny or gummy eyes; wheezing, panting and breathlessness; coughing and sneezing; lethargy; loss of appetite; discharge from nose, mouth or eyes. Any cat displaying these symptoms needs to be taken to the vet.
4. Allergies. These can produce symptoms in a cat similar to respiratory infections, including wheezing and sneezing. These will often stop the cat meowing. It is important to find the cause of the allergy, and if it isn’t obvious, a vet can advise you on what to do.
5. Laryngeal Paralysis. This is a dysfunction of the cat’s larynx (voice box). It is linked to old age, which is why very old cats tend to be quiet. Degeneration of the vocal cords means that the cat is no longer able to produce a sound. There is no discomfort involved, however, and a silent cat will still be a happy cat.
6. Tumours. Cats can be prone to various tumours, growths, polyps and cancers. If these affect the cat’s vocal chords, throat or mouth, it will lose its meow or change the sound drastically.
7. Nerve damage. If a cat has managed to get items such as grass blades or twigs stuck in its throat, it may damage the nerves that control the voice box. A blow to the throat region can produce the same effect, and this sometimes occurs if a cat has fallen or been attacked by another animal.
8. Recent surgery. A cat that has undergone surgery involving anaesthesia will have undergone intubation – i.e. had a tube inserted into its air passages. This can lead to internal inflammation that makes the cat unable to produce sound for anything from a few days to two weeks.
Less common reasons for a cat losing its meow include hyperthyroidism and rabies.
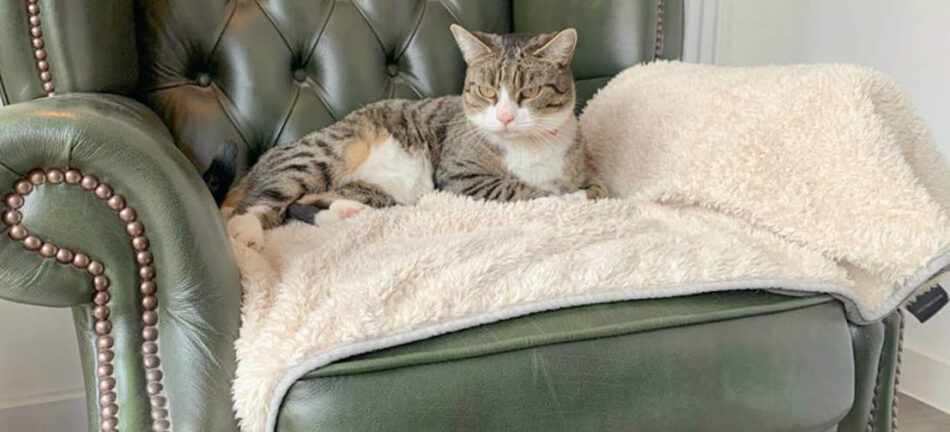
In all situations, your cat will need a little time to recover its poise. Medical or age-related conditions can silence the meow, but in most cases the cat will be back to its normal meow in a few days. Give your cat lots of attention and reassurance, and it will soon be back to its old meowing habits!
This entry was posted in Cats on March 4th, 2021 by juliakretzner