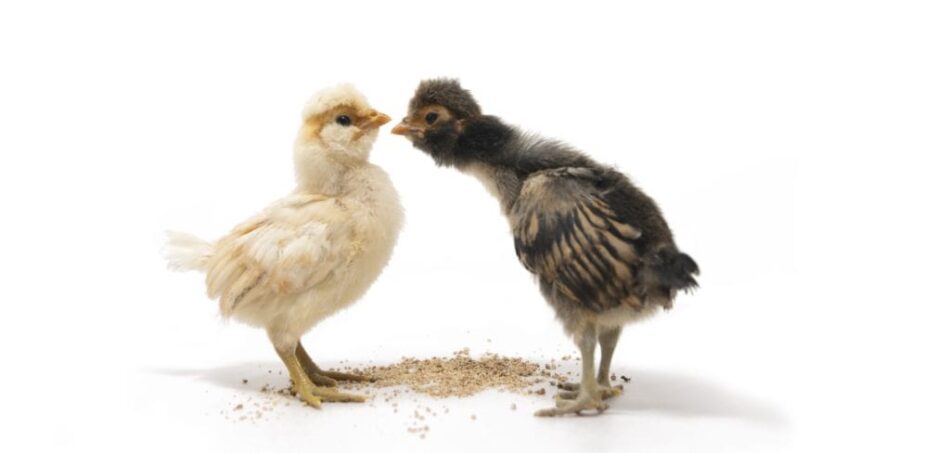
Chicks grow up quickly and soon it will be time to transition your chicks into their Eglu chicken coop. Their brooder will start to feel crowded after a few weeks, and your fully feathered pullets will be ready to strut out in a coop of their own. We’re here to help you make moving day an easy and stress-free experience.
What age can chicks move into their Eglu chicken coop?
Chicks are usually fully feathered by the time they’re 6 weeks old, but not all chicks are ready to venture beyond their brooder at this age. Even though they’ve traded their fluffy down for mature feathers, they’re still very young. At Omlet, we recommend transitioning your chicks from their brooder to their Eglu chicken coop at 12 weeks of age.
Waiting until your chicks are 12 weeks old will give them time to become more coordinated and build the strength they need to navigate ladders, and give them plenty of time to become familiar with their rise-to-roost schedule.
From brooder to coop
These 12 weeks will go by in a blink of an eye, so be sure to prepare for (and enjoy) your chicks’ time in the brooder. Caring for newly hatched chicks is exciting, and will set the tone for the rest of your relationship with them. Handling your chicks daily will help build a bond and before long your chicks will trust you, and there’s no better time than when they’re in their brooder to kickstart this relationship. Once your little flock trusts you, it will make their transition to their coop even easier.
In the meantime, you can set up your flock’s walk in chicken run to take your chicks outside once they’re fully feathered. Keep these excursions short to make sure they don’t get chilled or draw the attention of other animals (including your other pets). If you plan to use an automatic chicken coop door, you can open and close it while your chicks are on their outing to get them used to the noise. Show your small flock where their chicken feeders and waterers are so that they’ll know where to find them once they move in.
Once your chicks are 12 weeks old and are all healthy and happy, it’s time to make the move to the coop. The big moving day should be based on the weather rather than a specific date. You want to look for a sunny day with moderate temperatures – ideally between 18-26°C Avoid moving your chicks on windy or wet days, and try to move them as early as possible so that they can experience a full day and be ready to head to bed when night falls.
Tips for your chicks’ first night
If your brooder utilises a brooding plate rather than a heat lamp, your chicks may already have the hang of going to bed at nightfall. But, being in a brooder is much different than being out in the big world, so even chicks that have an established sleep cycle may be caught off guard during their first night out.
First and foremost, you’ll want to keep your chicks safe from predators. The attached runs of the Eglu chicken coops are predator-resistant, but they will be much safer and more comfortable overnight in the roosting area inside of the coop. You may need to manually tuck your chicks in on their first night (or two) and close the door until they learn when bedtime is.
If you have an Autodoor, the coop light acts like a nightlight to guide sleepy heads to the roost. This is particularly helpful for chicks that were raised with a coop light – they’ll associate light with warmth and will seek it out when darkness falls.
New chicks and the existing pecking order
If you’re introducing your chicks to an existing flock, your older hens will help them learn the tips and tricks of the coop. But, older hens will also let newcomers know who’s in charge. Every flock of chickens has a hierarchy, and by understanding the pecking order in chickens you’ll be able to recognise what is normal hen behaviour, or what constitutes bullying and the need to remove your chicks for their safety.
Most chicks fall into line quickly, just as most hens at the top of the pecking order aren’t ruthless tyrants. There are exceptions to the rule though, so be on the lookout for concerning behaviour like:
Hens keeping chicks away from food or out of the coop
Scuffles severe enough to draw blood or cause excessive feather loss
Pinning chicks down
If you notice your hens not accepting your chicks into the flock, try setting up an adjacent run or add walk in chicken run partitions to your setup to allow them to get to know each other through a safety barrier. It’s rare for hens to forever hold a grudge against new additions, so be patient, but also conscientious of the safety of your chicks.
Omlet and your chicks
Our products are designed to keep your flock safe – no matter their age, and to make caring for your chickens less of a chore and more of an enjoyable activity. The Eglu Cube chicken coop is perfect for growing flocks, especially when paired with our walk in chicken run. And, by installing an Autodoor, you’ll have peace of mind from the start. Make moving day an enjoyable and memorable experience for you and your chicks, and set the tone for a lifetime of adventures together.
You can buy chickens when they are still chicks, or you can choose ‘point of lay’ hens (also known as started pullets). These are ready-to-go birds that are about to begin laying eggs, and they offer the easiest entry into the wonderful world of chicken keeping.
If you choose to buy chicks or hatch fertilized eggs laid by your own hens, you will have to care for the young birds for the five months before they start laying. They are extremely cute but delicate little things, and easy prey for cats, rats and other creatures that wouldn’t attempt to attack a full sized hen. You will also need to keep them warm, which means investing in special equipment.
So, if you are simply keeping chickens for fresh eggs, you should start with adult birds rather than chicks.
Why buying point-of-lay hens?
This is the entry point for most people who are new to keeping chickens. By checking availability in your local area, you will be able to source birds close to home. The advantages of choosing these older birds pretty much outweigh all other options, and the only reason you would opt for buying or hatching chicks is if you want to look after small birds. For many people, this is a very rewarding activity, but for someone who just wants to look after laying hens, started pullets are the way forward.
Why keeping ex-barn hens?
Another great way to stock your coop is with rescued chickens. Intensively reared hens kept in barns are judged to be past their prime after a year and a half, even though they still have a good 18 months of laying ahead of them. For the majority, this is the end of the road.
All ex-barn hens have great charm and personality. They tend to look rather bedraggled and sad when first rescued from their imprisonment, but with a bit of TLC they will blossom as impressively as the Ugly Duckling!
Some ex-barn hens may arrive with a limp, and most of them will look half-plucked, but they will soon recover their composure, and – as most of these chickens are ‘disposed of’ at less than 18 months old – they will still give you a couple of years of good laying.
What do I need to know about buying chicks?
You need to be sure that you buy baby hens and not cockerels. There are no external clues as to what sex a chick is, and any stock sold sight unseen (or ‘straight run’) will be a 50/50 mix of male and female birds. You need the chickens to be sexed to ensure you get hens. If this is not possible, wait for started pullets to become available.
Chicks need special accommodation for the first few weeks, and they can’t simply be kept in a standard coop and run. You can buy brooder boxes to keep them, or you can improvise one using a cardboard box or plastic bin with holes in the side. The important thing is to keep the birds warm and protect them from drafts while ensuring good ventilation. You will need two square feet per chick to ensure they have enough room when they get bigger – which they will do, very quickly.
The chicks need to be kept in a temperature of 35C (95F) in their first week. The heat should be reduced slightly each week until you’ve reached room temperature. A heater designed for coops and aviaries is the best buy. A red heat bulb is another option (not a white one – these produce glare that keeps chicks awake at night and tends to make them irritable and prone to pecking). Standard light bulbs will not do the job.
After installing your chicks, pay close attention to how they behave. If they’re crowded together directly under or adjacent to the heat source, they’re cold. Lower the heat source or add another. If, on the other hand, they shy away from it, they’re too hot. In this case, the heater or bulb will need to be moved further away.
What do I need to know about chicken brooders?
You can buy brooder boxes to keep chicks in, or can make one yourself using a cardboard box or plastic bin with holes in the side. The important thing is to keep the birds warm and protect them from drafts, while ensuring good ventilation.
The chicks need to be kept in a temperature of 35C (95F) in their first week. The heat should be reduced slightly each week until you’ve reached room temperature. A heater designed for coops and aviaries is the best buy. A red heat bulb is another option (not a white one – these produce glare that keeps chicks awake at night and tends to make them irritable and prone to pecking). Standard light bulbs will not do the job.
Very young chicks will need to have their water changed at least twice a day, as they have the uncanny ability of turning all liquids to messy soups within a few hours! They also need their bedding changed at least once a week. A chicken wire covering for the top of the brooder is advisable, too. Chicks can easily ‘fly the nest’ if the sides of the brooder are less than 45cm high.
Chicks can spend a little time outdoors when they’ve reached two weeks. A large wire cage or some other type of portable enclosure can be placed outside for a few hours a day – but only if it’s at least 18C (65F) and not too windy, and dry. The birds will need food, water and shade, and shouldn’t be left alone for very long. Predators are everywhere when you’re a small chick!
Once they’ve reached four to five weeks, the chicks can be moved permanently into the outdoor chicken run.
Do I want to breed my own chickens?
Another way of keeping chickens is to keep the flock refreshed by hatching eggs from their own chickens. The easiest way of raising chickens is to let nature take its course. All you have to do is provide a nest box for a broody hen. She will provide the right conditions for hatching eggs (although she will not be able to cope with more than a dozen at a time, or fewer with smaller breeds), warming and turning them as necessary. An incubator is the alternative hatching method.
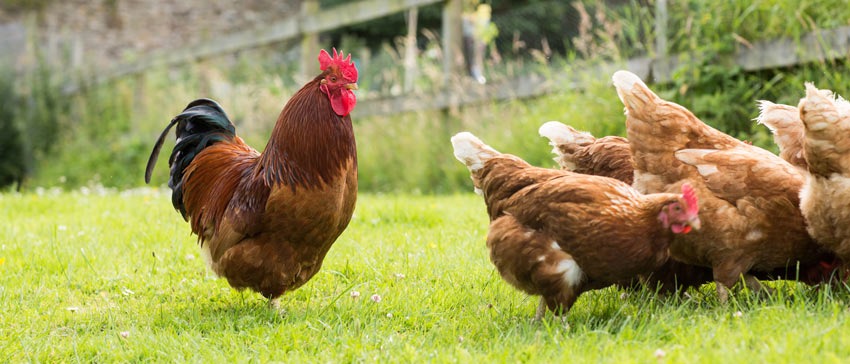
A cockerel will do everything in his power to tread the hens in his flock and fertilize the eggs. If a chicken is broody, she will then sit on the eggs for 21 days (the incubation period), and with a bit of luck these eggs they will then hatch.
Rearing chicks is a great hobby, but you need to be dedicated to the job. If all you want is fresh eggs and a flock of healthy, happy adult chickens, wait for point-of-lay birds to become available, or contact the BHWT for some of those rescue hens in need of a good home.
As long as your chickens are laying and there’s a cockerel in your flock, you can hatch and incubate chicks all year round. However, traditionally the most popular time to breed your own chickens is in the spring. Hatching and rearing your own chicks from eggs is an incredibly exciting and rewarding process. There is nothing better than seeing your tiny chicks grow up in the knowledge that they are getting the best possible life from start to finish. The incubation period for chicken eggs is usually 21 days. The most reliable way to incubate your fertilised eggs and maximise the chance that they will hatch into healthy chicks is to use an artificial incubator. Here’s our step-by-step guide to hatching chicks:
1. Long Term Plan
Before the hatching starts, you will need to have a plan in place as to what you are going to do with the chickens once they hatch. It is a safe estimate that 25-50% of eggs will not hatch due to either not being fertilized or due to some mishaps during incubation. Among those which will hatch, approximately 50% will be cockerels and 50% will be hens. Everybody wants hens and hardly anyone needs cockerels, so there is a question of what to do with the latter. In many breeds, cockerels do not tolerate each other and they will fight vigorously unless they are completely separated.
2. Eggs
First of all, you need to be as sure as it is reasonably possible that the eggs are fertilized, so getting them from a good breeder / farmer is crucial. Eggs of some breeds are quite expensive, so every egg that will not hatch costs you money. A breeder can never give you a 100% guarantee that the egg is fertilized, but an experienced one can be quite confident they are.
The eggs should not have any deformations or bear any other visible defects. Any cracks in the eggshells are a no-go. Any defect of the eggshell might result in the chick having difficulty in hatching, being deformed, or not developing at all.
Once you have the eggs, it is a good practice to wash them with an egg disinfectant. Eggs are porous and the embryos get oxygen and water through their eggshells. If there are any toxins or bacteria on the eggshells, that might endanger the embryos.
3. Keep a Diary
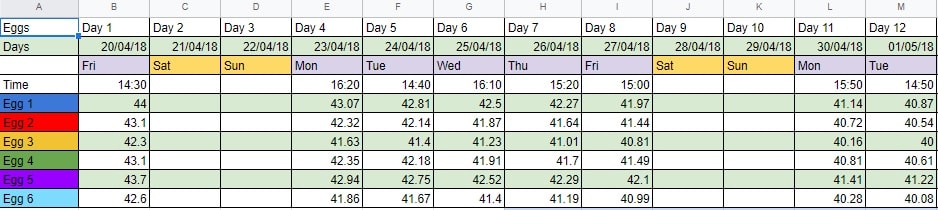
It is a really good idea to keep a diary of hatching. This includes numbering the eggs and keeping a daily record of each eggs weight. A developing egg will gradually lose weight in its 21 days of incubation. It will lose about 10-15% of its original weight over time. When the egg in the incubator is not losing weight it usually means it is not developing.
4. Incubator
Turning
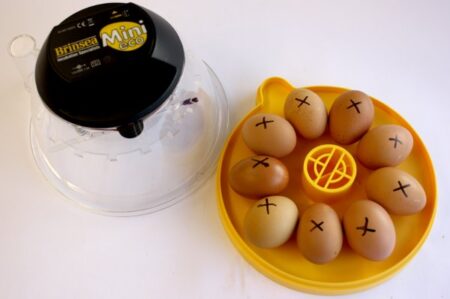
Choose your incubator carefully. Some incubators, such as the Brinsea Mini II Incubator have an Auto-turn mechanism built-in. Auto-turn saves you a lot of time and effort. Every egg during the incubation time needs to be turned every 90 minutes in order for the embryo to be positioned perfectly in the egg. A broody hen naturally turns all the eggs she is sitting on as she moves around the nest, so the turning simulates what naturally happens when a hen takes care after eggs. If the incubator does not have the Auto-turn option, you will need to turn the eggs manually. It is therefore a good practice to mark all eggs with a non-toxic marker just to be sure that every egg is being turned every time you visit them.
Temperature control
A good incubator will be able to keep a steady temperature within. One that we recommend is the Brinsea Mini II Incubator. The optimal temperature for hatching chicks is 37.5 degrees Celsius. A good incubator will set its alarm off if the temperature within drops below or rises above a certain threshold. Temperature in the room where the incubator is placed is crucial here, as it heavily influences the temperature in the incubator. You will be opening the incubator during routine controls of the eggs, so it is really important the eggs don’t get a temperature shock in the process – such a shock might kill the fetuses. We advise keeping a steady temperature of approx. 25 degrees Celsius in the room with the incubator. The room should also be draft free.
Humidity control
A good incubator will be able to provide a good humidity inside. Optimal humidity for the eggs during hatching is around 40-50% but needs to be increased on Day 19 in order to soften the eggshells and help the chicks to hatch out. With some Incubators such as the Brinsea II Mini Incubator, there are two water containers inside. Fill one up every day, and fill both of them from Day 19 onward. You can fill up the water container in the Brinsea without the need to open it which is very useful, since you generally don’t want to open the incubator too often. It is perfectly normal that some condensation starts to build up in the incubator after a few days due to high humidity.
5. Daily routine
Cooling
Day 7 is an important threshold. First of all, you need to start cooling the eggs for half an hour a day. It’s best to do this around the same time each day. A good incubator has a fan and you can set an automatic cooling time. If not, you need to cool the eggs down manually by taking them out of the incubator. The cooling temperature should not be shockingly different – a difference of 2 to 5 degrees Celsius will do.
Developing eggs keep their own temperature when exposed. That is how a hen tells the difference between a developing and a dead egg. When the hen gets off the nest to eat and drink, the dead eggs will go cold almost instantaneously. The hen will then get rid of the dead eggs from the nest.
Candling
You also need to start candling the eggs on Day 7 at the latest. Candling will show you which eggs are developing and which are not. If an egg does not show any signs of development on Day 7, it will not hatch. It is essential to take out any eggs which stop developing as they will start to decompose if left in the incubator. From Day 7 onward you should continue candling on a regular basis. It’s not necessary to do it every day, as you won’t see any significant progress on day-to-day basis, but it is a good practice to do it every third or fourth day. Weighing and candling combined are usually good indicators if the egg is developing or not.
From Day 7 up to Day 19 tasks should continue in a routine manner: daily cooling, weighing, and occasional candling.
6. Hatching
Day 19 marks the next important stage. You need to stop turning the eggs and cooling them, and lay out a hatching mat in the incubator (so the chicks won’t slip on the incubator’s surface on their first day of life). You also need to increase the humidity inside up to at least 65%. When using the Brinsea Mini II Incubator you can achieve this by filling up the second water container inside.
At some point during that period the eggs will start wiggling: the chicks will be moving around the egg to position themselves perfectly to hatch out. You might feel the temptation to check on the eggs often, but at this time it is best to leave them be and inspect the eggs every 6 hours or so.
Around Day 20 the chicks should peck out a small hole in their eggshells to catch their first breath of fresh air. It’s best to leave them be. Do not help them by making the hole bigger or breaking the shell apart. They will do it themselves in their own time. In that time they will also consume all the nutrients in their eggshells, so it is vital for them to stay inside for the time being.
Most of the chicken breeds hatch on Day 21 with only a handful of breeds hatching on Day 20 or 22. Do not help the chicks in hatching, they should be able to do it themselves – it’s their first test of strength. Only give a helping hand when a chick is really late (in comparison with its companions in the incubator) and/or the eggshell is really thick and the chick is evidently struggling to get out for a prolonged period of time.
Once the chicks hatch out, leave them in the incubator for another 24 hours. They should be well fed having eaten all the nutrients from their eggs. Apart from that, the incubator provides them with the optimal temperature and humidity.
Now watch our eggcellent egg hatching video to see how easy it is to hatch chicks!
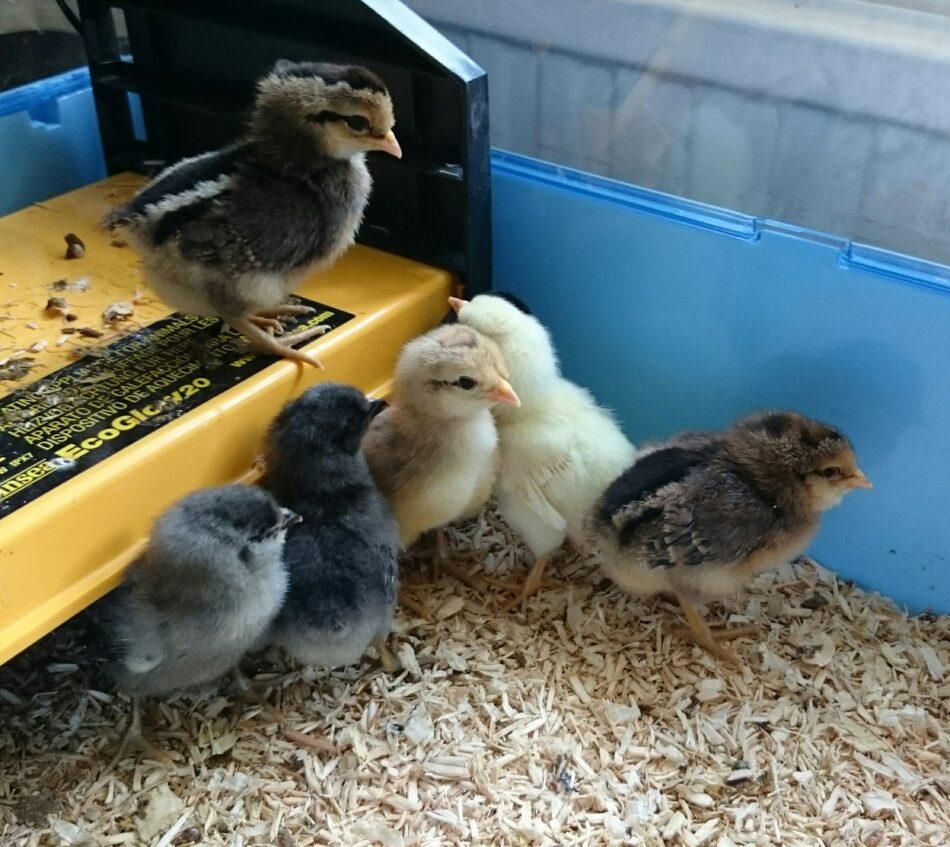

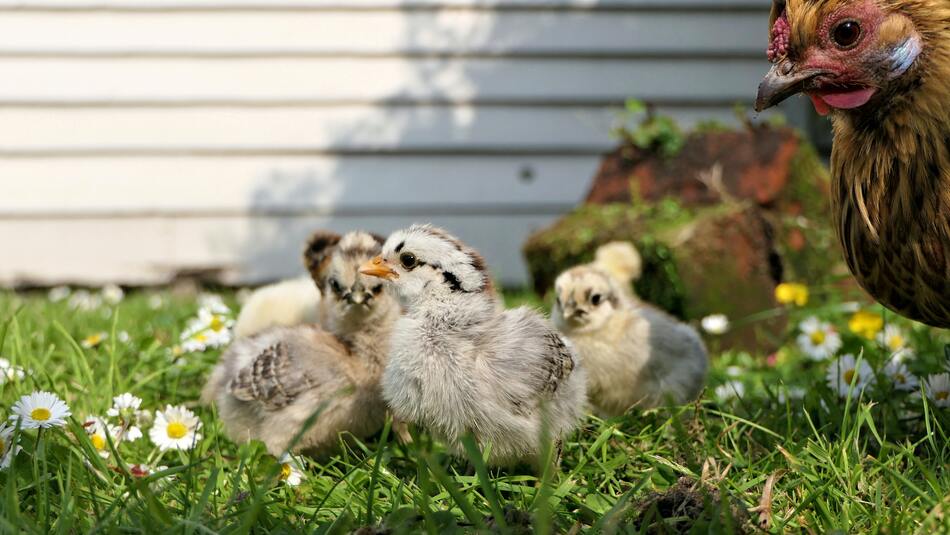 Photo by
 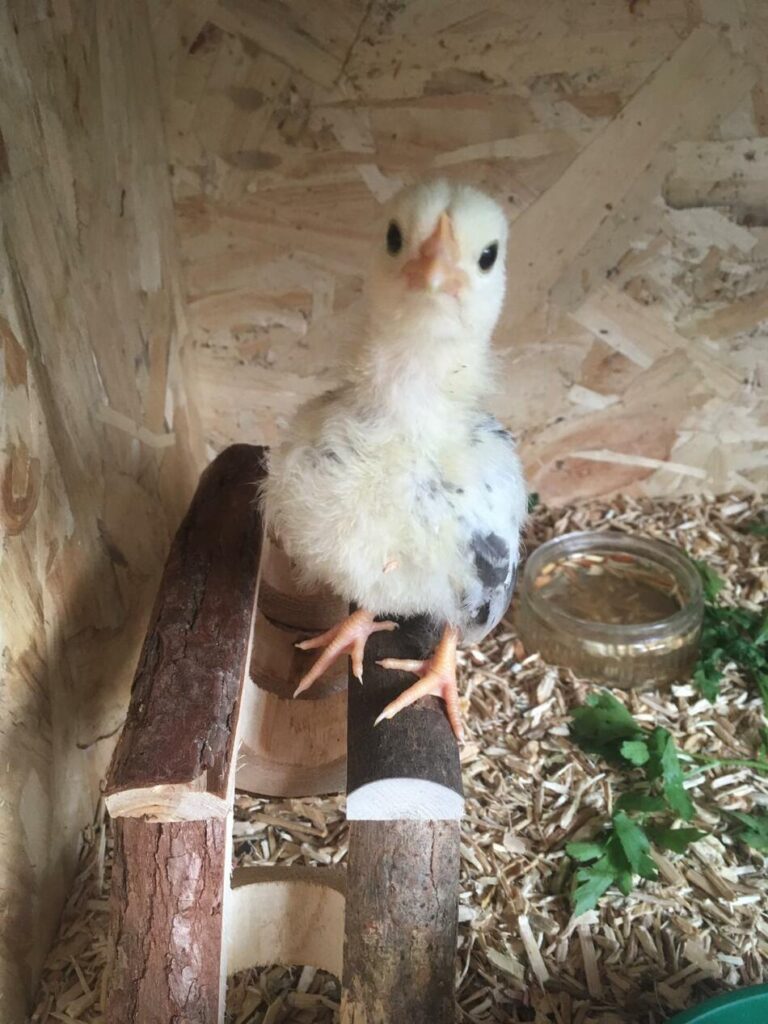 Chicks need special accommodation for the first few weeks, and they can’t simply be kept in a standard coop and run. You can buy brooder boxes to keep them, or you can improvise one using a cardboard box or plastic bin with holes in the side. The important thing is to keep the birds warm and protect them from drafts while ensuring good ventilation. You will need two square feet per chick to ensure they have enough room when they get bigger – which they will do, very quickly.